Drill a wooden disc
A simple and fun tool activity for young children using a rotary hand drill or a palm drill.
Introduction
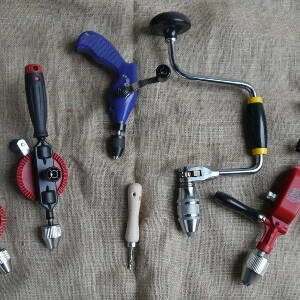
You can drill through a wooden disc using a palm drill or a rotary hand drill – either method is a perfect woodwork starter project.
We recommend a pistol grip hand drill for younger children to start with, as the gear mechanism is enclosed.
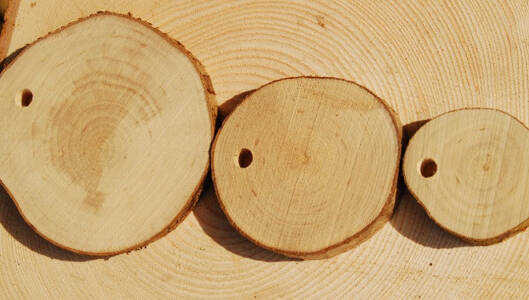
Once you have a hole in your disc you can be as creative as you like…
What you'll need
- workbench/log round
- palm drill
- or rotary hand drill & universal drill bits
- clamp (optional)
- wooden discs
This activity has been provided by
Useful items from our shop
Environmental Considerations
Consider the environmental impact of preparing, carrying out & completing this activity. Could this impact be reduced? Specific considerations for this activity could include:
- how is the wood being used harvested?
- ensure all tools are collected to ensure there is ‘no trace’ left behind
Health & Safety Considerations
Follow your usual operating procedures and carry out appropriate risk benefit assessments.
Some considerations particular to this activity include:
- skill level of group
- drill bits have sharp edges/points
- safe storage of tools
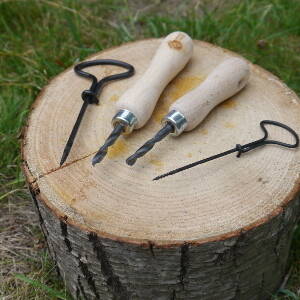
Step #1 prepare your work space & choose your tools
You will need a firm surface or workbench to work on – in the picture, as we didn’t need to clamp the work piece, we’re using a simple log round.
If you wish to protect your workbench it is advisable to clamp another disc or scrap piece of wood under your work piece before drilling.
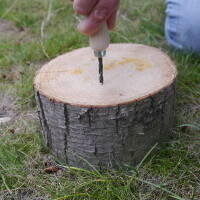
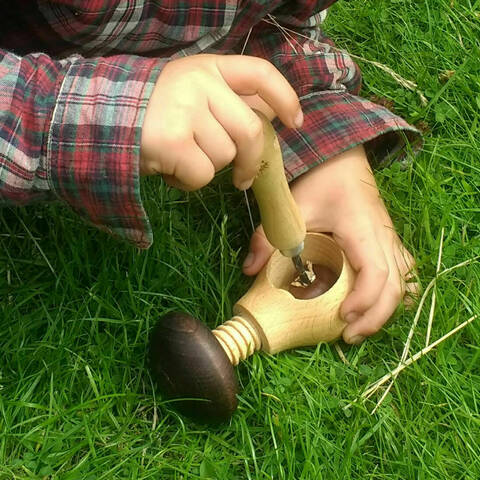
Step #2 Using a palm drill
Because you only need one hand to use a palm drill, you can hold the wooden disc with your non-dominant hand whilst drilling, or you can use a spring clamp to secure the disc to a workbench (see below).
It’s a good idea to practise using the palm drill first – practise vertical drilling and removal action. Torque on the drill bit can cause it to snap.
See our guide to palm drills for more information about palm drills and how to use them.
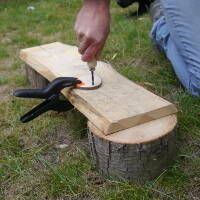
Step #3 Using a rotary hand drill
The main difference between using a palm drill is that you will need to clamp your disc to a workbench, because you need both hands free to use a rotary hand drill.
See our guide to rotary hand drills to find out more about different rotary hand drills and how to use a rotary hand drill.
We’re using an exposed-mechanism hand drill in this picture; a pistol grip rotary hand drill has an enclosed mechanism – this can be particularly helpful for drilling with younger children.
Fit your drill bit – our guide to drill bits explains how to fit a drill bit into a hand drill.

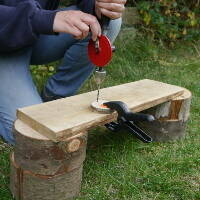
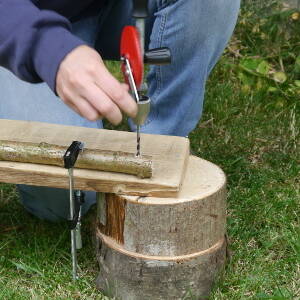
Step #4 clamp the disc
Clamping your wooden disc in place will prevent it moving as you drill. This is optional if using a palm drill. If using a rotary drill you will need both hands to drill.
It is advisable to clamp another disc or scrap piece of wood under the disc you are going to drill into, to protect your workbench.
This photo shows a spring clamp being used, however, if you have a thicker plank you may need to use an F clamp which has a larger jaw capacity.
Our guide to clamps and vices can help you decide what sort of clamp to use for your project.
Step #5 drill the disc
Choose where you want to make the hole – you may want to mark the spot with a pencil.
With a palm drill
Hold the drill vertically and begin turning it in a clockwise direction, applying light downward pressure.
Keep turning until you have made a hole right through the disc.
Tip – if you drill down just a few millimeters you will create a pilot hole, which is useful to have before using a rotary hand drill.
Step #6 With a rotary drill
Use a palm drill to create a pilot hole.
With your non-dominant hand hold the main handle of the rotary hand drill in a vertical position.
Ensure that the drill bit sits in the pilot hole and is at a 90 degree angle to your disc.
When you feel comfortable and ready, use your dominant hand to turn the handle clockwise in a constant, smooth drilling action. The drill bit will start to turn and begin to create a hole.
Keep drilling until you have made a hole right through the disc.
TAKE IT FURTHER:
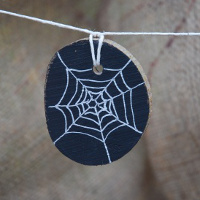
Activities using wooden discs with holes:
Disclaimer: Muddy Faces cannot take any responsibility for accidents or damage that occurs as a result of following this activity.You are responsible for making sure the activity is conducted safely.
You might also like
Key Features
- Age Range All Ages
- Duration Less than an hour
- Location Anywhere
- Season Any
-
Categories:
Art & Creating
wooden discs
Tool use & Traditional Crafts
palm drills & rotary hand drills