Guide to rotary hand drills
Rotary hand drills are a great tool to use in an outdoor classroom, forest school or woodworking area. Learn about different types of hand drills and how to use them.
Introduction
Using a rotary hand drill is a more technical drilling skill than using a palm drill.
There are a variety of different rotary hand drills to choose from. This guide aims to help you make the right choice for the project/group you are working with.
At Muddy Faces we sell a selection of hand drills and drill bits.
We also have a very informative information page on tool use and traditional crafts, with an introduction by Pete Moorhouse who is a specialist in woodwork in Early Years education.
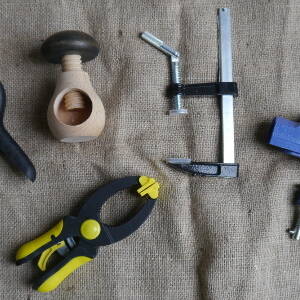
What you'll need
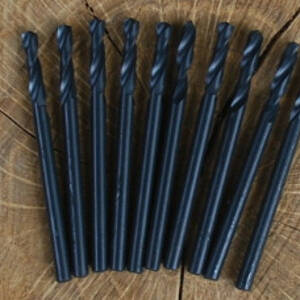
- rotary hand drill
- drill bits
- woods
- palm drill
This activity has been provided by
Useful items from our shop
Environmental Considerations
Consider the environmental impact of preparing, carrying out & completing this activity. Could this impact be reduced? Specific considerations for this activity could include:
- source of wood
Health & Safety Considerations
Follow your usual operating procedures and carry out appropriate risk benefit assessments.
Some considerations particular to this activity include:
- tool use
Drilling:
Drilling is a process that uses a drill bit to cut a hole into wood or other solid materials.
The bit is pressed against the item and rotated by the drill. The speed will vary depending on the ability of the users and the type of drill.
This rotary action, and the weight of the drill (with applied pressure if appropriate), forces the cutting edge into the item being drilled, cutting off slices (swarf) from the hole as it is drilled.
If you are using a hand drill to drill into smaller objects you will need to clamp them into place. Visit our clamps and vices page.
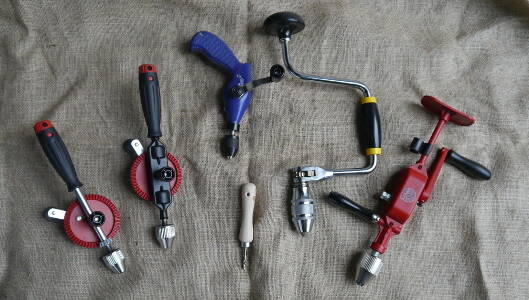
TYPES OF DRILL:
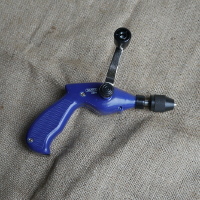
Pistol grip hand drill:
The pistol grip hand drill is an ideal next step from using a palm drill for younger children, and is one of the woodworking tools that Pete Moorhouse recommends for use in the Early Years.
The pistol grip drill has a casing that encloses the gears (no risk of fingers getting trapped). It is also used with a different grip to most rotary drills (as the name suggests – like holding a gun.)

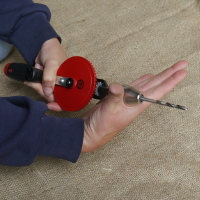
Rotary hand drill - single pinion:
These simple hand drills have an exposed mechanism. They have a turning handle connected to a drive wheel, this turns a single pinion (round gear) which then rotates the drill bit.
The single pinion (gear) connects to the main drive wheel in one place.
Rotary hand drill - double pinion:
Like the single pinion drill, the double pinion has an exposed mechanism. The double pinion allows for a smoother drilling experience and is better suited for more frequent use.
The double pinion (gear) is connected to the main drive wheel in two places.
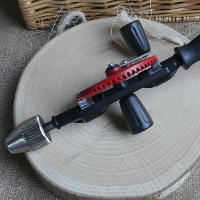
Rotary hand drill with 2 speeds & chest plate:
This is a heavy duty drill with an enclosed mechanism. The chest plate allows for additional pressure to be applied when drilling into hard materials such as metal (usually with the drill held in a horizontal position, used whilst standing).
The two gears (switched with interchangable handle) allow for a fast or slow drilling speed.
Carpenter’s brace:
The carpenter’s brace is suitable for drilling holes with a larger diameter in wood, using an auger bit. The sweep handle generates more torque as it is further away from the centre of rotation.
The brace also has a ratchet mechanism so it can be used if working in a restricted space where you are unable to turn the handle all the way around.
HOW TO USE A ROTARY HAND DRILL:
Set up your work space and workbench:
Unless you are drilling into a heavy object (for example a log round) you will need to clamp your workpiece as you need both hands to work a rotary hand drill. If you don’t clamp a lighter item it is likely to start spinning. In order to use a clamp you will need a workbench.
A workbench/plank is required when working with clamps.
If working outdoors, use a portable workbench – a plank on a couple of log rounds works well.
Ideally, your position will be comfortable and stable with no force being applied unintentionally to the drill. To be able to drill vertically downwards your position needs to be above the work piece.
Ensure that the area you are working in is clear and that you have something comfortable to kneel on if you are working on the ground.
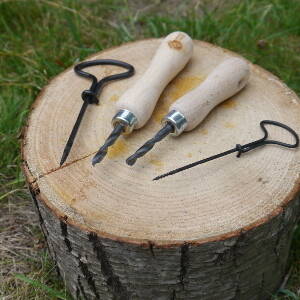
Step #1 Make a pilot hole - optional
A pilot hole is a small hole/indentation that will help the drill bit sit in place. It is not essential but can often be helpful, as it can stop the drill from skidding around on the surface of the workpiece before it cuts in.
Use a palm drill to make a small pilot hole (approximately 2mm deep) in the place that has been marked. Use your workbench to lean down on.

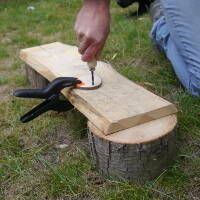
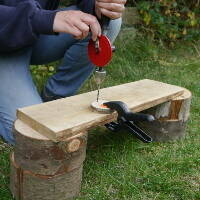
Step #2 Clamp the workpiece
The workpiece needs to be clamped into position to prevent it moving as you drill – both hands are required to use a rotary hand drill. This photo shows a spring clamp being used.
If you want to protect the workbench, it is advisable to put a piece of scrap wood in between your workpiece and bench.
However, if you have a thicker plank or thicker workpiece you may need to use an F clamp which has a larger jaw capacity.
Visit our guide to clamps and vices to help you decide what sort of clamp to use for your project.
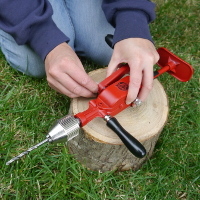
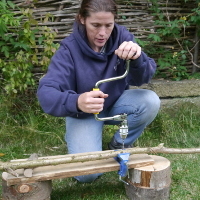
Step #3 Drilling position
A standing position next to your workbench is ideal, as long as the workbench is not too high for the user.
If you are off-site using a portable drilling stand then kneeling comfortably on the ground provides a solid position to work from; or any position where you feel comfortable and steady if you have to sit or stand.
The main consideration is if the drill were to slip off the work piece front or back could it impact a part of your body or the body of an assistant.
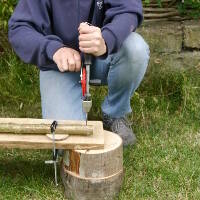
Step #4 Using the drill
Hold the main handle of the rotary hand drill with your non-dominant hand in a vertical position.
Ensure that the drill bit sits in the pilot hole (if using one) and is at a 90 degree angle to your workpiece.
When you feel comfortable and ready, begin to turn the turning handle with your dominant hand clockwise in a constant, smooth drilling action. The drill bit will start to turn and begin to create a hole.
Keep drilling until you have made a hole to your required depth or right through the workpiece.
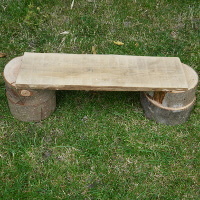
TAKE IT FURTHER:
View our drill a wooden disc and drilling a pole activity.
Disclaimer: Muddy Faces cannot take any responsibility for accidents or damage that occurs as a result of following this activity.You are responsible for making sure the activity is conducted safely.
You might also like
Key Features
- Age Range 3+
- Duration Less than an hour
- Location Anywhere
- Season Any
- Time of Day Anytime
-
Categories:
Tool use & Traditional Crafts
Tool Guides
palm drills & rotary hand drills