Drilling a pole
How to make a simple hole in a pole - useful for all sorts of projects.
Introduction
What you'll need
- workbench (plank on log rounds)
- rotary hand drill
- drill bits for use with wood
- F clamps
- pole
- marker/pencil
- palm drill
- ruler/tape measure
This activity has been provided by
Useful items from our shop
Environmental Considerations
Consider the environmental impact of preparing, carrying out & completing this activity. Could this impact be reduced? Specific considerations for this activity could include:
- if harvesting wood, ensure this is done considerately, to reduce impact on the trees
- ‘leave no trace’ – account for all tools and drill bits
- don’t drill into living trees.
Health & Safety Considerations
Follow your usual operating procedures and carry out appropriate risk benefit assessments.
Some considerations particular to this activity include:
- drill bits are sharp, consider how the bit will be handled and cleaned
- safe tool storage
- if working with a long pole, allow a larger safety area, so poles do not create trip hazards or impacts when being manoeuvred
- risk with external gears on drills – potential entanglement – tie back loose clothing and hair.
Step #1 set up your work space & workbench
Ensure that the area you are working in is clear and that you have something comfortable to kneel on if you are working on the ground. We recommend keeping a distance of 2 poles length from other people.
A plank on a couple of log rounds provides a good portable workbench if you are out and about and need to work from the floor.
Aim for a comfortable position that allows you to work vertically down without leaning on the drill for support. Ideally, you want to be working where your hands and body are above the work bench and working piece.
Step #2 secure the pole
There are various methods you can use to secure the pole. Including:
- a v-shaped saw horse
- use grooves in logs
- woodwork benches with vices
In our example we are using a mini portable vice on a portable bench.

Step #3 Clamp the pole into position
You will need to clamp the pole in place using 2 clamps. Sliding clamps allow a greater gripping distance compared to plastic spring clamps (see our guide to clamps & vices for more info).
In our example we used a set of ‘F’ clamps; with the jaws open up to 150mm.
Place your pole onto the workbench, so it sits along the length of the bench.
If you don’t want to damage the bench, place a small disc under the workpiece to raise it slightly so you can see if the drill has made it through the pole.
Position one clamp at one end of the pole and fit it so that the clamp sits under the workbench and over the pole.
When the clamp is roughly in position tighten it by holding the T-bar handle in a horizontal position, turning clockwise to tighten/close the clamp.
Repeat this at the other end of the pole until the pole is secure. You might need to make some adjustments to the position of the pole so it sits well in the clamps, for example avoiding knots in the wood.
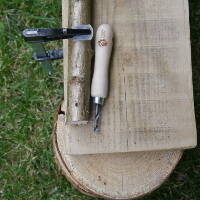
Step #4 mark up the position of the hole
Take any measurements needed and mark up the place you want to drill the hole with a pencil or marker.
You can do this before or after you have clamped the pole.
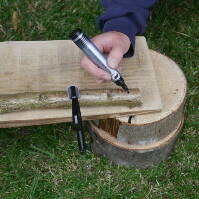
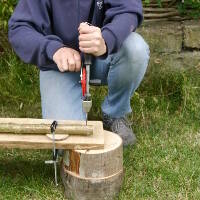
Step #5 make a pilot hole
Making a pilot hole is not essential, but can be helpful when using a rotary hand drill. A pilot hole will help the drill bit sit in place and stop it from skidding around on the surface of the pole.
Using a palm drill, make a small pilot hole (approximately 2mm deep) in the place that has been marked.
Because you will have a hand free when using the palm drill, you can hold the pole with one hand and use the other to use the palm drill. Use your workbench to lean down on.
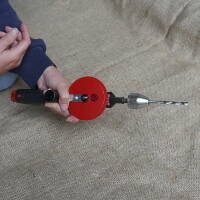
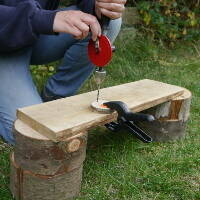
Step #6 set up the rotary hand drill
Choose the diameter of drill bit to use (5mm is a good size for threading string or wire) – our guide to drill bits might be useful.
Fit the bit in the drill.
Step #7 find your drilling position
Kneeling on the ground provides a solid position to work from.
If you have to sit or stand find a position where you feel comfortable and steady.
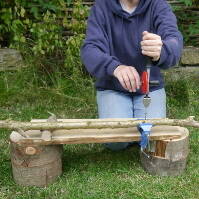
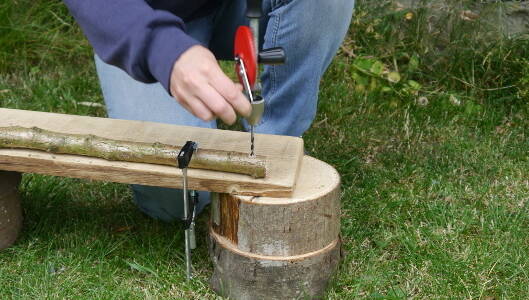
Step #8 drill the hole
Hold the main handle of the rotary hand drill with your non-dominant hand in a vertical position.
Ensure that the drill bit sits in the pilot hole and is at a 90 degree angle to the pole.
Do not apply any pressure – the weight of your hand should be enough to keep the drill bit in place.
Begin to turn the turning handle with your dominant hand, clockwise in a constant, smooth drilling action. The drill bit will start to turn and begin to create a hole.
Keep drilling until you have made a hole right through the pole.
TAKE IT FURTHER:
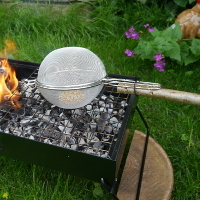
What can you do with a pole and a hole?! You can create:
- a perfect den pole
- a hanging musical percussion instrument
- a sieve popcorn cooker.
What else can you make? We’d love to hear about your pole-with-a-hole projects!
Disclaimer: Muddy Faces cannot take any responsibility for accidents or damage that occurs as a result of following this activity.You are responsible for making sure the activity is conducted safely.


Key Features
- Age Range 6+
- Duration Less than an hour
- Location Anywhere
- Season Any
-
Categories:
Tool use & Traditional Crafts
palm drills & rotary hand drills