Hapa zome decorations
Create natural prints on wooden discs using a hammer! A great little activity for young children who love bashing with hammers!
Introduction
Hapa zome is really fun and is such a simple and satisfying activity. Particularly suited to anyone who likes bashing with a hammer!
* Muddy Faces actively promotes child-led outdoor play & learning. We recognise and believe in the curiosity that children have and their drive to explore and discover. We hope that you will bear this in mind when considering more prescribed activities like this one - often much more creative ideas will occur if resources are simply provided and children are given the time and space to explore independently.
What you'll need
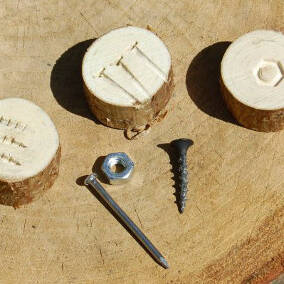
- a firm surface - wooden board/slice
- calico/cotton/paper
- natural materials - fern fronds, leaves, flowers etc.
- hammer/pebble
- wooden discs
- palm drill if drilling own hole
This activity has been provided by
Useful items from our shop
Environmental Considerations
Consider the environmental impact of preparing, carrying out & completing this activity. Could this impact be reduced? Specific considerations for this activity could include:
- source of natural materials
Health & Safety Considerations
Follow your usual operating procedures and carry out appropriate risk benefit assessments.
Some considerations particular to this activity include:
- tool use
This activity can be very effective but some types of leaves don’t seem to work so well – so we recommend doing some testing before you do it with a group.
If you don’t have drilled discs use a palm drill to make holes (see our 'drill a wooden disc' activity) so you can make pendants or hanging decorations.
Step #1
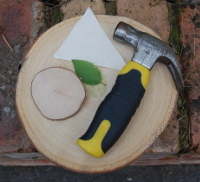
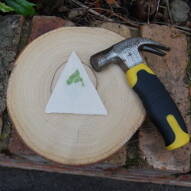
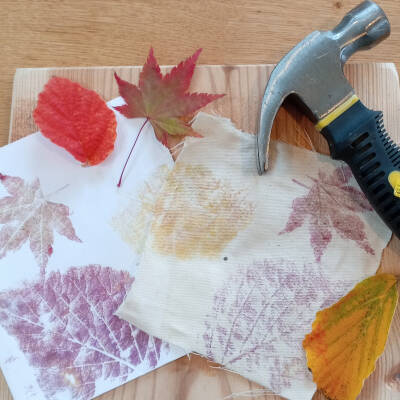
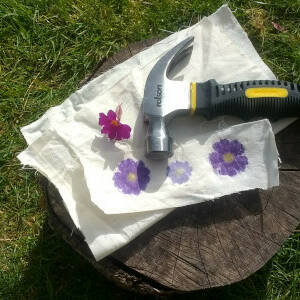
Place your disc or piece of wood onto a firm base and place a leaf on top.
Step #2
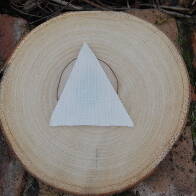
Cover the leaf with a piece of fabric.
Although this is not totally necessary, if it’s not covered the leaf can stick to the hammer and come off the disc.
Plus you get the added bonus of creating a leaf print on the piece of fabric as well (two items out of one process!).
Step #3
Start tapping the fabric with a hammer, ensuring you hit the whole area evenly.
Try to hit the hammer down with a flat face – if it’s not flat the edge of the hammer hits which can dent the wood and create a dappled pattern.
Continue hitting with the hammer until all the leaf shows through the material.
Step #4
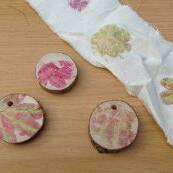
If you want to take a peek, pull the fabric up from one edge only so you can lay it back down in exactly the same position to continue.
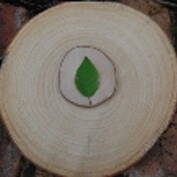
Once you are finished peel off the fabric to reveal the leaf print.
The leaves in this photo are autumn leaves that gave amazing different natural colours.
Step #5
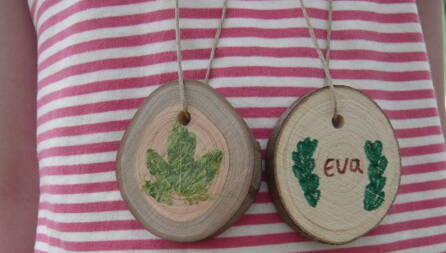
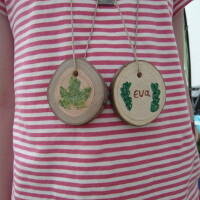
Thread your discs on to string to hang as decorations or to use as pendants.
Take it further:
- varnish over the print to create a sheen and to bring the colour of the wood alive
- use your discs as name tags or welcome tags
- use acrylic paint pens or felt tips to enhance/personalise
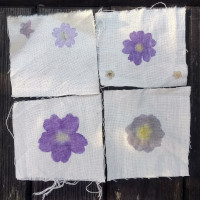
- try it with flowers.
Disclaimer: Muddy Faces cannot take any responsibility for accidents or damage that occurs as a result of following this activity.You are responsible for making sure the activity is conducted safely.
You might also like

Key Features
- Age Range All Ages
- Duration Less than an hour
- Location Anywhere
- Season Any
- Time of Day Anytime
-
Categories:
Art & Creating
leaves, sticks & petals
with tools
Tool use & Traditional Crafts
hammers