Wood Slice Bracelet Maker
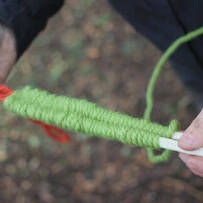
Using slices of wood and lengths of colourful wool, children can explore basic weaving techniques while creating their own unique wearable pieces.
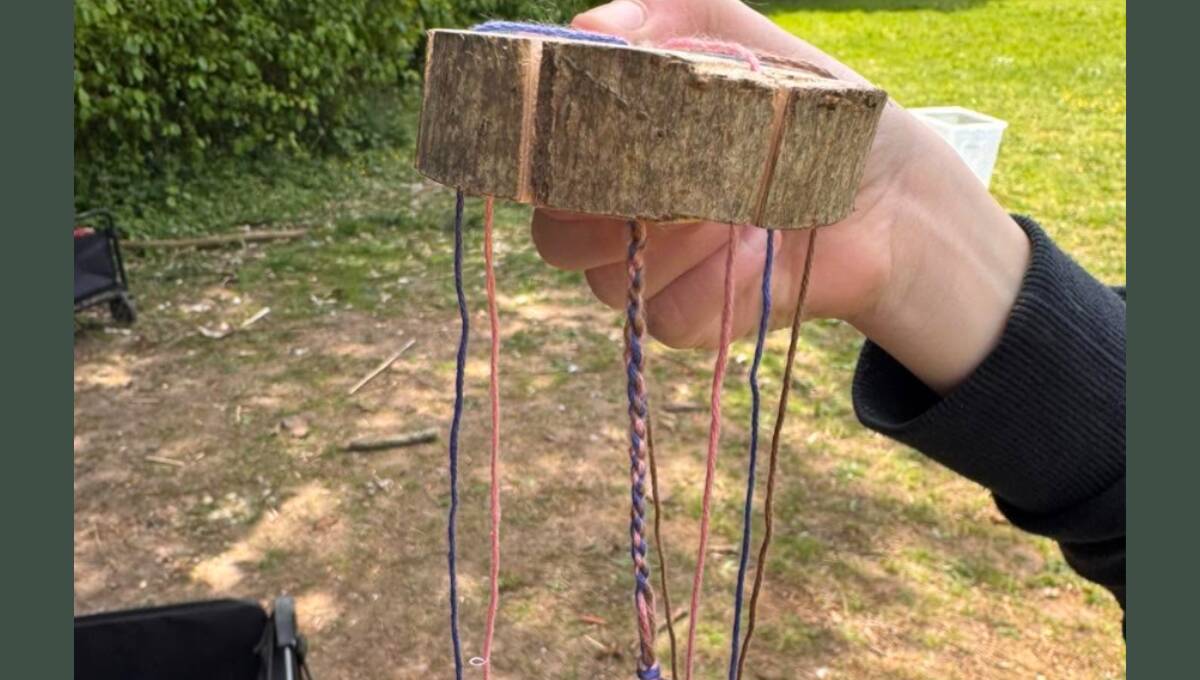
Introduction
This activity is perfect for outdoor learning, Forest School sessions or nature-based craft time. It encourages children to slow down, focus and enjoy working with natural textures, combining fine motor skills with creative design. Each wood cookie becomes a small, tactile canvas for pattern-making, threading and colour exploration.
Thank you to Emma@ Practical Play Forest School for the inspiration and feature image.
What you'll need
- balls of different coloured wool
- wood slice/cookie
PracticalPlayForestSchool

Useful items from our shop
- Discs
- Natural Threading Frames
- Natural Weaving Frames
- Palm Drills
- Faithfull Junior Hacksaw
- Knotting / Braiding Star
- The Survival Bracelet Kit
Environmental Considerations
Consider the environmental impact of preparing, carrying out & completing this activity. Could this impact be reduced? Specific considerations for this activity could include:
- source of wood
- leave no trace
Health & Safety Considerations
Follow your usual operating procedures and carry out appropriate risk benefit assessments.
Some considerations particular to this activity include:
- using tools / hand drilling
- using scissors
- using lengths of wool
You must use YouTube or Vimeo video URLs. Be sure to use the full video URL, and not a channel or short URL
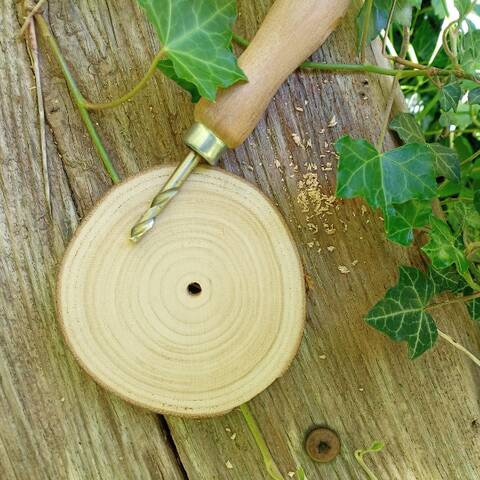
Step #1 create the wood slice bracelet maker
Drill a hole in the centre of the wood slice, at least 3mm wide.
See our 'Drill a wooden disc' activity page.
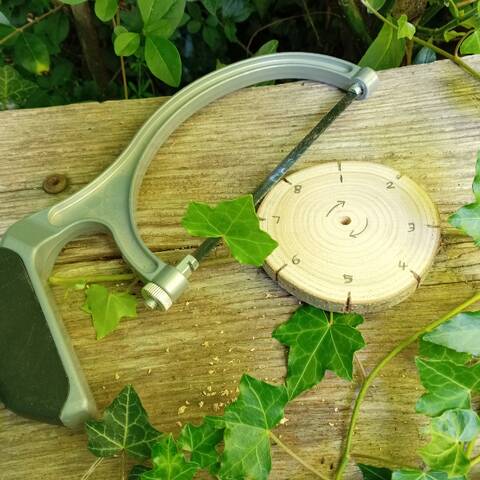
Step #2
Mark out the places to cut 8 evenly spaced notches using a ruler, then cut and label the notches 1-8.
Add directional arrows around the centre hole as a reminder of which way to turn the wooden disc.
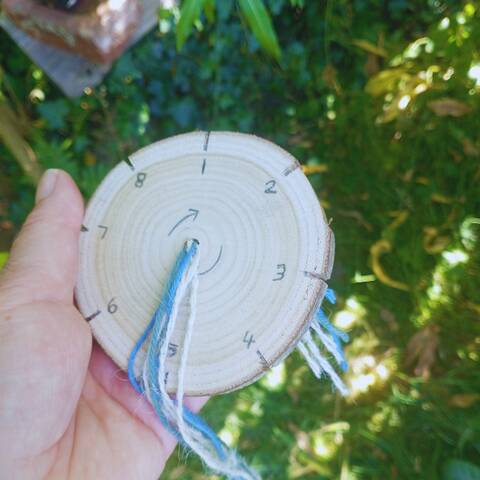
Step #3 get threads/lengths of wool ready
Choose 7 threads - 3 different colours will create a nice pattern but you can choose any colours or just 1 colour - to make a bracelet you'll need to cut lengths of approx. 1m.
Knot them altogether at one end and thread them up through the hole so they appear on the marked side of the disc
Top Tip
If threading them through is proving tricky, try using a crochet hook or darning needle to poke the wool through the hole, or use the palm drill to make the hole larger.
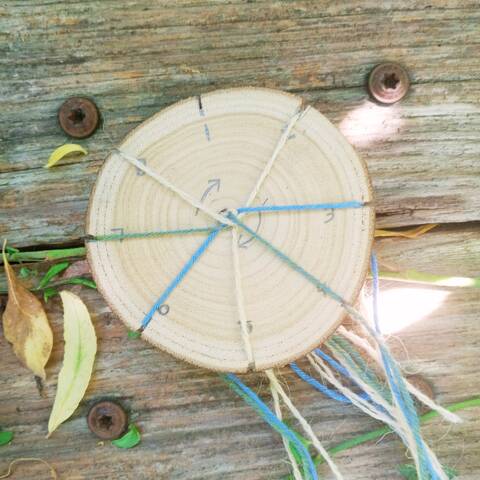
Step #4 placing threads in notches
Place a thread in notches 2-8 (as shown in the picture).
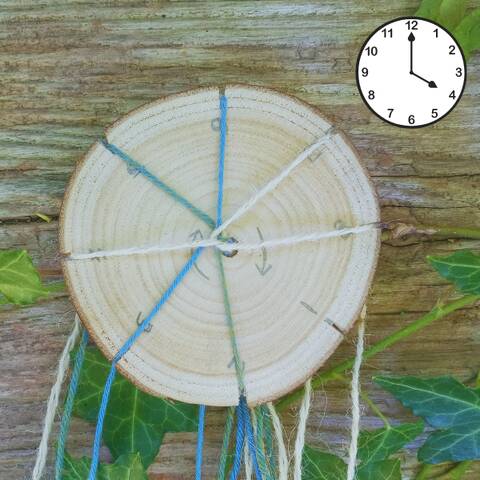
Step #5 weaving process
Rotate the disc so that the '1' is in the 4 o'clock position as pictured. The weaving process is moving the 12 o'clock thread at the top of the disc to the empty 4 0'clock position and then rotate the disc so the new empty slot is at the 4 o'clock position and move the 12 o' clock top thread across and keep going in this pattern. Using the numbers to help:
- from notch 6 to notch 1 - rotate
- 3 to 6 - rotate
- 8 to 3 - rotate
- 5 to 8 - rotate
- 2 to 5 - rotate
- 7 to 2 - rotate
- 4 to 7 - rotate
- 1 to 4 - rotate
(go back to the start and repeat, starting with notch 6 to notch 1)
Top Tip
Make sure the knot/threads are held tight underneath the wood cookie and keep pulling it down.
Step #6 Tie the ends
Test the length to make sure it fits around the wrist and tie up the loose ends and now it's ready to wear.
Take it further:
Experiment with different numbers of slots/strands.
Disclaimer: Muddy Faces cannot take any responsibility for accidents or damage that occurs as a result of following this activity.You are responsible for making sure the activity is conducted safely.
You might also like
Key Features
- Age Range 6+
- Duration Less than an hour
- Location Anywhere
- Season Any
-
Categories:
Art & Creating
weaving & wool