Stick Weaving
The simplest of weaving for little fingers!
Introduction
This activity feels like weaving right from the very beginning and is a skill children and adults can make progress with really easily. It’s not too fiddly and doesn’t require a needle. This is something a child can make from scratch (with a little help). See how you get on.
Lorna Norton - Kith Homestead
What you'll need
- Two equally-sized thin, straight sticks
- A vegetable peeler
- A power drill/hand drill to make two small holes
- Cotton/string
- Yarn (chunky is best)
Lorna Norton - Kith Homestead

Useful items from our shop
Environmental Considerations
Consider the environmental impact of preparing, carrying out & completing this activity. Could this impact be reduced? Specific considerations for this activity could include:
- source of sticks
Health & Safety Considerations
Follow your usual operating procedures and carry out appropriate risk benefit assessments.
Some considerations particular to this activity include:
- tool use
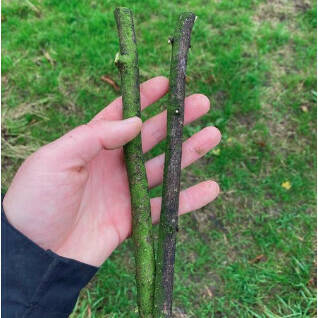
Step #1
Find yourself two straight, thin-ish sticks that taper (get thinner) slightly at one end.
(they need to taper so your yarn will easily slide off the sticks onto the warp)
Step #2
Peel your sticks to remove all the bark and nobbly bits.
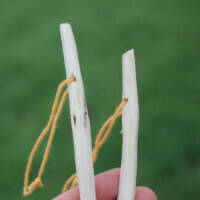
Step #3
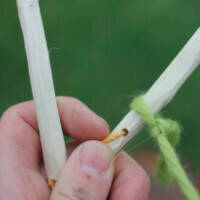
Drill a small hole through each of your sticks, at the slightly thinner end, about 1.5cm from the end.
Using a piece of string/cotton, thread through a loop on each end. This loop holds onto the warp strings (see next step).
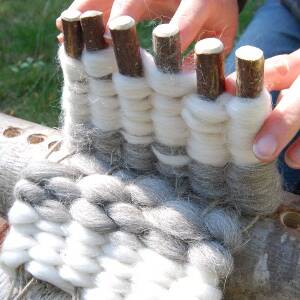
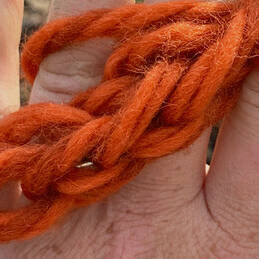
Teaching Point
Warp is the up and down strands in a weave - these are typically held stationary (the orange yarn in the photos)
Weft is the left to right strands - your “working weave” (the green yarn in the photos)
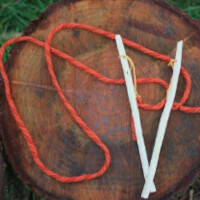
Step #4
Tie a long string/yarn to each of the loops. This needs to be as long as you want your finished piece to be. I like to make one continuous piece tied at each end.
You’re now ready to start weaving!
Step #5
Holding the sticks with the loop at the bottom, tie your weft piece (your working piece) on to one of the sticks, just above the holes/tied on loops.
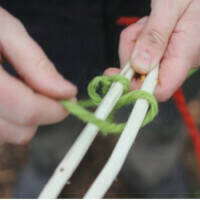
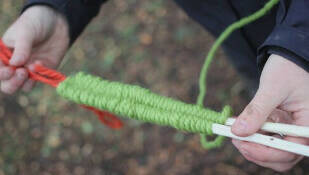
Step #6
Holding the sticks with the loop at the bottom, start weaving up the sticks.
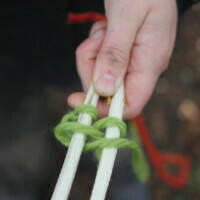
Your weaving rhythm is pretty straight forward - you just need to remember the number 8!
Weave the yarn behind - in front - behind - in front, in a figure of 8 shape. You’ll find the sticks “fill” quite quickly.
Step #7
… and just keep going!
You don’t need to wrap the sticks too tightly as you’ll struggle to do the next part. Finding your tension will be a work in progress - you’ll figure it out as you go.
Step #8
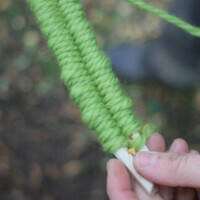
When the sticks fill up, you’ll need to gently tease the woven yarn onto the warp (the hanging strings you attached to the loops).
Slide the weft (your working yarn) off the end of the sticks onto the warp with care. It’s fairly fail-proof, just go slowly so it doesn’t tangle.
Step #9
Continue weaving the figure 8 at the top and pushing your weft down onto the warp.
Once you get to the bottom of the warp, you’ll begin filling it up until it reaches the sticks.
At this point, cut your weft string and tie it to the warp on both sides. Then cut or untie your warp from the loops.
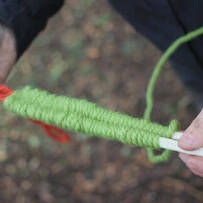
And ta-da! Here is the finished weaving (finished at home, out of the rain!)
Let us know how you get on - which bit you found easy and what you’ve done with your weaving.
Take a peek at YouTube or Pinterest for more ideas of what to do with it afterwards. We’ve made a set of placemats, a rug and this snake for B (which he uses more as a helicopter propeller!)


Disclaimer: Muddy Faces cannot take any responsibility for accidents or damage that occurs as a result of following this activity.You are responsible for making sure the activity is conducted safely.
You might also like
Key Features
- Age Range 3+
- Duration Less than an hour
- Location Anywhere
- Season Any
-
Categories:
Art & Creating
weaving & wool