Needle felting in 2D
A simple starter project & introduction to the art of needle felting.
Introduction
This is a simple activity to get you started in the versatile art of needle felting. Needle felting is the process of making wool fibres mesh together by stabbing them with a needle (look at our felting guide for more information about felting needles).
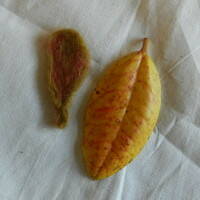
Using a leaf as inspiration this simple project shows you how to create a 2D free-standing leaf and a felt leaf on fabric (appliqué).
What you'll need
- wool tops*
- felting needle (size 36/38 gauge is a good starter needle)/needle felting tool
- needle felting mat (or piece of upholstery foam/pile of green scourers)
- selection of gathered leaves.
* Tops – also known as ‘roving’ – is wool that has been washed and combed so that all the fibres are going in the same direction. Wool top separates easily if you pull gently; pull hard and the fibres will lock together (wool has tiny scales which lock together which is why it is perfect for wet or dry felting). Tops normally come in long lengths wrapped up into balls.
This activity has been provided by
Useful items from our shop
- Felting Needle Tool
- Felting Needles 36 Gauge - Set of 10
- Shetland Wool
- Mixed Felting Wool - Coloured
- Felting Needle Mat
- Needle Felting Foam Pad
- Needle Felting Starter Set
- Merino Wool Mixed - Autumn
Environmental Considerations
Consider the environmental impact of preparing, carrying out & completing this activity. Could this impact be reduced? Specific considerations for this activity could include:
- source of wool
Health & Safety Considerations
Follow your usual operating procedures and carry out appropriate risk benefit assessments.
Some considerations particular to this activity include:
- felting needles are sharp
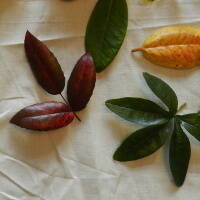
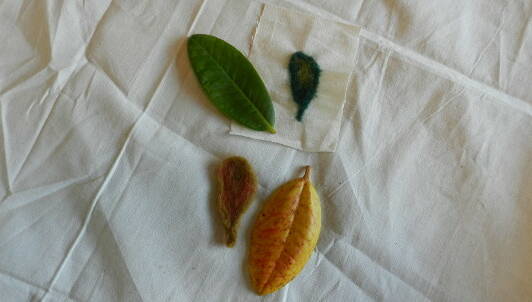
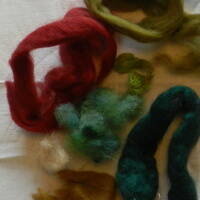
Step #1 Inspiration
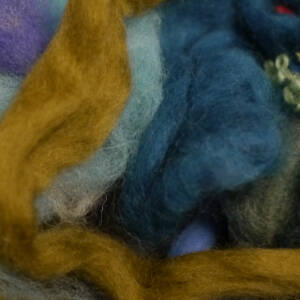
Find some leaves for inspiration and select wool tops in a range of colours.
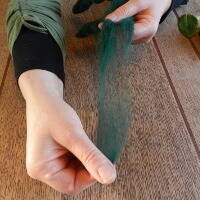
Step #2 Pulling off Fibres
Wool tops are long combed parallel fibres that come in thick lengths.
Working with small, fine fibres of wool, ease out fibres by first spreading them out then gently pulling off small bits (without ripping). If the fibres don’t pull off easily then spread them out even finer.
Step #3 Arranging the fibres
Arrange the fibres onto your pad/mat in roughly the same shape that you want the finished piece to be. It doesn’t need to be perfect at this stage.
The fibres stick into the bristles of the manufactured needle mat and make it difficult to remove them. A foam pad or pile of scourers works well (although the scourers will begin to degrade after 4-5 projects).
Step #4 Stabbing the fibres
Holding the needle near the top, in a way that feels secure and comfortable, stab in and out of your wool shape, building up your speed and then working as quickly as you feel you can.
As you stab you will begin to observe the fibres meshing together.
When they look like they are felting together, carefully pull the piece off the mat and turn it over. This prevents the fibres sticking into your block/mat. Keep turning your piece throughout the following steps.
Tip: always be aware where your opposite hand/fingers are to avoid stabbing yourself!
Step #5 Adding more
Add more fibres if you want to build up/change the shape/add different colours to your piece.
The beauty of needle felting is that it is an organic process and you can work with it as you go.
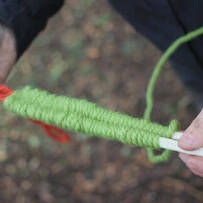
Step #6 Adding detail
To add a stalk to the leaf, twist and shape some fibres first, then overlap them slightly over your main piece.
Using the felting needle begin stabbing to felt the stalk onto the main piece.
Step #7 Adapting the shape
If you are not happy with the shape you can use the tip of your needle to lift the edges and fold them in to change the shape.
Once folded over, stab gently to hold in place. Once it is secure you can felt it into the main piece.
Tip: a multi–needle tool is better for working on larger pieces (it is noticeable how much quicker the fibres felt!).
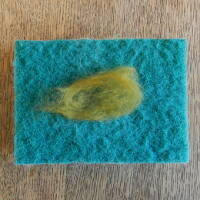
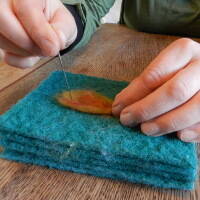
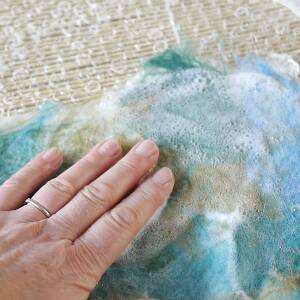
Appliqué (felting onto another piece of material)
Uses the same technique as the free standing leaf but with a base layer of fabric (or card) underneath. A manufactured needle felting mat works well with this method of 2D felting.
Take it further:
- try using a playdough/cookie cutter as a guide/template for a shape
- appliqué felt directly onto an item of clothing.
Disclaimer: Muddy Faces cannot take any responsibility for accidents or damage that occurs as a result of following this activity.You are responsible for making sure the activity is conducted safely.
You might also like
Key Features
- Age Range All Ages
- Duration Less than an hour
- Location Anywhere
- Season Any
- Time of Day Anytime
-
Categories:
Art & Creating
leaves, sticks & petals
weaving & wool
Tool use & Traditional Crafts
felting
Activity Downloads