Wet felting
Create a woollen work of art with soapy suds and a lot of elbow grease.
Introduction
Wet felting is the process of using a combination of friction/agitation, soap and water to make felt out of wool fibres. The hot water and soap changes the pH of the wool and allows the scales on the fibres to open up. The soap also helps provide a lubricant and allows your hands to move around the fibres easily.
Look at our felting guide to find out more about the felting process. This activity shows the basic process of wet felting. We’ve suggested a range of different options for resources to use.
What you'll need
- good quality tops* (Merino is best)
- selection of coloured tops*
- bath towel
- piece of netting/mesh or tea-towel
- bamboo mat
- bubble wrap or anti-slip mat
- rolling pin or something that rolls (broom handle/dowel/swimming noodle/pipe insulation)
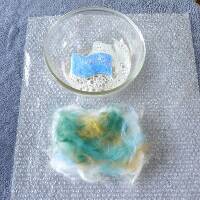
- hot water in a bowl
- soap (liquid/flakes)
- spray bottle or sponge
*Tops – also known as ‘roving’ – is wool that has been washed and combed so that all the fibres are going in the same direction. Wool top separates easily if you pull gently; pull hard and the fibres will lock together (wool has tiny scales which lock together which is why it is perfect for wet or dry felting). Tops normally come in long lengths wrapped up into balls.
This activity has been provided by
Useful items from our shop
- Shetland Wool
- Mixed Felting Wool - Coloured
- Bamboo Mat
- Oliva Olive Oil Soap Flakes
- Oliva Olive Oil Soap Bar
- Handmade Fulling Block
Environmental Considerations
Consider the environmental impact of preparing, carrying out & completing this activity. Could this impact be reduced? Specific considerations for this activity could include:
- source of wool
- disposal of soapy water
- re-use bubble wrap
Health & Safety Considerations
Follow your usual operating procedures and carry out appropriate risk benefit assessments.
Some considerations particular to this activity include:
- if you have sensitive skin use rubber gloves
- choice of soap product
- wet floor
Step #1 Preparing your work area
Create a clear working area on a table/flat solid surface and set it up to protect it from water spillage (wet felting is wet!).
Put a vinyl tablecloth down or a piece of plastic sheeting. Have a bath towel to hand to mop up any spillages. You can also put a towel down in addition to the plastic.
Step #2 Adding your work surface
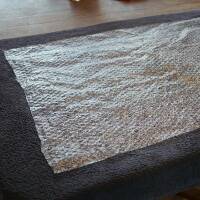
Place the towel down flat.
Lay a piece of bubble wrap flat on top of the towel (if you haven’t got any bubble wrap you can use anti-slip matting or a bamboo mat. The bubble wrap does have the advantage of containing some of the water used in the process).
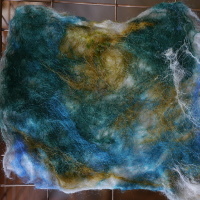
Step #3 Creating a base layer
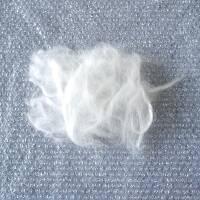
Pull off small, thin pieces of higher quality tops (see our felting guide) and lay the fibres out horizontally to cover an area the size of the piece you want to create. Ensure they overlap slightly as you lay each piece out.
Add another layer on top at right angles to the first layer.
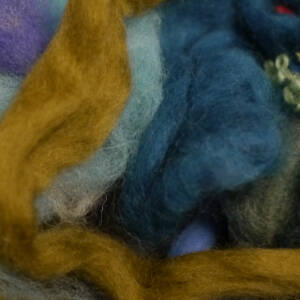
Step #4 Adding colour & details
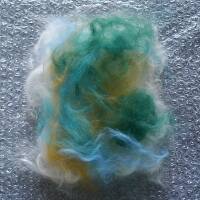
Add thin pieces of coloured tops over this to create your pattern/picture.
Keep an even coverage to avoid patches in your final piece.
If you use any particularly thick fibres to create a denser colour then tease out a few very fine strands of the same colour to lay across the thicker strands. The fine fibres will hold the thicker fibres in place, as they will felt more easily.
Step #5 Adding the soap
When you are happy with the position and colours of your fibres you are ready to start felting.
Make up a soapy solution in warm water (hand-hot rather then luke warm). Either use a mild eco-detergent or grate olive oil soap flakes into the water. The water should feel slippy. Add soap solution sparingly at first as you do not want too many bubbles when you start working (the bubbles may get in the way of the fibres meshing).
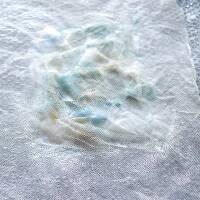
Step #6 Wetting
Carefully wet all the fibres either by dripping on the warm soapy water or using a sponge or spray (apply liberally).
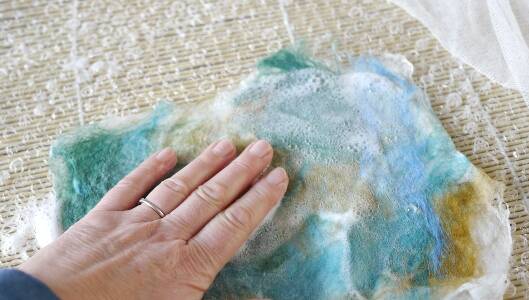
Lay a piece of netting/mesh on top; this has the advantage of you being able to see the wool whilst you work on it. Alternatively you can use a tea towel if you don’t have any netting. This layer helps keep the fibres in place as you roll the fibres (Step 7, 8 and 9).
Drip more soapy water over the netting then press down gently with your wet and slightly soapy hands, avoiding creating too many suds.
Alternatively you can rub a soap bar over the netting instead of making a soap solution. Experiment and see what works best for you.
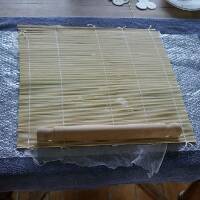
Step #7 Rolling up
When you are satisfied that the whole piece is wetted lay the rolling pin (or similar) at one end and roll the bubble wrap containing your picture around it.
Tip: you can also lay a bamboo mat over the top of the bubble wrap – it will provide additional friction.
Tip: if you do not have a rolling pin (or similar) just spend more time rubbing the piece when it is flat before you roll it up.
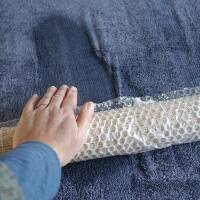
Step #8 Rolling
Now for the hard work…
Roll the whole piece up tightly and start rolling, short and fast, for 5-10 min. This is the agitation/friction part of the process.
You can tie the roll up with elastic bands first but we found that rolling without worked and it was easier to unroll and turn or check.
Step #9 More rolling
And more hard work…
Unroll and turn your piece around by 90 degrees, add some more soapy water and roll it again.
Continue this turning and rolling process until the fibres start to knit; pinch them to test and see how matted the fibres are. If they are still loose you need to keep rolling. If you get tired, have a rest or find a willing volunteer to have a go at rolling! You can also roll out using your forearms.
If you plan to put the finished piece behind a picture frame then you don’t need to worry too much about the degree of felting.
Tip: at any stage you can add more little pieces of wool and keep adding soapy water.
Step #10 Rinsing
When the piece is felted, rinse off the soap in warm water, either under the tap or in a bowl of clean warm water. At this stage you should be able to scrunch it up in your hands whilst you rinse it.
Leave to dry naturally.
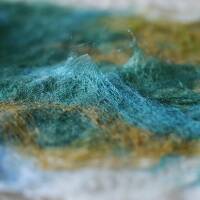
The finished piece!
Think of all the creative ways to use your completed work of art!
For example: make a cushion cover, a patch for a jumper, a small hat for a teddy, cut into it and thread ribbons through it or stitch into it – lots of ideas to try.
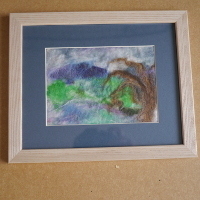
TAKE IT FURTHER:
- create a picture by adding more detail and framing it; be creative, the opportunities are endless!
Disclaimer: Muddy Faces cannot take any responsibility for accidents or damage that occurs as a result of following this activity.You are responsible for making sure the activity is conducted safely.
You might also like
Key Features
- Age Range 6+
- Duration 1 - 2 Hours
- Location Garden / Home
- Season Any
-
Categories:
Art & Creating
weaving & wool
Tool use & Traditional Crafts
felting