Nail art star
A super simple children's woodworking activity using a hammer and nails.
Read More about Nail art starHands-on hammer and nail art activities for children, supporting safe tool use, coordination and creativity through open-ended outdoor woodworking and nature-based craft.
Introduce children to practical woodworking through engaging hammer and nail activities designed for outdoor learning spaces. Ideal for Forest School, nurseries, classrooms and home education, this resource helps build confidence using real tools in a safe, supported way. Children can create patterns, pictures or structures using wood, natural materials and found objects, developing hand strength and coordination. Activities can be extended to include measuring, spacing and simple maths through shape making. These activities encourage independence, creativity and problem solving while promoting responsible risk taking and meaningful, hands-on learning experiences.
Photo Credit: Jo@Hummingbirds
This activity has been provided by
Consider the environmental impact of preparing, carrying out & completing this activity. Could this impact be reduced? Specific considerations for this activity could include:
Follow your usual operating procedures and carry out appropriate risk benefit assessments.
Some considerations particular to this activity include:
*Muddy Faces actively promotes child-led outdoor play & learning. We recognise and believe in the curiosity that children have and their drive to explore and discover. We hope that you will bear this in mind when considering more prescribed activities like this one - often much more creative ideas will occur if resources are simply provided and children are given the time and space to explore independently.
Place the piece of wood that nails are going to be hammered into on a flat, stable surface.

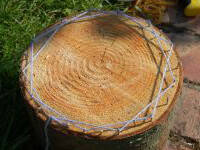
Create a piece of art by hammering leaves onto the piece of wood.
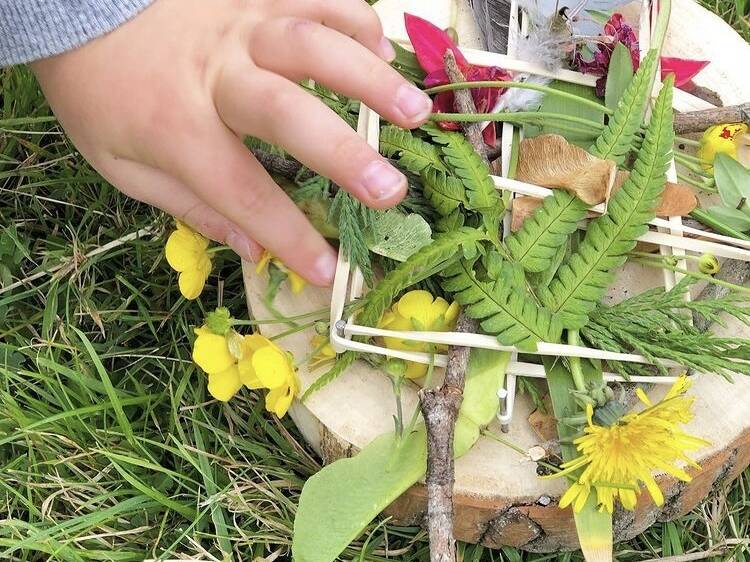
Use elastic bands to create a 'frame' to secure natural materials into.
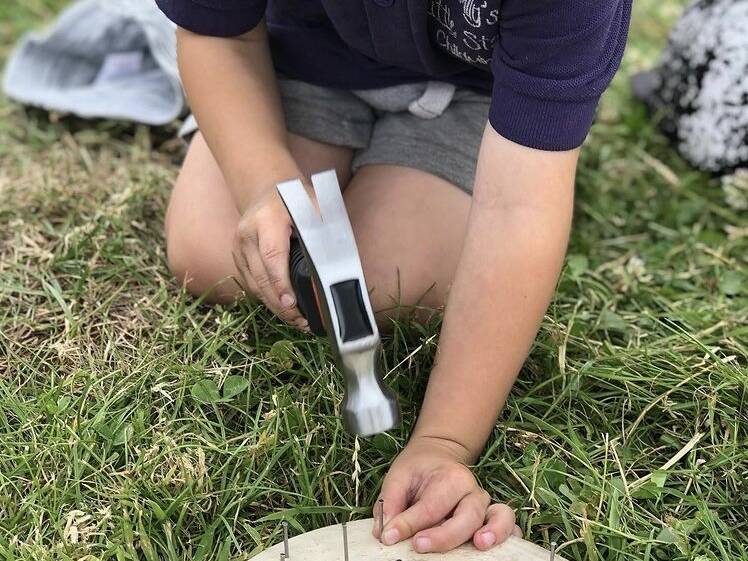
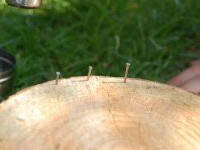
Hammer nails into wood leaving space around the nails to enable manipulation of materials around the nails.
Nail art star
A super simple children's woodworking activity using a hammer and nails.
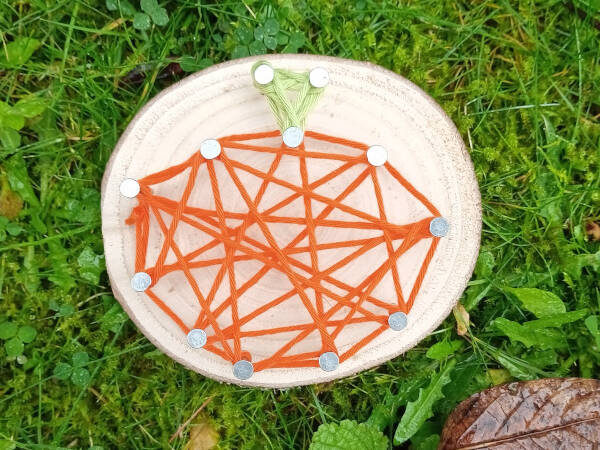
Read More about Nail art starThis activity involves hammering nails into a log slice then using dexterity and numeracy skills to create geometric shapes and patterns.
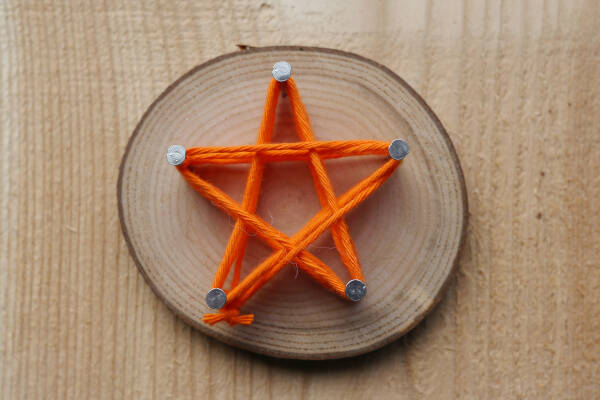
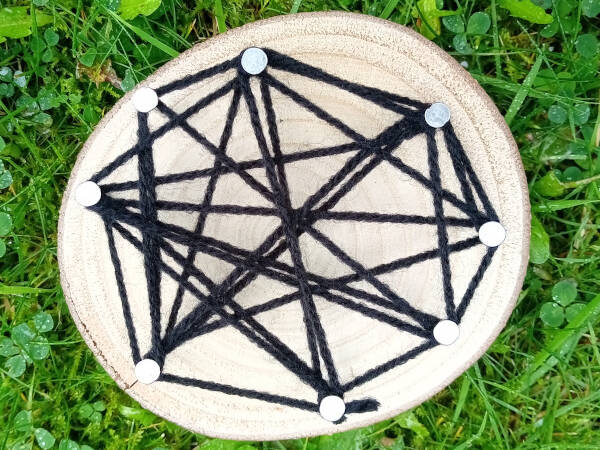
Hammer in the nails, spacing them out equally in a circle (the ones in this picture are around 2-3cm apart. We didn’t measure them – we just made them approximately equal.)
For accuracy and/or to add numeracy skills into the activity, measure and mark out equally-spaced dots to create the circle, marking the exact point to hammer the nails into.
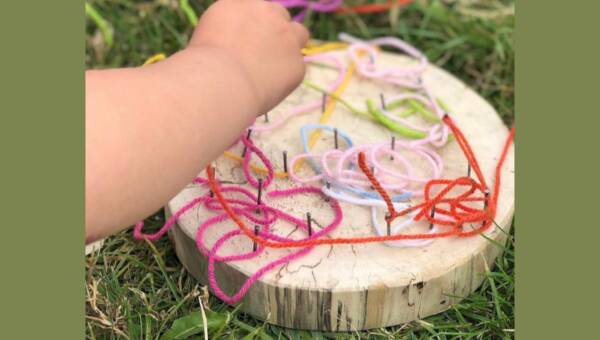
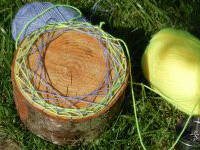
Attach a length of wool or string to one of the nails (we’ll call this the Start Nail).
To create your pattern decide how many nails to jump each time – ideally you don’t want to end up back on the Start Nail.
Count the nails you have chosen to jump then wrap or tie-off your wool/string onto the nail. Continue jumping and wrapping again and again around your log slice until you are satisfied with your pattern.
If you do end up on the Start Nail within one or two circuits, either undo and start again or re-start using a different number.
If you are mathematically-minded you could count the number of nails and work out the number to skip before you start. We just started and adapted as we went along.
Don’t include the Start Nail in your count, and skip the same number of nails each time to create a consistent pattern.
If you decide to tie every 4th nail, count this way:
Start Nail
… one, two, three… tie-off on four
… one, two, three… tie-off on four
etc.
You can speed up the process by not tying-off on each nail but just wrapping around it once. The downside of this is that you need to keep a constant tension on the string otherwise it can all unravel.
We ended up alternating – doing a few turns then a tie-off, a few turns then a tie-off, so if it did go slack we only unravelled back to the last tied nail, not the whole thing.
Continue the pattern. Hopefully you’ll miss the Start Nail and continue round the circle until you have used every nail.
Tie-off and snip off any excess wool/string.
Choose a different colour wool or string.
Choose a new Start Nail, attach to it and start a new pattern with a new count.
You can repeat with a couple of different colours.
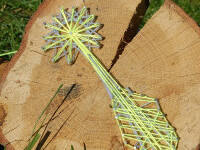
This photo shows a round pattern done by an adult and a more random pattern made by a 7-year-old. He wanted to connect the patterns together; the result was this cool shape. He said: “it looks like one of those rocket toys that make a whizz sound as they fly” (I was thinking a shooting star…).
Disclaimer: Muddy Faces cannot take any responsibility for accidents or damage that occurs as a result of following this activity.You are responsible for making sure the activity is conducted safely.