Weaving on a rustic peg loom
Weaving on a peg loom is a wonderful craft activity; so simple to use and the results are fantastic!
Introduction
The instructions below are how to weave with sheep’s wool, but many other materials could be woven using the same techniques – strips of material or wool. How about trying natural materials such as twisted long grasses?
We also have a couple of videos for you to watch: how to use a peg loom and make your own peg loom.
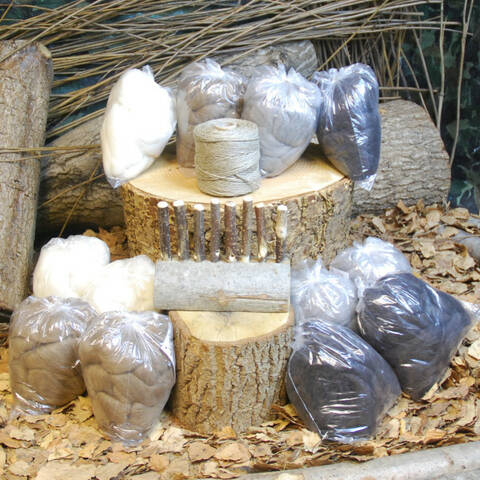
What you'll need
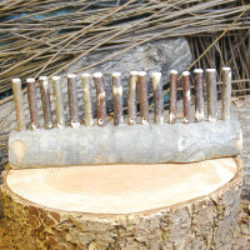
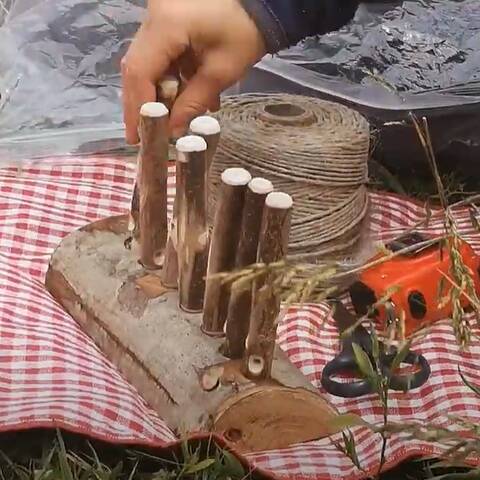
- loom base & pegs - you can make these from all sorts of different woods and dowels. The rustic stand gives a nice, heavy, stable base and a great look
- string - you can use most strings in a loom; we have gone for a thick flax string. It’s not the cheapest but it is all natural and looks amazing
- scissors or knife
- wool and/or other weaving fibres
This activity has been provided by
Useful items from our shop
Environmental Considerations
Consider the environmental impact of preparing, carrying out & completing this activity. Could this impact be reduced? Specific considerations for this activity could include:
- source of wood if making your own pegs and loom
- ‘leave no trace’ if working outdoors
Health & Safety Considerations
Follow your usual operating procedures and carry out appropriate risk benefit assessments.
Some considerations particular to this activity include:
- use of scissors/knife
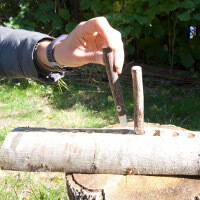
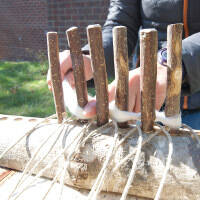
Step #1 Setting up the pegs
Width - choose the number of pegs to create the width of woven material you require.
Step #2 Measuring the string
Work out the length of string you’ll need.
The length of each string should give at least 20 cm extra at the bottom and the top of your finished woven piece (allowance for knot tying/frills). You will need to have an idea of the length you will be weaving before you start.
Example: If you are making a mat that will be 30cm long then your string will need to be 30+20+20=70cm, then times this by two to create the actual length of string you require (full length = 70 x 2 = 140 cm).
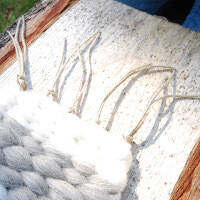
Step #3 Setting up the string
Take each peg in turn and thread a piece of string through the hole at its base.
Pull the string through the hole in the peg until both ends extend to an equal length. Stretch the string away from the back of the loom across the work surface.
Once all pegs are threaded make sure the strings are not tangled and stretch away from the loom.
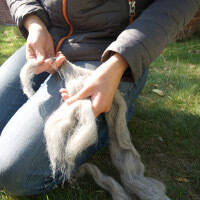
Step #4 Starting the wool
Take a piece of wool about as thick as your thumb (you may have to split the skein down its length to get a thinner piece).
Wrap the end of the wool around the first peg on the left of the row and twist it once or twice around itself to stop it slipping.
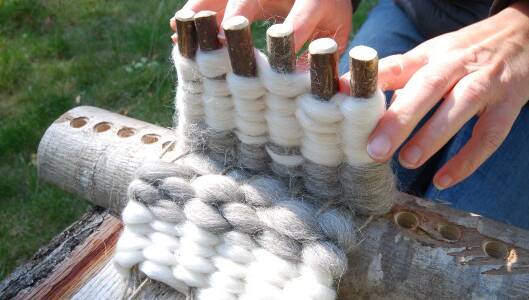
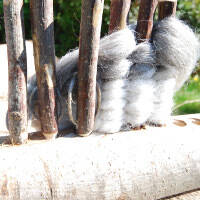
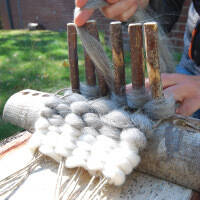
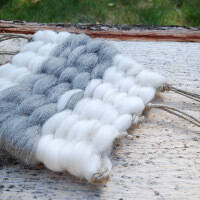
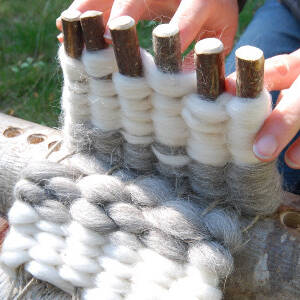
Step #5 Weaving
Take the long end of the wool and weave it along the row of pegs, in and out of each one, until you reach the end. Take care not to miss any pegs and keep pressing the wool down to the base of each peg as you weave.
At the last peg go all the way around it and continue weaving back along the row. You will be weaving on opposite sides to the first row.
Step #6 Adding wool
If your wool is starting to run out or you wish to change the colour, take a fresh piece of wool and lay its end along the last 20cm or so of the first piece.
Hold the pieces of wool together as if they were one piece and continue weaving in the same direction until the first finishes and the second takes over – then continue weaving as in Step 5.
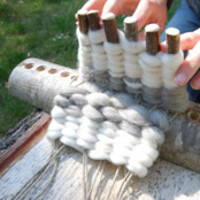
Step #7 Removing and replacing the pegs
When your weave comes to about 2 cm below the top of the pegs you will need to pull the pegs through.
Finish weaving to one end and let go of your wool.
Work your way along the row of pegs pulling each one up through the weave and replacing it back in its hole. You may have to wiggle and jiggle the pegs a little and hold the weave down to get them out.
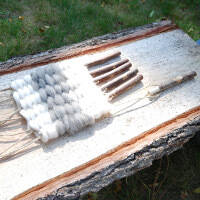
Step #8 Continuing the weave
Allow the finished block of weave to sit flat on the work surface behind the loom. Pick up your wool from where you left it and continue to weave as before, back along the row – taking care to start on the opposite side from that which you finished on.
Don’t worry about the gap between the finished block and the new weave you are creating. You can use the strings sticking out of the end to pull this tighter as you progress.
Step #9 Finishing Off
Continue repeating steps 7 and 8 until you have finished the piece you are working on.
Take the end of the last piece of wool and tuck it downwards into the weave, down the length of one of the pegs, using your finger, or tuck it down the edge of the woven piece after you have removed it from the pegs. This tidies the end and helps prevent it unravelling.
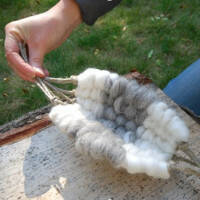
Step #10 Removing the weaving
Starting at one end of the loom pull each peg up and through the weave, like in step 7. But this time don’t replace them in the loom holes – when you have pulled all the pegs through, lay the weave flat on the work surface and move the loom base to one side.
Pull each peg and string through the weave until you have equal lengths of string sticking out of each end of your woven piece.
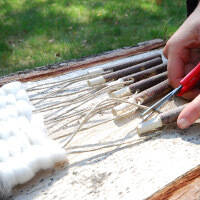
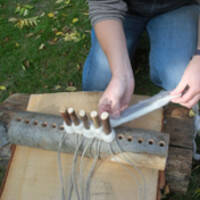
Step #11 Removing the string from the pegs
Using scissors or a knife, cut each string at the point it goes through its peg hole, making sure each piece of cut string is equal in length. Place the pegs to one side.
Make any final adjustments to your weave; stretching, shaping and tightening it, then lay flat on the work surface.
Step #12 Securing the weave
At each corner of the weave, count in the first three strings. Hold these together in a bunch and knot them in a single knot, close to the edge of the woven material.
Now work along one end of the mat, then the other, knotting all subsequent strings in pairs, this will split the original pairs and tie across the wool, securing your woven piece in place and preventing it sliding off the strings.
Step #13 Finishing touches
Finally, trim the knotted strings to your preferred length.
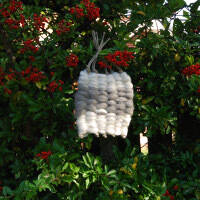
Your teapot stand / plant mat / hedgehog rug / wall hanging / mouse hammock is now finished!
Take it further:
- cut much longer strings to make a scarf or use a wider loom to make a wider piece
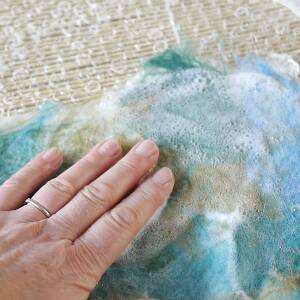
- if you enjoyed working with wool why not try some wet felting?
Disclaimer: Muddy Faces cannot take any responsibility for accidents or damage that occurs as a result of following this activity.You are responsible for making sure the activity is conducted safely.
You might also like
Key Features
- Age Range 6+
- Duration 1 - 2 Hours
- Location Anywhere
- Season Any
- Time of Day Anytime
-
Categories:
Art & Creating
weaving & wool
Tool use & Traditional Crafts
weaving