Fires: creating & maintaining
A guide and top tips for creating and maintaining a fire. For some, the art of fire lighting can be tricky; these basic rules will help make each fire successful.
Introduction
Collecting, sorting, and storing the driest most appropriate materials will more than likely lead to success. With the correct preparation, fires can be lit and maintained in very adverse conditions.
Lessons learned:
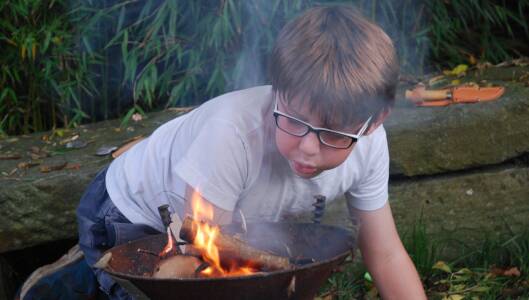
My 10-year-old spent quite a while trying to light newspaper with large sticks on it. He watched it flare up with a happy smile on his face, then disappointment set in as the flames died back and the large pieces of wood had not caught alight. Not to be beaten he would screw up some more newspaper, lighting it again, once again to no avail. Through trial and lots of errors he now chooses to spend a good 10 minutes using the hatchet to chop his kindling into very fine pieces.
He now experiences success in his fire lighting endeavours (well, most of the time). I have noticed if there is no kindling left and he’s not in the mood to chop any up, he occasionally does light the newspaper and put a log on. Although now he’s not so disappointed when it goes out as he knows this will happen - but there is always hope.
Liz
What you'll need
This activity has been provided by
Useful items from our shop
Environmental Considerations
Consider the environmental impact of preparing, carrying out & completing this activity. Could this impact be reduced? Specific considerations for this activity could include:
- Fires: fire safety guide when use standing dead wood consider if it is part of a habitat pile
- risk of ground fires
- smoke nuisance or pollution
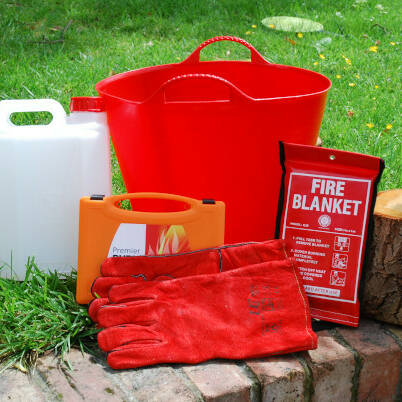
Health & Safety Considerations
Follow your usual operating procedures and carry out appropriate risk benefit assessments.
Some considerations particular to this activity include:
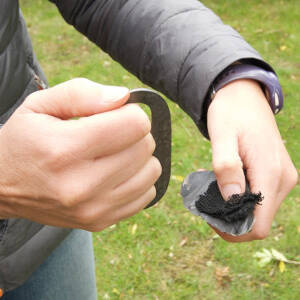
- snapping sticks can cause splinters and flying splinters
- wear protective gloves to handle split wood and to snap sticks
- always snap sticks with the opening break pointing away from your face
- only split logs with appropriate tools and training
- inhalation of smoke
- fire safety (for more detailed information look at our Fire safety guide)
Preparation:
Once you have established a site for your fire (see Fires – fire area preparation) you are ready to create and maintain your fire.
How fire works:
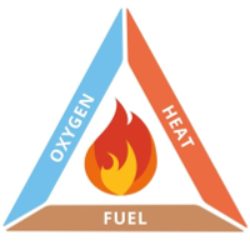
The “Fire Triangle” illustrates the rule that to ignite and burn, a fire requires three elements – heat, fuel and oxygen.
Heat - the energy provided by ignition from a spark, flame or friction. Once the fire is going it generates its own heat
Fuel - material for burning such as wood, coal or charcoal, to continue to supply energy to the fire
Oxygen - usually sourced naturally from the air. More oxygen is injected to feed the fire by blowing carefully into the base of the fire
Resources - what you need:
Collect all of your required resources before attempting to start lighting a fire.
Spend time collecting plenty of good dry tinder and kindling.
Fire lighting is an art: the more experience you gain the easier it becomes, and you may need several attempts before it works. The most common reason for unsuccessful fire lighting is wet or poor tinder, kindling and/ or fuel.
It is helpful to lay out your materials in size order in a dry place.
Tip - find standing dead wood:
This consists of dead branches and twigs that have been caught up in branches and have not reached the ground yet.
Wood lying on the ground absorbs moisture from the soil making it difficult to ignite, whereas standing dead wood is air-dried.
To check if wood is suitable bend it a little. If it breaks with a snap, it is most likely dead and dry. If it bends it is most likely still alive and attached to the tree or recently separated and not dried out. If it snaps with a dull noise it is likely to be damp and rotten. A little close inspection and pressing fingers into the wood will reveal if it is moist or not.
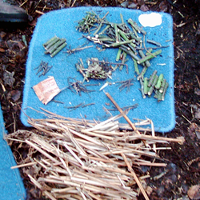
Tinder:
Tinder is easily flammable material used to ignite fires. Ideally tinder needs to be small/thin and dry. Materials commonly used as tinder:
Natural tinder:
Dried leaves or grass, birch bark, standing dead wood, dry or charred wood, wood shavings, a feather stick, some types of fungus, bird down, dried bluebell stalks, dry pine needles, bulrush head. Most very dry natural materials could be used as tinder.
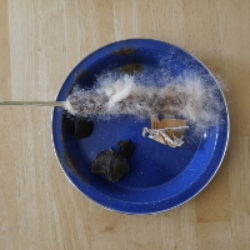
Man made/processed tinder:
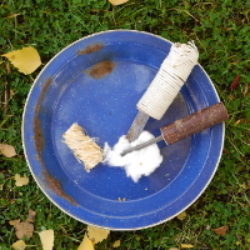
Char cloth, cloth, lint, frayed rope (if made from plant fibres and not plastic or treated), cotton wool, paper, newspaper (not colour), toilet paper, shaved magnesium.
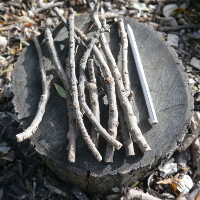
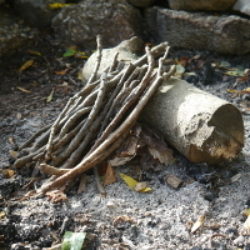
Kindling:
Larger sticks than tinder – pencil thickness to about anything you can break easily by hand.
Feather stick - this is a useful technique to use especially after rainfall. By shaving the wood with shallow cuts with a penknife you can expose the dry inner wood and allow more surface area to be exposed to the ignition source.
Fuel:
This is large sticks, split logs, logs, charcoal.
Ideally the fuel needs to be dry but if the fire is hot enough it can burn off the moisture (creating steam and smoke) then it can go on to burn the fuel.
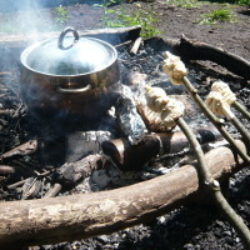
Once the fire is going it needs to be fed to keep it burning and to achieve the purpose it has been created for. For example, to create a bed of embers, enough fuel needs to be burnt and the flames left to die down to create a hot bed ideal for cooking over. If there is not enough fuel burnt the ember bed will not be hot enough to cook; too much fuel and the fire could be burning for ages.
It is often tempting to add lots of fuel to a fire but this can smother (not enough oxygen) the fire especially if the fuel is damp.
This same temptation can lead to the fire getting too big and possibly out of control. When fires become too big they generate huge amounts of heat that can cause the ground underneath them to catch alight. In the right environment and conditions this can cause an underground and possibly full forest fire.
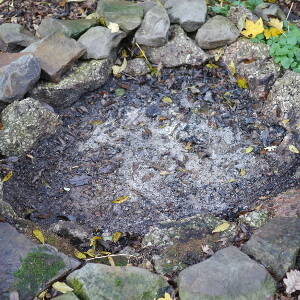
Always extinguish your fires correctly; see how to extinguish a fire for more information.
How to lay a fire:
There are many different ways to arrange (lay) the tinder, kindling and fuel to help get the fire going and to support the move from a non-established fire (likely to go out if not closely maintained) to an established one that can be left for sustained periods of time without attendance. Below we briefly explore a few different basic lays which can all be done in a standard fire pit. We do not explore digging pits or making fire ovens.
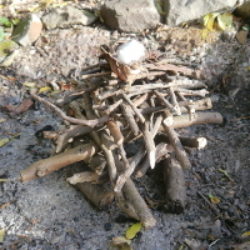
Teepee lay:
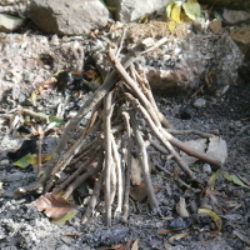
Place your tinder in the middle of your fire area/pit. If the ground is wet, place it on something that will prevent the tinder from becoming wet (like a piece of bark).
Around your tinder, place some very thin kindling, leaning it into a central point to create a teepee shape. Continue adding kindling to this teepee, increasing the size as you work your way out.
Then add your fuel wood to create a larger teepee around your kindling teepee.
Advantages: a very easy technique
Disadvantages: can sometimes use a lot of kindling to get it going.
Log cabin lay:
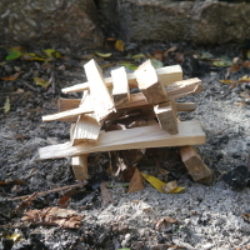
To make this fire, you first make a teepee fire.
Then build a wall around the fire by stacking kindling sticks on top of each other. The idea is that the walls will fall in on the teepee, creating a self-feeding fire.
Advantages: once lit it requires less effort to maintain
Disadvantages: it is more complicated and time consuming to build.
Lean-to or A frame lay:
Place a thick log, that you intend to use for fuel, into the fireplace, upwind of where you intend to make the fire, this will act as a wall and protect the ignition process from being blown out.
Place your tinder against the log (alternatively this could be added at the end if it is wet or could be blown away) and prop kindling against it to make a lean-to or alternatively an A-frame.
Light the tinder and feed with small kindling and keep adding the kindling until the fire is well established. As the lean-to burns through it will fall onto and feed the fire. Once established the wet or wind should not be a problem.
Advantages: good for adverse weather conditions
Disadvantages: the barrier stops air flow to the fire, making it harder to catch. The fire requires more oxygen by blowing into the base.
Upside-down lay:
This is where you lay your fuel down first than a layer of larger kindling on top of this.
Continue layering back and forth in decreasing size of kindling then finally place the tinder on the top.
Advantages: quite a simple structure
Disadvantages: if you are lighting the tinder in situ you need to make sure you don’t press down as it may dislodge the stack.
Build-as-you-go:
This is not a particular lay style but you create it as each step develops.
Tinder, kindling and fuel is neatly stacked close to hand but not too close to catch alight.
Create a dry platform of sticks to raise your fire off the damp earth.
Place a bed of dry leaves, cotton wool or a layer of birch bark on top of the platform. This will stop your tinder falling through the sticks.
Place the tinder onto this bed. Fluff up the tinder to allow plenty of surface area and exposure to the air.
Ignite the tinder.
Add more tinder swiftly and carefully as soon as the tinder has caught alight. Allow each bit to catch before adding more. Too much added at once can suffocate the flame; too little and the flame will exhaust before catching the next pieces alight. Gradually increase the size of tinder added.
Add kindling once the tinder is burning, adding the smallest pieces of kindling first. Lay the kindling across the tinder in one direction allowing each piece to catch. Add the next sized kindling at right angles, again allowing it to catch before adding more.
Continue gradually adding the kindling in this way. This close method assists the flames to catch the next pieces alight.
Add fuel once the kindling has caught and is burning well. Make sure you place pieces on the fire carefully to prevent flicking embers up and possibly extinguishing your fire. Lay the logs along the fire parallel to each other.
Ignition:
We now have the fuel part of our fire triangle ready, and there is oxygen in the air. We may need to insert a little extra to help things get going, so now we need the heat.
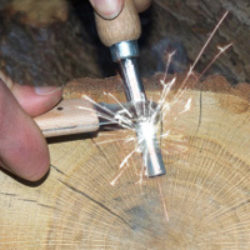
Some examples of ignition source are:
- flame from matches
- sparks from a flint
- sparks from a fire steel
- heat from the friction of rubbing sticks together and magnifying the suns light (take a look at our ignition sources information sheet)
- you may already have a burning ember that you prepared earlier (see below)
These are all ways to add the heat into the triangle, once the fire is going it generates its own heat.
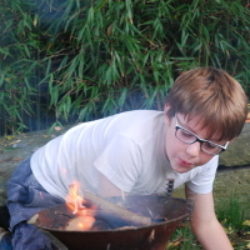
Using an ember:
Where you have succeeded in producing some heat from one of your ignition methods, if you have an ember you will need to add your tinder and blow oxygen in to generate more heat, allowing the tinder to combust.
When you have a small flame you can start to add your thinnest, driest kindling, only moving to the next size up when your first addition has caught alight. Be careful not to smother your flame!
Adding oxygen:
When lighting fires it is helpful to increase levels of oxygen available for the fire.
Position yourself upwind and try to get as level with the fire as possible, considering safety issues, particularly loose clothing or hair.
Relax and blow gently and constantly into the base of the fire.
If you blow too hard at the tinder stage you may blow the tinder away. If you blow too hard in the kindling and fuel stages this could result in hot embers being blown up and back towards your face. Also, you will run out of breath and potentially become light-headed.
Take it further:
Try out some different methods for ignition such as a bow drill or fire piston. Or make your own char cloth.
Create a fire for cooking and heating water for drinks.
Watch: Fire Management at Forest School - Fire Lays for different purposes
Wanting to expand your Forest School skills in fire management? In this video I will show you 5 fire lays for different purposes and explore their pro’s and con’s, including for campfire cooking. We’ll also consider the properties of different species as fire woods. Forest School Lou, August 2020. (33 mins 40)
Disclaimer: Muddy Faces cannot take any responsibility for accidents or damage that occurs as a result of following this activity.You are responsible for making sure the activity is conducted safely.
Key Features
- Age Range 3+
- Duration Less than an hour
- Location Anywhere
- Season Any
- Time of Day Anytime
-
Categories:
Fire, Shelters & Bushcraft
fire