Reindeer face weaving
A simple festive activity using sticks and string.
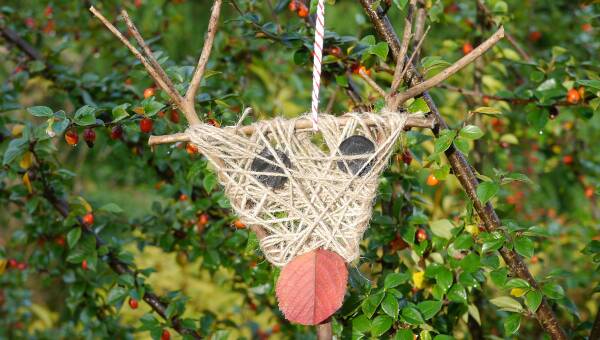
Introduction
A great activity idea for older children to create an animal face.
We used this technique to make a festive reindeer, but you could be creative and add your own features to make faces of different animals - what features make each animal distinct?
* Muddy Faces actively promotes child-led outdoor play & learning. We recognise and believe in the curiosity that children have and their drive to explore and discover. We hope that you will bear this in mind when considering more prescribed activities like this one – often much more creative ideas will occur if resources are simply provided and children are given the time and space to explore independently.
What you'll need
- sticks
- string
- scissors
- festive ribbon/string
- natural materials for creating nose/eyes
This activity has been provided by

Useful items from our shop
Environmental Considerations
Consider the environmental impact of preparing, carrying out & completing this activity. Could this impact be reduced? Specific considerations for this activity could include:
- leave no trace
- source of wood
Health & Safety Considerations
Follow your usual operating procedures and carry out appropriate risk benefit assessments.
Some considerations particular to this activity include:
- using scissors
- using sticks
Preparation
Source and cut some sticks to size (the length will depend on how big you want to go!). The sticks need to be fairly sturdy - or you may snap them while you're weaving!
Step #1 create the face shape
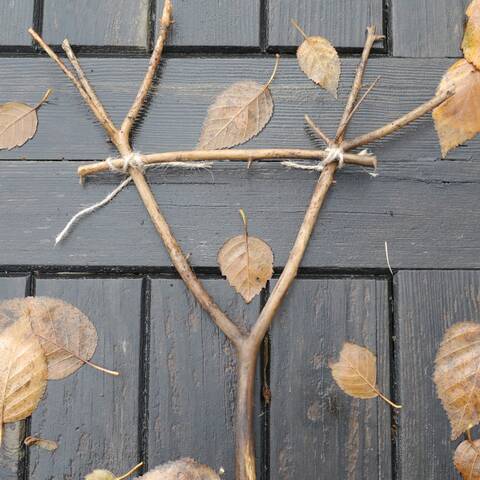
Use sticks to form a triangle - even better if you find a Y-shaped stick, then you just need a cross-bar at the top! Keep two ends long for the antlers.
Tie the sticks together with string. If you want to learn how to lash sticks together check out our natural frames activity.
Step #2 Start weaving
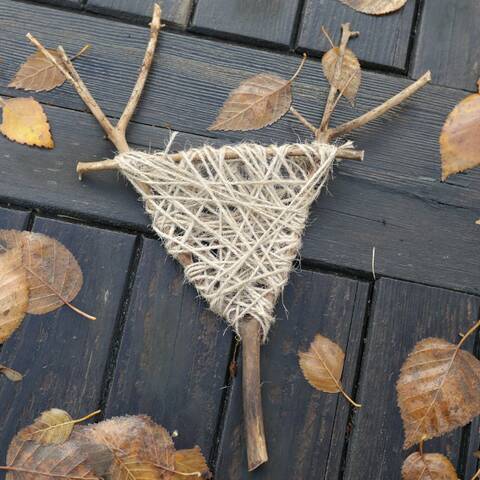
Now you have your frame, tie one end of the cotton string ball on and wrap/weave around the frame in all directions to fill the triangle. Tie it off when it looks full enough to attach your facial features.
Tip
By working with the ball, rather than cutting a length of string, you know you’ll have enough to cover the area evenly and not run out!
Step #3 Add features
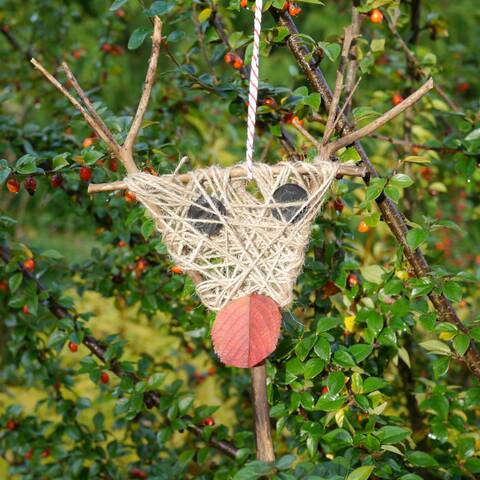
Add eyes and a nose. We cut a red leaf into a circle shape and left the stalk to poke into the string weave for a no-glue approach. We used a layer out of a chocolate box for the eyes - threading them in amongst the woven string.
You could use alternatives for both - pom poms, red/black material, red/black card...
Fix a length of festive ribbon to the top (between the antlers you left on!) and “dash away, dash away, dash away all.”
Take it further:
- make your own pompoms in advance to use for eyes and nose
- read “‘Twas the Night before Christmas” by Clement Clarke Moore and be inspired to make all of the reindeer!
- make mini reindeer faces to hang on your Christmas tree
- what other animals could you make? A fox? A mouse? What can you use to make whiskers?
Disclaimer: Muddy Faces cannot take any responsibility for accidents or damage that occurs as a result of following this activity.You are responsible for making sure the activity is conducted safely.
Key Features
- Age Range 6+
- Duration Less than an hour
- Location Anywhere
- Season Winter
-
Categories:
Art & Creating
leaves, sticks & petals
