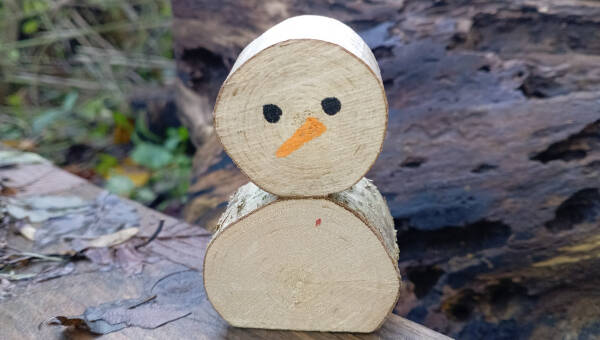
Noggin Frosty Friend
Make a festive wooden snowman using simple tools.
Introduction
This fun and creative activity brings a touch of winter magic to your setting or outdoor classroom. Using wooden noggins and a few simple tools, children can design and build their own wooden snowman or frosty friend to take home or display. It’s a great way to introduce basic tool skills - such as sawing, drilling, joining, and decorating - while encouraging imagination and fine-motor development. Whether there’s snow on the ground or not, this hands-on project captures the spirit of the season and offers plenty of opportunities for playful learning and creativity.
What you'll need
- 2 different sized sticks
- palm drill
- saw
- clamp/vice
- matchsticks (or similar)
- mark making resources

Useful items from our shop
Environmental Considerations
Consider the environmental impact of preparing, carrying out & completing this activity. Could this impact be reduced? Specific considerations for this activity could include:
- source of wood
- leave no trace
Health & Safety Considerations
Follow your usual operating procedures and carry out appropriate risk benefit assessments.
Some considerations particular to this activity include:
- tool use

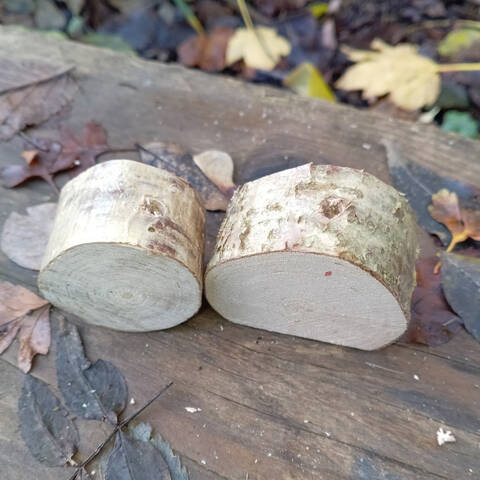
Step #1 Select your pieces of wood
Top tip
Choose 2 different-sized pieces of wood so the head is a smaller size; this will help with stability.
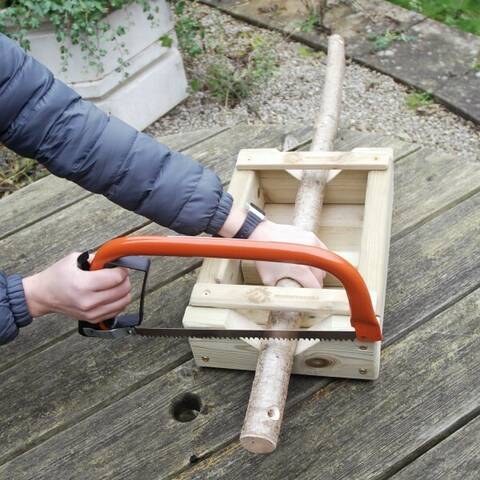
Step #2 Saw your noggins
Saw 2 noggin pieces approx. 2.5 cm thick.
If they are too thin (disc/cookie size) the snowman won't be able to balance and may fall over, and it won't be thick enough to drill.

Step #3 Create a flat bottom for your snowman's body.
Take a slice off the edge of the larger noggin to make a standing edge.
If using a saw it is recommended to use a clamp or vice.
Top tip
If you don't want to use a saw to slice off the bottom you could stand your snowman on a base of clay for stability.
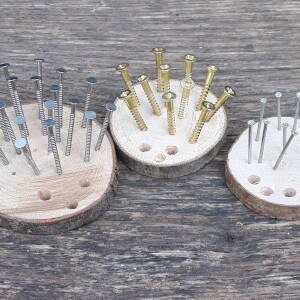
Step #4 Drill holes
Drill a hole through the head of the smaller noggin (head), vertically down through the centre of the piece of wood as shown.
Do the same with the larger noggin making sure to drill on the opposite side to the flat base you just created.
Top tips
- Drill to a depth of approx 0.5-1cm.
- Check out our Drill a wooden disc activity if you want help with this.

Step #5 connect the head and body
Break off bits of a match so you have 2 pieces of the same length. Stick them in the hole you have created on the body and use them to attach the snowman's head.
You may need 3 pieces depending on the size of palm drill you have used. You could also use bits of dowel or twig to fit.
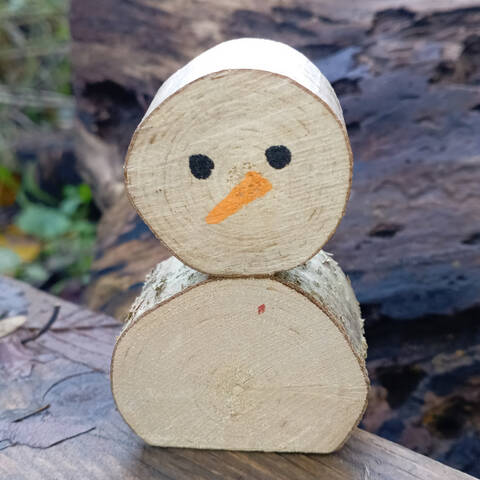
Step #6 Decorate your snowman
Any way you like...
We went for a very simple design.
Disclaimer: Muddy Faces cannot take any responsibility for accidents or damage that occurs as a result of following this activity.You are responsible for making sure the activity is conducted safely.


Key Features
- Age Range 6+
- Duration Less than an hour
- Location Anywhere
- Season Any
-
Categories:
Tool use & Traditional Crafts
palm drills & rotary hand drills