Finger Knitting
A super simple knitting technique using fingers that is great for children!
Introduction
This is one of those skills that once you’ve got it, you’ve got it! It gives the best brain-body workout as your fingers are mindfully working, you brain is building muscle memory and your body is in a gentle flow state.
I realised this needed to be on the Homestead Series after successfully teaching two sets of camp kids and a grown up how to finger knit in autumn 2020. Lots of balls of yarn and lots of busy fingers later, they’d learnt a skill for life.
Lorna Norton - Kith Homestead
What you'll need
- 2 fingers (dry, muddy or grubby fingers work best)
- Chunky yarn
Lorna Norton - Kith Homestead

Useful items from our shop
Environmental Considerations
Consider the environmental impact of preparing, carrying out & completing this activity. Could this impact be reduced? Specific considerations for this activity could include:
- leave no trace - take unused wool home
- use dead sticks that have already fallen off a tree
Health & Safety Considerations
Follow your usual operating procedures and carry out appropriate risk benefit assessments.
Some considerations particular to this activity include:
- using wool/string
Step #1
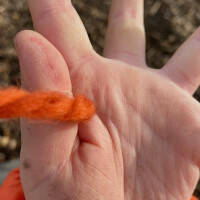
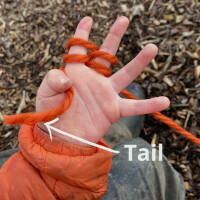
Begin by trapping the tail end of the yarn between your thumb and hand.
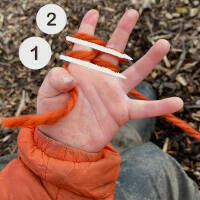
Step #2
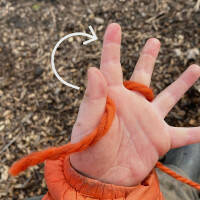
Next take the yarn behind your pointy finger and in front of your middle finger.
Then bring it back behind your middle finger and in front of your pointy finger.
It should look like a figure 8 around your first two fingers.
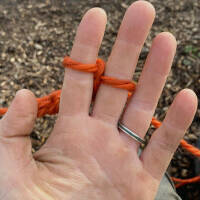
Step #3
Make the same figure 8 again.
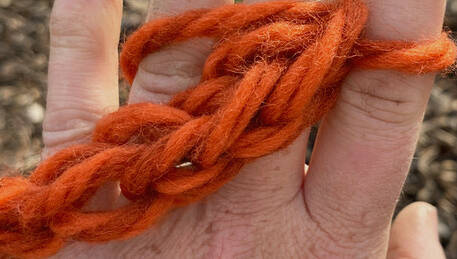
It should look like this - see image - with the tail trapped between thumb and hand and 2 rows of figure 8s stacked on your fingers.
The working yarn end will stay behind your hand.
Step #4
You’ll see there are now 2 rows of yarn on your fingers.
Take one of the bottom rows of yarn (row 1) and loop it over the top row and off your finger. Then do the same on the other finger.
Give the tail a little tug to tighten it up. If the yarn looks loose, give the working end of the yarn a little tug too.
* Please note, it’ll take 2-3 rounds for the weaving pattern to emerge.
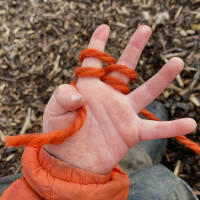
Step #5
(Please excuse the change of hand model, the tiddler-toddler went off to splash in puddles!)
Once you’ve looped over both of the bottom rows, it’ll look like this.
Step #6
Repeat your figure 8 shape, just one this time.
Once you have your 2 rows again, bring the bottom loop up and over just like before.
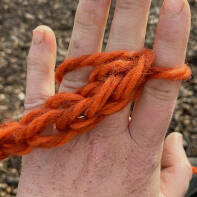
Step #7
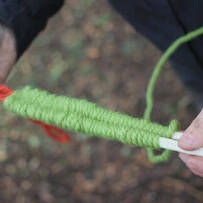
When you turn over your hand, your creation should be looking great!
Continue with the same rhythm to grow your weaving…
- yarn goes behind - in front - behind - in front
- loop up and over - loop up and over
Once you’ve grown your weaving to a length you’re happy with, cut the working end and gently take the weaving off your fingers. Thread the new end through the two loops your fingers were just in, give it a little pull to close, and tie a knot.
It was so much fun throughout October teaching all the children to finger knit. Its a great skill which is so versatile. Once you know how to do 2 fingers, you can progress to 3 then 4 fingers! And once you know how to knit on 4 fingers then you can progress to different types of knitting.
Lorna Norton - Kith Homestead
Disclaimer: Muddy Faces cannot take any responsibility for accidents or damage that occurs as a result of following this activity.You are responsible for making sure the activity is conducted safely.
You might also like
Key Features
- Age Range 3+
- Duration Less than an hour
- Location Anywhere
- Season Any
-
Categories:
Art & Creating
weaving & wool