Making charcoal
How to make charcoal from pieces of willow.
Introduction
Charcoal is a lovely resource for artists and even better if you can make some yourself. It's amazing how quickly the willow transforms!
What you'll need
- bypass pruners
- finger-width, freshly-cut green hazel or willow sticks, about 5cm long
- tin with hole in the lid (hammer, nail, tin)
- calico/cotton sheet/paper
- fire glove
- campfire
This activity has been provided by
Environmental Considerations
Consider the environmental impact of preparing, carrying out & completing this activity. Could this impact be reduced? Specific considerations for this activity could include:
- leave no trace
- smoke from fire
Health & Safety Considerations
Follow your usual operating procedures and carry out appropriate risk benefit assessments.
Some considerations particular to this activity include:
- fire safety
- handling hot objects
- tool use
Light your campfire and let it burn down to embers.
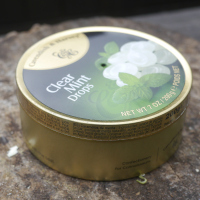
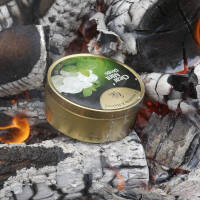
Prepare a tin that is big enough to fit your pieces of green wood in (a used travel sweet tin is a good size, you could also use a golden syrup or treacle tin).
Make a hole in the tin by hammering a nail through the lid: place the lid on a small block of wood and hammer the nail through the lid into the wood, then pull apart; this will stop the lid deforming.
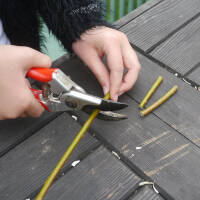
Step #1
Using secateurs, cut your willow into lengths (approx. 6cm). Allow for some shrinkage in the diameter.
Top tip: Cut a selection of widths to increase the chance of a good fit if you are going to place it inside an elder pencil.
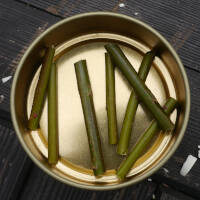
Step #2
Place your green wood in the tin and replace the lid.
Don’t overfill the tin as the pressure of gas could force the top off the tin.
Step #3
Place the tin in the hot embers.
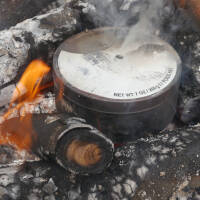
Step #4
White smoke will come out of the hole in the lid.
The smoke will then change to a vapour that is likely to burn as a flame out of the hole.
When this flame no longer appears remove the tin from the fire and let it cool.
This whole process will probably take a few minutes.
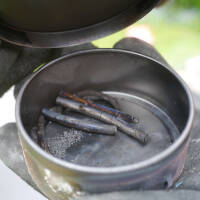
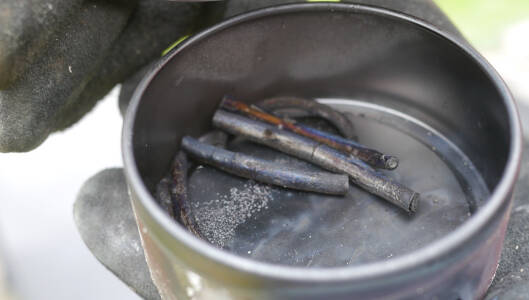
Step #5
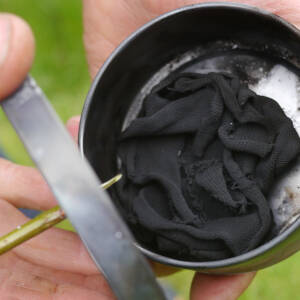
Remove the lid and take out the charcoal sticks.
Take it further:
Use a piece of elder to make a holder for your charcoal – see our elder pencil making activity.
Disclaimer: Muddy Faces cannot take any responsibility for accidents or damage that occurs as a result of following this activity.You are responsible for making sure the activity is conducted safely.
You might also like
Key Features
- Age Range 6+
- Duration Less than an hour
- Location Anywhere
- Season Any
- Time of Day Anytime
-
Categories:
Art & Creating
campfire craft
Tool use & Traditional Crafts
fire craft