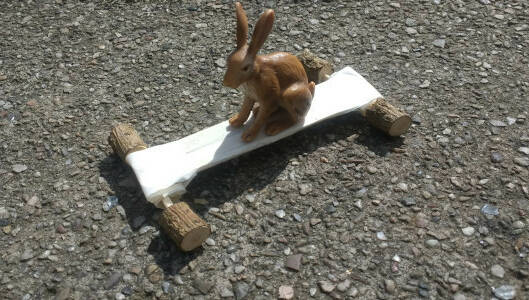
Elder four wheeler
A fun making project for children. Create a little vehicle for an animal or toy using elder beads as wheels.
Introduction
Turn four simple elder beads into a set of wheels and then design and create your own skateboard/go-kart/miniature car!
* Muddy Faces actively promotes child-led outdoor play & learning. We recognise and believe in the curiosity that children have and their drive to explore and discover. We hope that you will bear this in mind when considering more prescribed activities like this one – often much more creative ideas will occur if resources are simply provided and children are given the time and space to explore independently.
What you'll need
- Length of elder with inside pith the diameter of a match
- bypass secateurs or small saw
- matches
- lollipop sticks
- masking tape
This activity has been provided by
Environmental Considerations
Consider the environmental impact of preparing, carrying out & completing this activity. Could this impact be reduced? Specific considerations for this activity could include:
- source wood responsibly – see our tips for foraging
Health & Safety Considerations
Follow your usual operating procedures and carry out appropriate risk benefit assessments.
Some considerations particular to this activity include:
- tool use

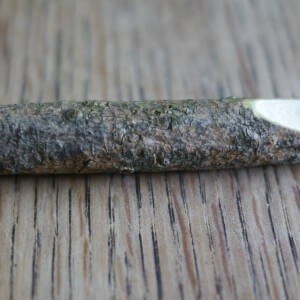
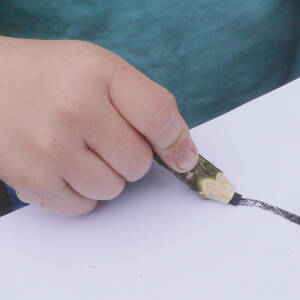
Step #1 Cut your elder
Using by-pass secateurs or a small saw cut off a piece of elder about the diameter of your forefinger and about 5cm in length.
Ideally the pith in the centre of the elder should be about the diameter of a match stick (If the pith is thicker than a match then you could use a thin piece of dowel or similar.)
If you want smooth wheels rather than ‘off road’ wheels then peel off the bark at this stage.
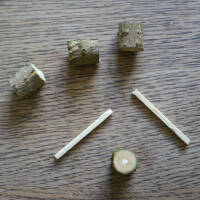
Step #2 Wheels
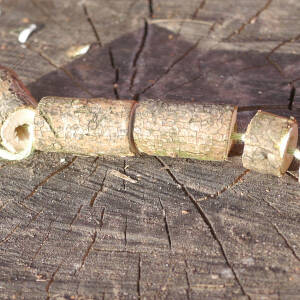
Cut your length of elder into 4 equal pieces (these will be the wheels).
Step #3 Insert match sticks
Remove the striking end of 2 matches.
Push each match stick approx. half way into the pith of 2 of the ‘wheels’. Hopefully it will be a tight fit to hold the match in place.
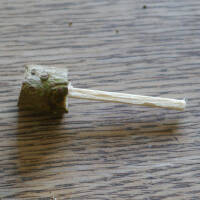
Ta da … a fairy lollipop! If you want to stop at lollies, go no further!
If you want to complete the wheels then carry on – insert the other end of each match into the pith of the other 2 wheels.
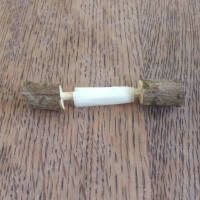
Step #4 Axles
Create a tube around the match (axle).
This can be done by taping a piece of card around or, in our photo, we used masking tape – sticky side up first and then another layer sticky side down.
The aim is to create a cylinder that moves around the match – for the axle to rotate within.
Repeat with the other set of wheels.
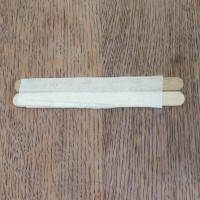
Step #5 Chassis
Create a chassis.
We used two lollipop sticks taped together, but please share any other engineering designs with us!
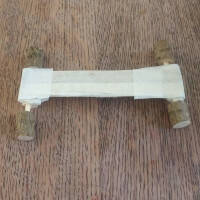
Step #6 Build your vehicle
Connect the chassis to the wheels.
Have a go your way and experiment with different fixing ideas. but once finished the chassis should be attached and the wheels should turn freely.
Take it further:
- make a seat, decorate it, test out its load bearing or have a downhill race!
- (don’t forget a seat belt!)
Disclaimer: Muddy Faces cannot take any responsibility for accidents or damage that occurs as a result of following this activity.You are responsible for making sure the activity is conducted safely.
You might also like
Key Features
- Age Range All Ages
- Duration 1 - 2 Hours
- Location Anywhere
- Season Any
- Time of Day Anytime
-
Categories:
Art & Creating
with tools
Tool use & Traditional Crafts
secateurs & saws