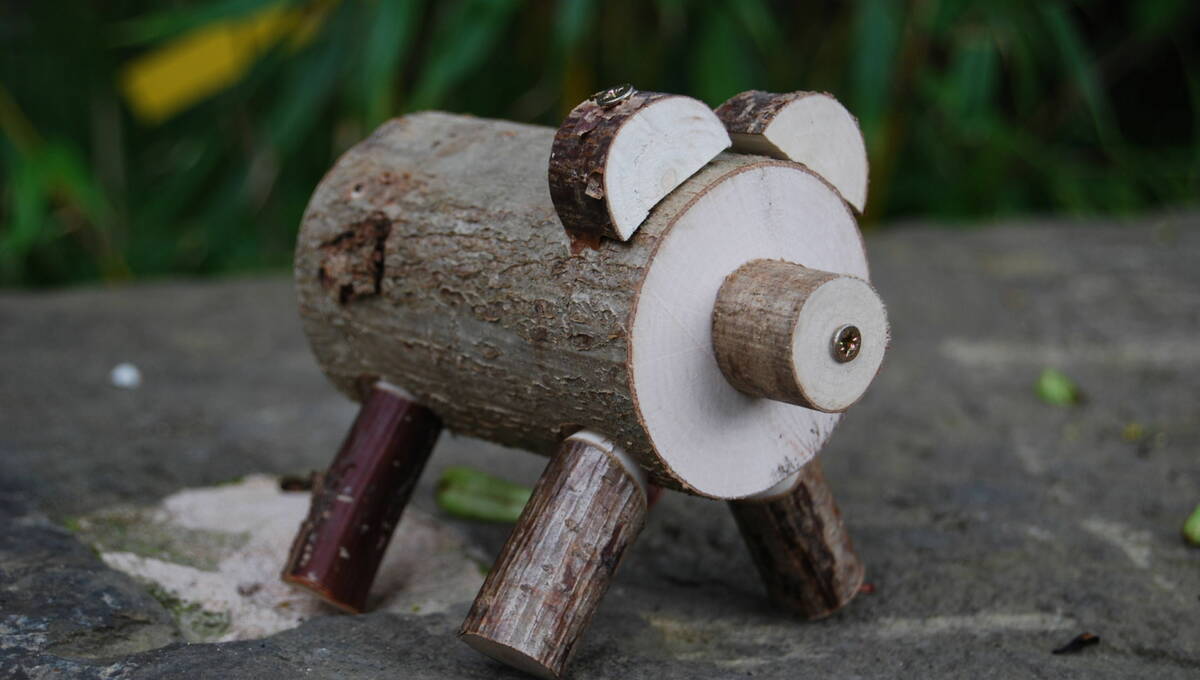
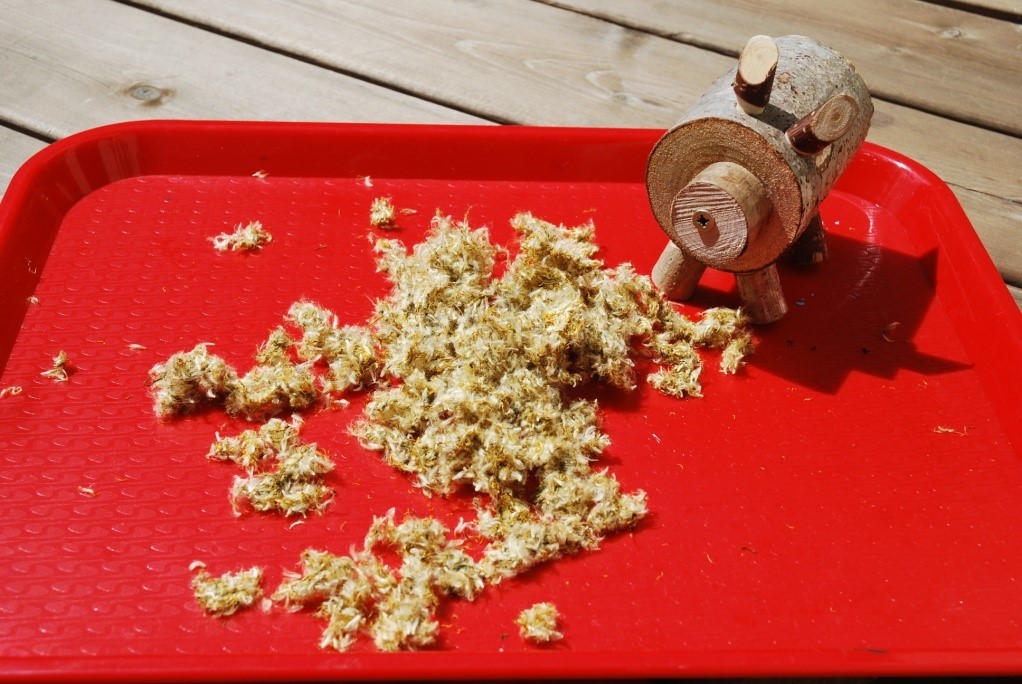
Log hog
A forest school woodworking activity using a variety of tools.
Introduction
These log hogs can be made large or small.
Larger ones require larger holes to be drilled, this will require a more complex set up for drilling, with a large auger bit.
What you'll need
- logs (10cm diam. and 30-40cm length)
- poles (2cm diam. and 25-30cm length)
- auger drill bit & carpenters brace
- knife
- saw
- wood glue (optional)
- hammer
- screwdriver
- screws (crosshead/Philips)
This activity has been provided by
Useful items from our shop
Environmental Considerations
Consider the environmental impact of preparing, carrying out & completing this activity. Could this impact be reduced? Specific considerations for this activity could include:
- source of wood
Health & Safety Considerations
Follow your usual operating procedures and carry out appropriate risk benefit assessments.
Some considerations particular to this activity include:
- tool use
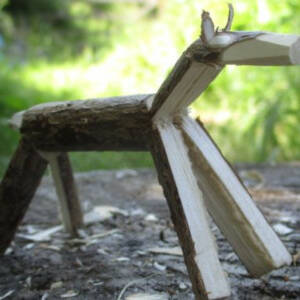
Step #1 cut body, legs, snout & ears to length
Using a saw, cut the log to the length you would like for the body of the hog.
You will also need
- 4 x pieces for the legs (approx 5cm in length)
- 3 x pieces for the snout & ears (approx 2cm in length).
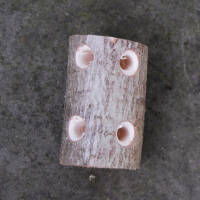
Step #2 drill leg holes in the body
Clamp the log into position so that the leg holes can be drilled. You may have to reposition the clamp for each pair of leg holes.
Tip - refer to our guide to using clamps & vices & instructions for drilling a pole if you need help with this.
Once you have secured your log body, drill 4 holes (as pictured) using an auger drill bit. These are available in different sizes so you need to find one that fits the diameter of the poles/legs. Auger bits often work best with a carpenter's brace drill.
Angle the holes so they splay outwards to give the hog a wide stance, making it more stable.
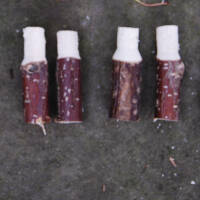
Step #3 carve the end of the legs
Using a knife, shave one end of each leg to secure them in the holes of the body.
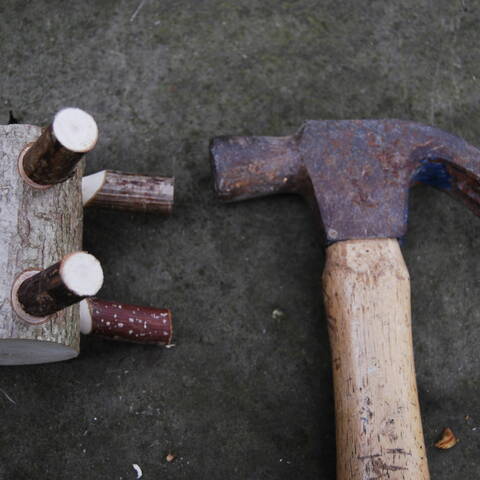
Step #4 knock the legs in
Place a leg into position and use a hammer to tap each leg into position.
You could add some wood glue for extra strength.
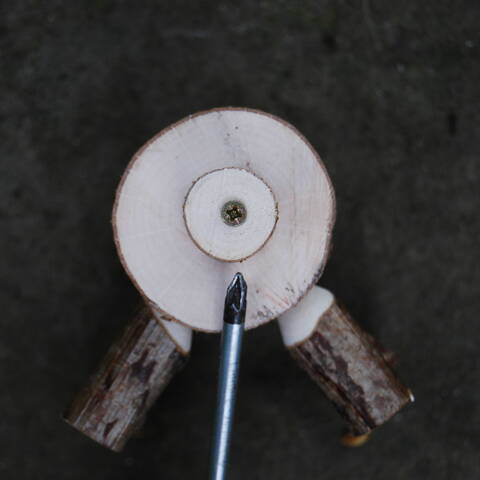
Step #5 attach the snout
Drill a hole through the centre of one of the discs cut in Step 1.
Screw into place in the centre of the end of the hog body as shown.
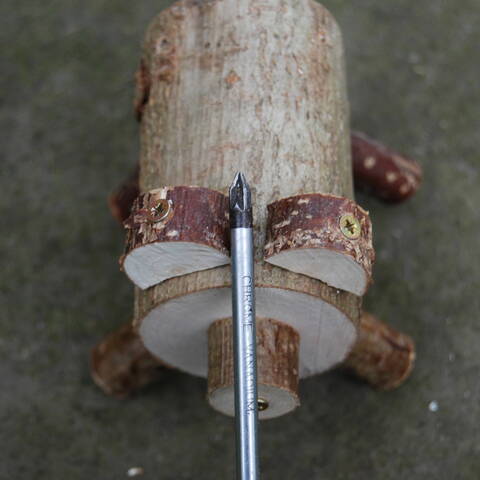
Step #6 attach the ears
Remove a section off each ear disc, as shown in the picture. This is best done using a knife like a billhook - place the knife blade along a line where you want to split the disc then gently tap the top of the knife with the hammer.
Drill a hole through the top of each ear, as shown, and screw into place.
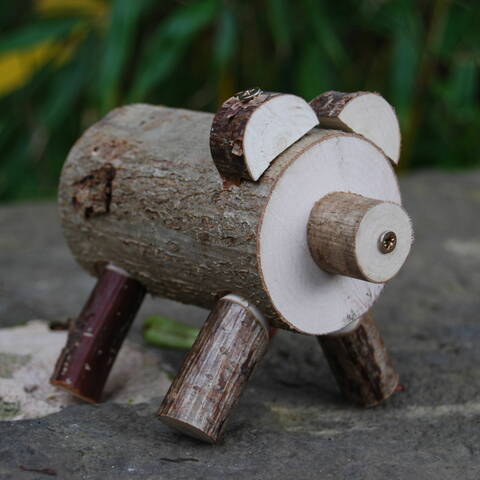
Step #7 add details
Stand the hog up.
Screw or nail in two eyes.
Use a piece of leather or a curled piece of wire for a tail.
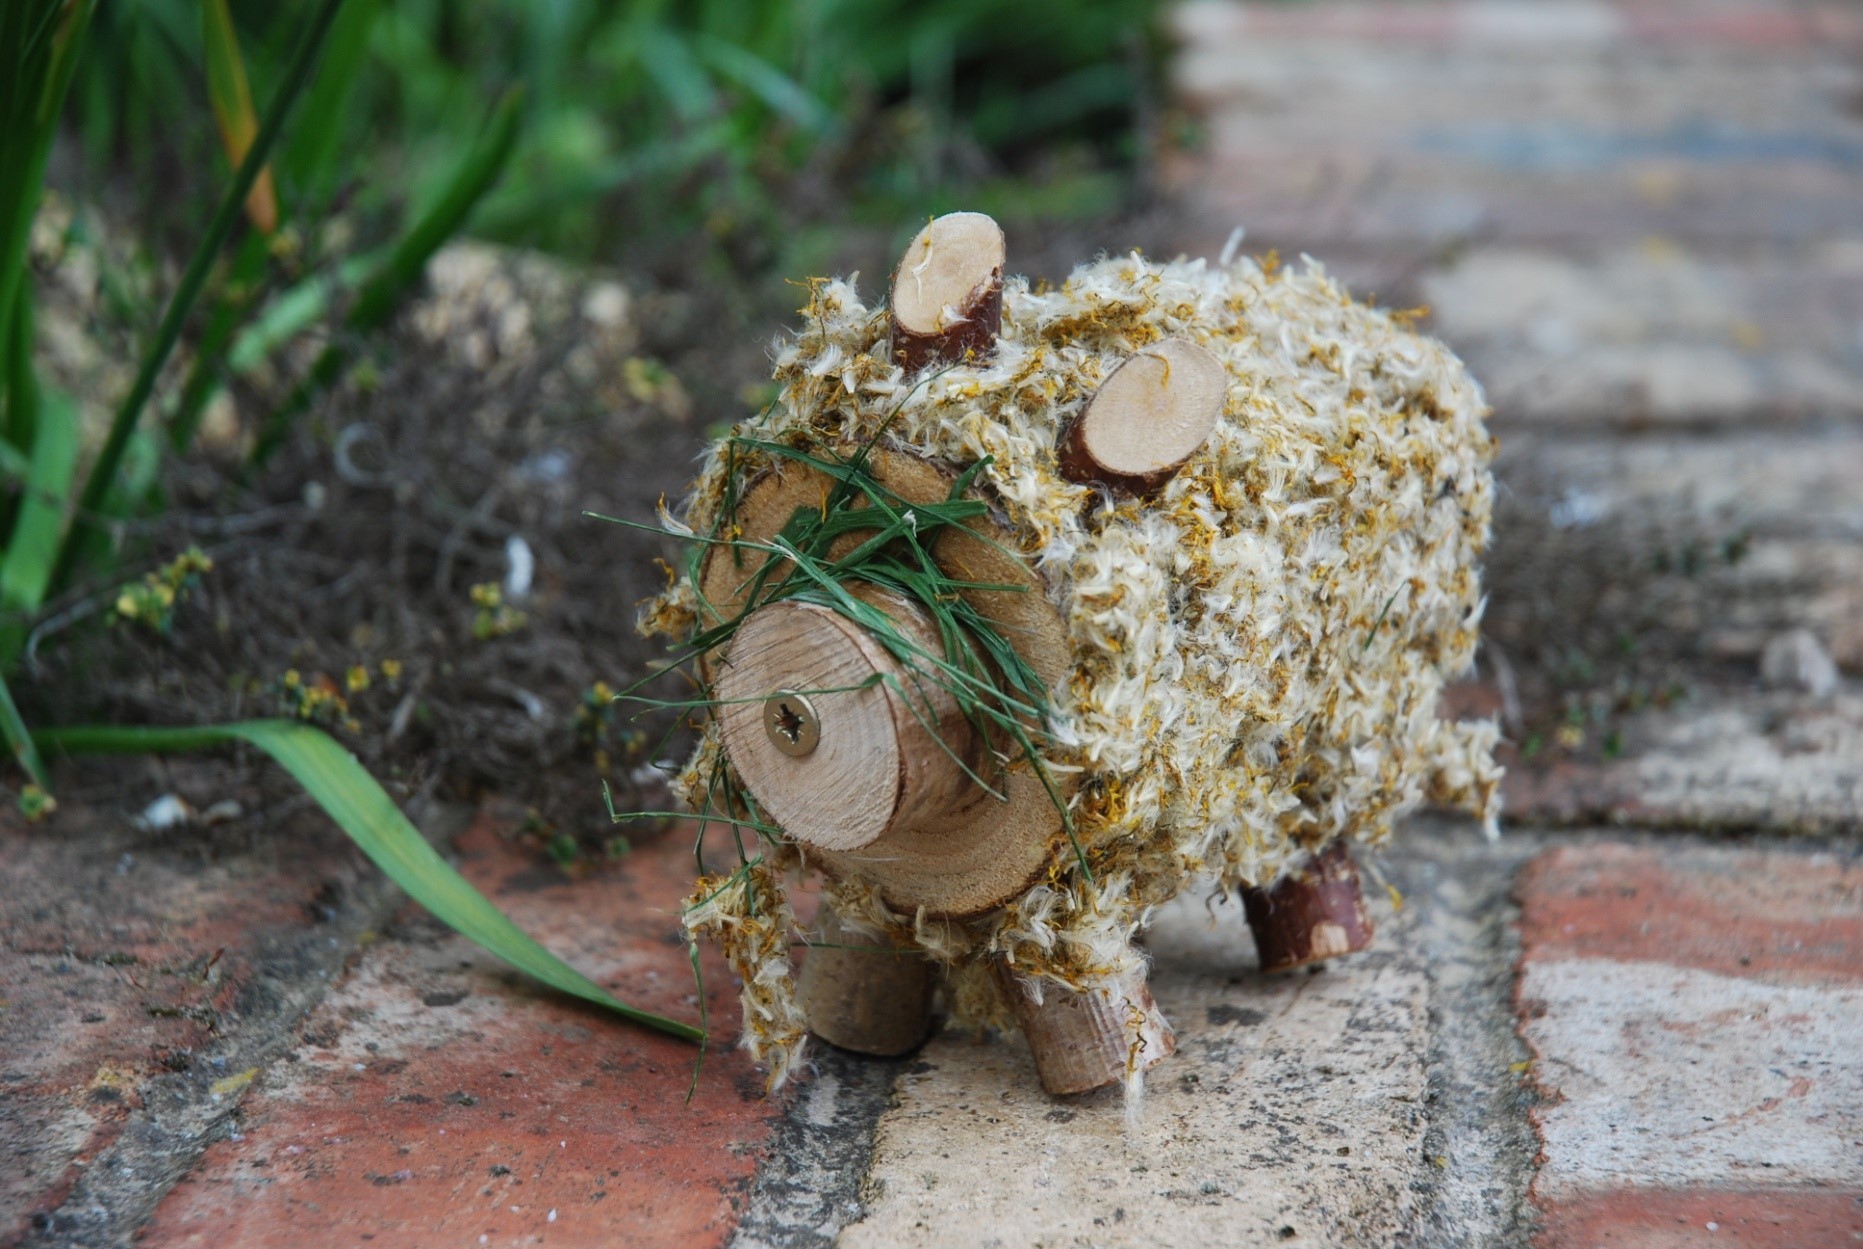
Take it further
Now you have got the basic design, get creative!
You could make the legs longer or create a neck.
What amazing creatures will emerge from the woods?!
Disclaimer: Muddy Faces cannot take any responsibility for accidents or damage that occurs as a result of following this activity.You are responsible for making sure the activity is conducted safely.
You might also like

Key Features
- Age Range All Ages
- Duration Less than an hour
- Location Anywhere
- Season Any
-
Categories:
Art & Creating
leaves, sticks & petals
with tools
Tool use & Traditional Crafts