Nettle cordage
Nettle fibres are really strong and even stronger when made into cordage.
Introduction
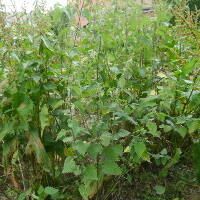
In the spring nettles can be seen beginning to grow. In May/June you can find them around one metre in height which is perfect for making nettle cordage.
For cordage making you need to experiment with different nettles. Some are too tender at the top (light green soft growth) and break easily, and others are too tough at the bottom making them difficult to work with. If you have a long nettle to work with then you can always cut off the tougher bottom section.
What you'll need
- nettles
- gloves
- long sleeves
- cotton rags
- table knife
This activity has been provided by
Environmental Considerations
Consider the environmental impact of preparing, carrying out & completing this activity. Could this impact be reduced? Specific considerations for this activity could include:
- foraging
Health & Safety Considerations
Follow your usual operating procedures and carry out appropriate risk benefit assessments.
Some considerations particular to this activity include:
- nettle stings
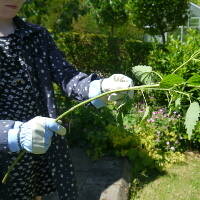
Step #1 Picking
Seek out a tall patch of nettles (roughly one metre in height).
Wearing gloves and long sleeves pull out or cut the nettles with secateurs. Take several nettles per person (ensuring you have a supply to practise with until you get the hang of it).
If a group of people are doing this activity we advise that they pick/carry/work at least a nettle length away from each other to avoid stinging each other!
NB: Nettles are very important plant for wildlife. Please follow our tips for foraging so you can collect sustainably. Ideally use the nettles from a patch that has been allocated for clearing.
Step #2 Stripping
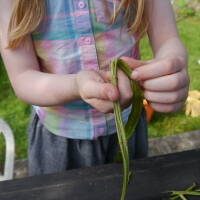
Whilst still wearing gloves and holding the base of the nettle carefully, remove the leaves from the stalk.
Take care not to tear the outer layer of the stalk as you remove the leaves as this is the part of the nettle that will be used for the string.
Try plucking or rubbing off the leaves by pushing up the length of the stalk from the base to the tip. Or use a knife, secateurs or cut leaves off with scissors (skill/age appropriate).
Our experience - I was working with an 8-year-old who preferred to use scissors as she found it hard to pull off the leaves without tearing the outer layer.
When all the leaves are removed, still wearing gloves, use a rag to gently rub up and down the length of the stalk to remove the fine hairs.
The nettle stalk should now be free of hairs and can be handled without gloves. If you are working with a group they may need convincing – handle it first to show them it will not sting.
Idea - how about having some magnifying glasses available so you can investigate the difference between an untouched stalk and one that has be rubbed?
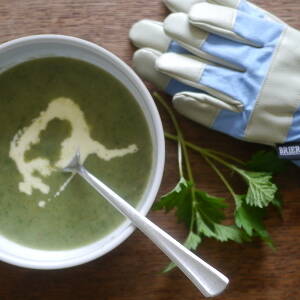
Top tip - keep all nettle leaf debris in one place or in a bucket to avoid leaving a stinging carpet on the floor! If they are young leaves keep them and make some nettle soup.
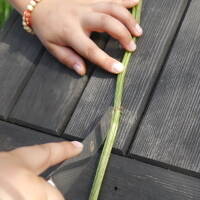
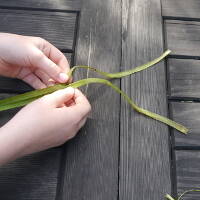
Step #3 Splitting the stalk lengthways
We only need the outer fibres of the nettle, so we need to remove the inner pithy layer. This layer is quite hard and provides the structure of the nettle.
If you examine a nettle it is made up of segments along its length (intersected by the points where the leaves were attached). Have another look with the magnifying glass.
Open out the nettle by splitting it in half along its length – hold the nettle on a hard flat surface and use a blunt table knife to press through each intersection of the nettle. Take care not to cut all the way through, just push through until you get to the pithy layer.
Repeat along the whole length of the nettle.
It will then be possible to open up the nettle along its whole length, using your thumb.
Step #4 Removing the inner layer
With one hand hold the base of the flattened length of nettle in front of you.
With the other hand break the inner layer by bending a section down towards the ground.
The inner pith will break and you can then peel it off and discard it.
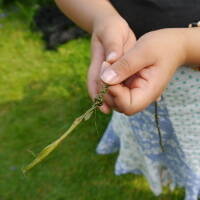
At this stage you can see that the nettle is made of four fibres (strips) along its length; try and keep these all attached.
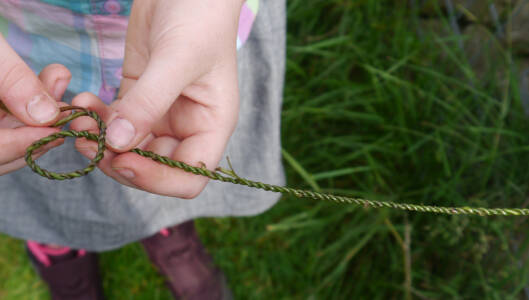
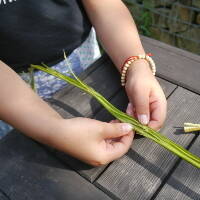
Step #5 Joining the fibres
You can work with the fibres when they are wet. However they shrink when they dry out so it is advisable to let them dry first for a few hours before making into cord.
Split the four fibres in half lengthways (see image).
To create one long strip of fibre overlap (by about 10cm) a thin end (top of nettle) with a thick end (bottom of nettle) and twist together; rolling them with your thumb and forefinger.
Step #6 Plaiting/twisting
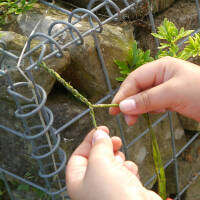
Find a place to secure the nettle strip that will provide some resistance (it will need to be removed when you have finished plaiting). Ideally use a hook or make your own with a nail on a log/fence, or you can ask a patient friend to nip and hold it.
Hold the long strip you have just created at the midway point and allow the fibres to fall so you have equal lengths either side.
Hook this midway point over your anchor point – you are now ready to plait.
Using both hands hold each section between your thumb and forefinger and roll the fibres to the right.
After one roll, cross the fibres over to the left, then roll to the right. Repeat the process until you come to the end of the fibres.
Step #7 Making it longer
You can make the cord longer by twisting in additional strips.
Leave about 10 cm at the bottom of the strips to twist in and overlap new strips. Remember to twist in a thick end to a thin end to keep the cord a consistent thickness.
Step #8 Finishing Off
Once you have plaited the length of cord you need, remove from your securing point and tie a simple knot in the end to secure. Now it is ready to use!
Take it further:
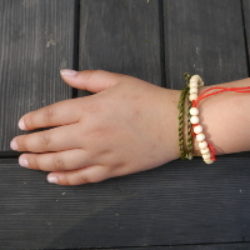
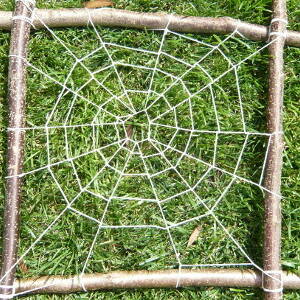
- make a simple bracelet or use longer cord for lashing poles together for shelter making.
Disclaimer: Muddy Faces cannot take any responsibility for accidents or damage that occurs as a result of following this activity.You are responsible for making sure the activity is conducted safely.
You might also like
Key Features
- Age Range 6+
- Duration 1 - 2 Hours
- Location Anywhere
- Season Spring
- Time of Day Daylight
-
Categories:
Fire, Shelters & Bushcraft
knots & cordage