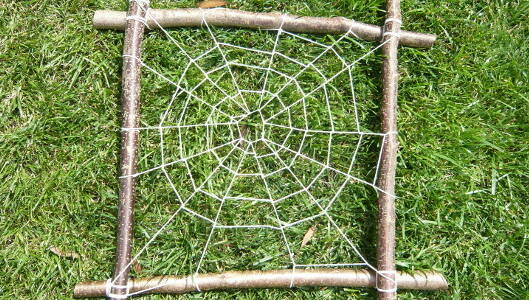
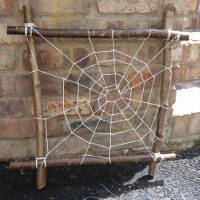
String spiders web
A simple stick and string activity to create your own spiders web!
Introduction
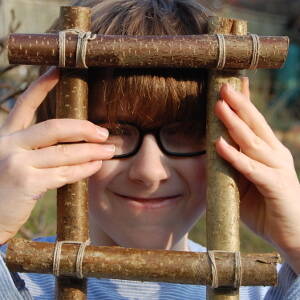
Make the frame - tie/lash the sticks together to create a square shape - see natural frames activity. Take the time to observe a real spider's web and even better see if you can spot a spider in the process of constructing a web.
* Muddy Faces actively promotes child-led outdoor play & learning. We recognise and believe in the curiosity that children have and their drive to explore and discover. We hope that you will bear this in mind when considering more prescribed activities like this one – often much more creative ideas will occur if resources are simply provided and children are given the time and space to explore independently.
What you'll need
- drawknife
- scissors
- string
- 4 x sticks or poles, whatever length you wish
This activity has been provided by
Useful items from our shop
Environmental Considerations
Consider the environmental impact of preparing, carrying out & completing this activity. Could this impact be reduced? Specific considerations for this activity could include:
- source of wood
Health & Safety Considerations
Follow your usual operating procedures and carry out appropriate risk benefit assessments.
Some considerations particular to this activity include:
- tool use
Preparation
Cut your lengths of string. You will need:
(a) one short length for the central circle
(b) approx. 14 pieces for the spokes of the web – the length depends on your frame size (from centre to edge) but always cut longer than you think you will need to allow for knot tying
(c) a long piece for the spiral – probably double what you think you need, to allow for knot-tying.
Step #1
Lie your frame flat on the ground.
Using the short piece of string (a), tie the ends together to make a small circle (this will make the center of the web).
Place this circle where you want the centre of the web to be – don’t put it too close to the edge of the frame as it will make knot-tying tricky.
Step #2
Tie the lengths of string (b) to the central circle, fanning them out like spokes on a bicycle wheel.
Then tie each length of string to the frame.
Step #3
Once all the spokes are tied tightly to the frame, start to add in the spiral (c), knotting it to each spoke as you come to them.
Tip:
A slight disadvantage of this technique is that the knots can slip along the spokes, making the web saggy.
To prevent this, at step#2 do not tie the spokes to the frame, but start your spiral free from the frame, tying a non-slip knot at each point. The disadvantage of this is it can be tricky to do without the web working out of shape.
Try both ways and see what works best for you.
Disclaimer: Muddy Faces cannot take any responsibility for accidents or damage that occurs as a result of following this activity.You are responsible for making sure the activity is conducted safely.
You might also like
Key Features
- Age Range 3+
- Duration 1 - 2 Hours
- Location Anywhere
- Season Any
- Time of Day Anytime
-
Categories:
Art & Creating
leaves, sticks & petals