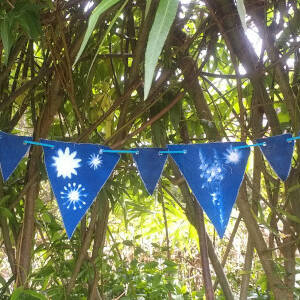
Making flags
A simple flag making activity to decorate your outdoor space.
Introduction
Flags are a great asset to any outdoor space/camp/den and even better if you can make your own!
What you'll need
- material – we have used calico but an old cotton sheet would work just as well
- pens – fabric pens or acrylic pens (water based pens such as felt tips work well but will run if left out in the rain)
- a wooden stick for a flag pole
This activity has been provided by
Useful items from our shop
Environmental Considerations
Consider the environmental impact of preparing, carrying out & completing this activity. Could this impact be reduced? Specific considerations for this activity could include:
- leave no trace
- consider using recycled material
Health & Safety Considerations
Follow your usual operating procedures and carry out appropriate risk benefit assessments.
Some considerations particular to this activity include:
- tool use
- working with sticks
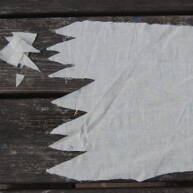
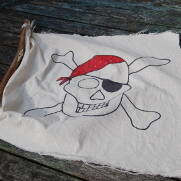
Step #1 Cut your cloth
Cut out a flag shape. If you want to age it you could feather the ends and stain with tea (NB too much staining will effect the art work).
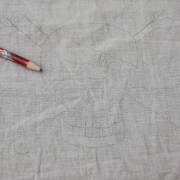
Step #2 sketch your design
Using a pencil, draw the outline/shape you wish to create.
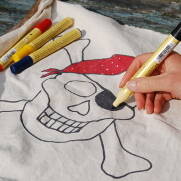
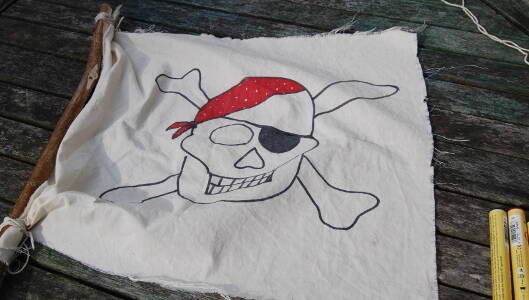
Step #3 Make it permanent
When you are happy with the design draw over the pencil in your chosen pen.
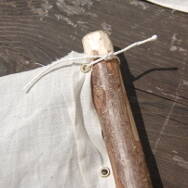
Step #4 Attach to the flagpole (a)
Attach the flag to the pole – tie the ends of the flag to a wooden pole with string. You will need to do this tightly or it will keep falling off.
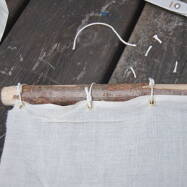
Step #5 Attach to the flagpole (b)
Alternatively, eyelets can be used to help tie the flag onto the pole and for a neater finish. You can get different types of eyelets; the ones we used in this activity were inserted using eyelet pliers.
Tie the flag through eyelets onto the pole and secure using a knot such as reef knot.
Step #6 Finish off
Trim all the ends to tidy up.
Tip
If your flags keep slipping down try drilling a hole in the top of the pole or sawing a groove in the top to secure the string to.
Disclaimer: Muddy Faces cannot take any responsibility for accidents or damage that occurs as a result of following this activity.You are responsible for making sure the activity is conducted safely.
You might also like
Key Features
- Age Range 3+
- Duration Less than an hour
- Location Anywhere
- Season Any
-
Categories:
Art & Creating
with tools