Sun Print Bunting
Cyanotype is a photographic printing process using the sun. Use it to create beautiful bright blue fabric bunting!
Introduction
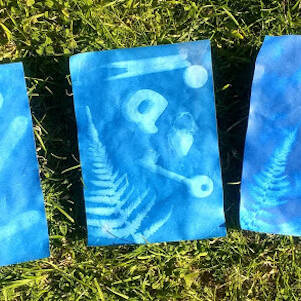
The blue print fabric is light-sensitive, 100% cotton, treated for cyanotype. Cyanotype is a printing process that produces a cyan-blue print. Engineers used to use the process as a low-cost way to produce copies of drawings, referred to as blueprints. Two chemicals are used: ferric ammonium citrate and potassium ferricyanide.
* Muddy Faces actively promotes child-led outdoor play & learning. We recognise and believe in the curiosity that children have and their drive to explore and discover. We hope that you will bear this in mind when considering more prescribed activities like this one - often much more creative ideas will occur if resources are simply provided and children are given the time and space to explore independently.
What you'll need
- a sunny day!
- colour changing fabric
- natural materials
- cardboard
- pins
- scissors
- string/wool
- water & container
- protective waterproof gloves
This activity has been provided by
Environmental Considerations
Consider the environmental impact of preparing, carrying out & completing this activity. Could this impact be reduced? Specific considerations for this activity could include:
- leave no trace
- dispose of water used for rinsing in mains drainage
Health & Safety Considerations
Follow your usual operating procedures and carry out appropriate risk benefit assessments.
Some considerations particular to this activity include:
- wear protective gloves when rinsing – chemicals used are mild irritants
- using scissors and string
- hand wash after activity
Preparation
You will need a bright, sunny day for this activity and somewhere to show off the finished product!
Prepare some cardboard the correct size to pin your fabric pieces onto.
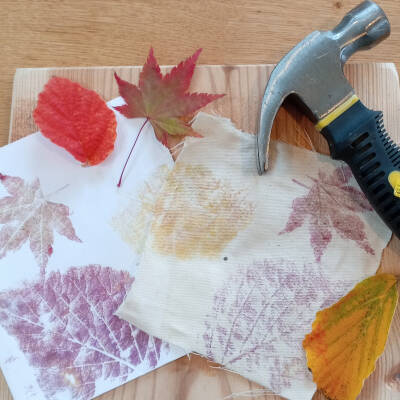
Collect some natural materials (or have a collection to use if you don’t have much on your doorstep). Look for interesting-shaped leaves and flowers.
If you are doing this activity away from mains drainage you’ll need water and a container to hold the used rinsing water, to be taken off site for disposal.
Step #1 Prepare the fabric
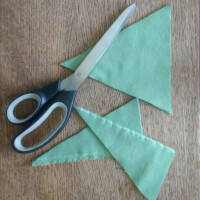
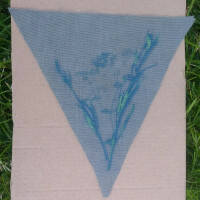
Remove the blue print fabric from the packaging. Although it is called blue print the un-exposed fabric is green.
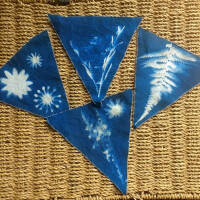
Cut the fabric as desired for making bunting or a picture. We cut some triangular bunting pieces and used the off-cuts for mini-bunting – waste nothing!
NB: Exposure to indoor daylight/incandescent light will not affect the fabric so you have time to prepare indoors or in a shaded area. Fluorescent light and sunlight will affect the fabric.
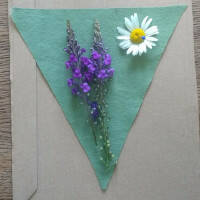
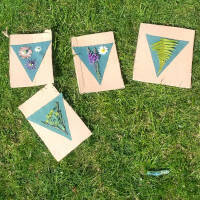
Step #2 Create your image
Pin your fabric pieces onto the cardboard.
Place your objects on top of the fabric and play around with your positioning and arrangements.
Tip: Flat natural materials will give a much crisper print; non-flat materials will leave a more delicate shadow effect.
Tip: Use pins to hold objects down. Push the pin right through the card to avoid a pin shadow print.
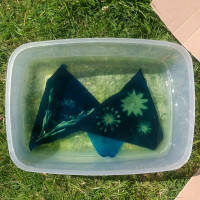
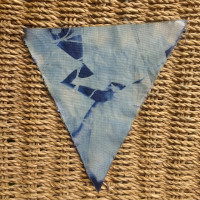
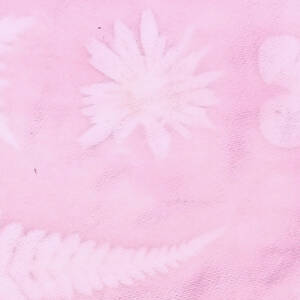
We also experimented with a ‘tie dye’ style wrap-up!
Step #3 Expose the fabric
Expose the fabric to direct sunlight.
The process takes 5-10 minutes on a sunny day (we left ours out for 10 minutes), and 15-30 minutes on cooler/less bright days.
The fabric will change from the original green to a grey-green colour.
Step #4 Remove from sunlight
Remove the objects from the fabric.
From now on keep the fabric out of direct sunlight.
Step #5 Stop the process
Wearing protective gloves, rinse the fabric under a tap until the water runs clear, or rinse it in a container (you will notice the water changing to a slight green colour).
Dispose of the rinsing water into a mains drain.
Step #6 Drying
Dry the fabric flat, out of direct sunlight.
The images will sharpen during drying time.

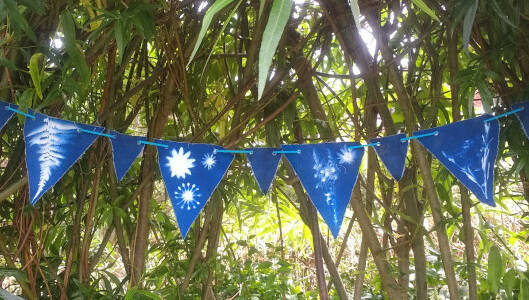
Step #7 Make the bunting
Attach your bunting to string – we used a hole punch then threaded wool through to hold it all together.
Now you can show off your beautiful bunting!
Take it further:
- have a go at tie dye (as shown)
- use a large piece of fabric and get creative on a grander scale
- have a go at sun printing on paper.
Disclaimer: Muddy Faces cannot take any responsibility for accidents or damage that occurs as a result of following this activity.You are responsible for making sure the activity is conducted safely.

Key Features
- Age Range All Ages
- Duration Less than an hour
- Location Anywhere
- Season Any
- Time of Day Daylight
-
Categories:
Art & Creating
sun print
Activity Downloads