Leaf decorations
Combine leaves & cookie cutters for a fun and effective natural art project for children.
Introduction
* Muddy Faces actively promotes child-led outdoor play & learning. We recognise and believe in the curiosity that children have and their drive to explore and discover. We hope that you will bear this in mind when considering more prescribed activities like this one – often much more creative ideas will occur if resources are simply provided and children are given the time and space to explore independently.
What you'll need
- collection of leaves
- cutters
- hammer
- solid surface to hammer on
- glue
This activity has been provided by
Useful items from our shop
- Claw Hammer - 8oz Stubby
- Glue - Waterproof
- Hole Punch (Kids at Work)
- Calico Squares
- Circular Cookie Cutter Set
- Mini Star Cutters - Set of 3
- Butterfly Cutter
Environmental Considerations
Consider the environmental impact of preparing, carrying out & completing this activity. Could this impact be reduced? Specific considerations for this activity could include:
- source of natural materials
Health & Safety Considerations
Follow your usual operating procedures and carry out appropriate risk benefit assessments.
Some considerations particular to this activity include:
- collecting natural materials
- tool use
Preparation
Head out for an autumn walk through your park, woods or other outdoor space and collect lots of fallen leaves – all different shapes, sizes and colours. Use the opportunity to discuss whether or not you should pick leaves off live trees and plants, or only use the fallen ones.
Step #1
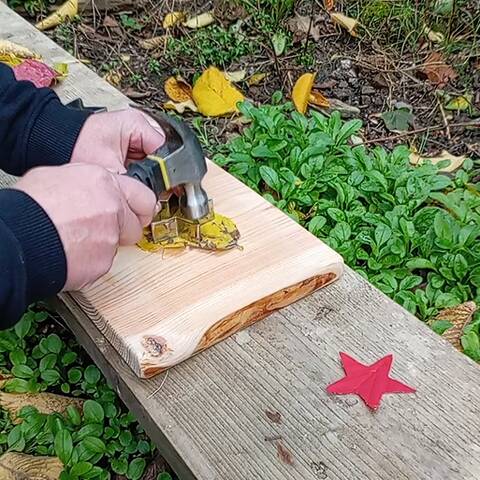
Create shapes using metal cookie cutters.
Make sure you have a wooden board or similar surface/workspace suitable for hammering on. Line up the cookie cutter on the leaf and gently tap around the edge of the cutter with a hammer.
Step #2
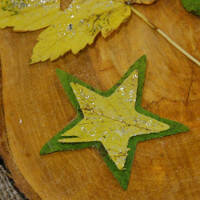
Carefully peel the shapes out of the leaf.
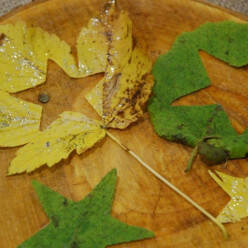
You could glue the leaves and cut-out leaf-shapes together in layers of different shapes and sizes or simply enjoy the process of creating lovely leaf shapes.
Paint over with glue to help preserve shapes and colours (optional).
You could also use a hole punch to pass some string through to create a hanging decoration.
Step #3
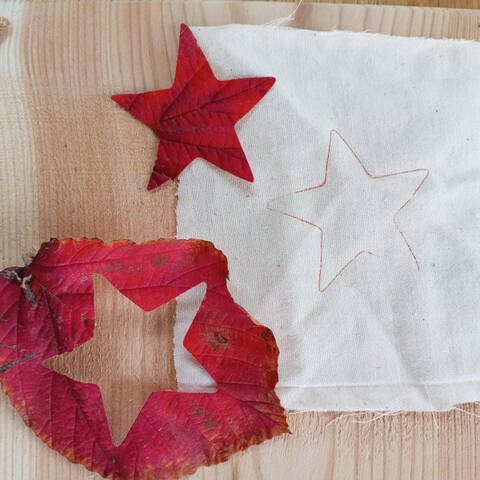
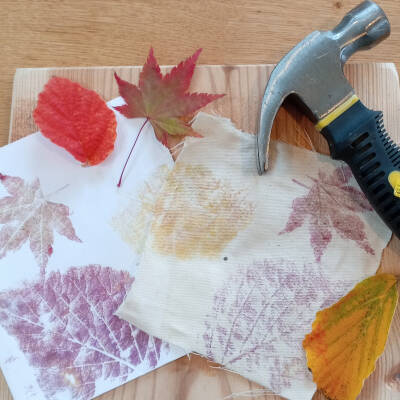
If you hammer out the leaf shape on top of a piece of cloth you can create some fab 'hapa zome' patterns.
Step #4
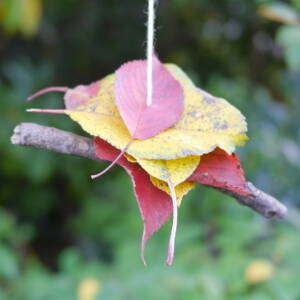
Use a hole punch to carefully punch a hole in your leaves, then lightly thread a thin ribbon through to create a lovely decoration.
Take it further:
- try colour-clashing or colour-matching different leaves, or sticking different shapes together so they overlap in interesting ways
- try cutting them with different-shaped cutters
- or draw around a template and then cut with scissors
- use your decorated leaves to make a collage or leaf mobile.
Disclaimer: Muddy Faces cannot take any responsibility for accidents or damage that occurs as a result of following this activity.You are responsible for making sure the activity is conducted safely.
You might also like
Key Features
- Age Range All Ages
- Duration 1 - 2 Hours
- Location Anywhere
- Season Autumn
- Time of Day Anytime
-
Categories:
What's New
Art & Creating
leaves, sticks & petals
Tool use & Traditional Crafts
hammers