Securing a tarp using natural materials
A selection of techniques utilising natural materials to secure tarps, shelters and sheets.
Read More about Securing a tarp using natural materialsAn introduction to large shelters - with suggestions for choosing, using & maintaining a large group shelter.
A focus on non-permanent lightweight shelters that need to be erected and dismantled after each session. There's quite a lot involved in putting up a shelter correctly - we offer some guidance and links to more detailed information.
Includes top tips on how to look after and store your shelter.
Muddy Faces fire retardant lightweight shelter or other tarp
This activity has been provided by
Consider the environmental impact of preparing, carrying out & completing this activity. Could this impact be reduced? Specific considerations for this activity could include:
Follow your usual operating procedures and carry out appropriate risk benefit assessments.
Some considerations particular to this activity include:
These shelters require putting up & dismantling at each session which can be quite time consuming so rigging a system can vastly speed up your erection and dismantling time.
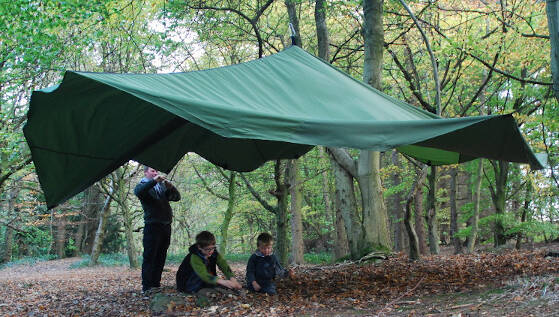
Large shelters provide group protection from the rain, provide shade from the sun and create a focal meeting place. A shelter can last for years if you look after it correctly - leaving it exposed to the elements when it is not in use reduces its life span significantly.
Often it is a slow and complicated process to put up a shelter and if you use the space frequently it’s very tempting to leave the shelter up until your next session, but this puts it at risk from the elements and possible vandalism. Therefore we recommend, where possible, that you use a shelter-rigging system that allows you to quickly and easily set up and dismantle your shelter.
Read on for tips and techniques to help you achieve this.
Points to consider:
To raise a shelter you will need to have a high point to
hoist your shelter up to. A simple technique can be seen here: Throwing a rope over a high branch.
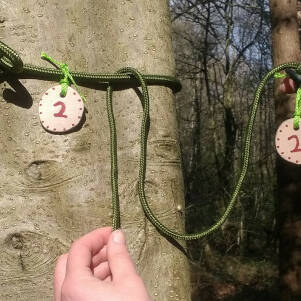
If you plan to use your site more frequently or don’t have anything directly above the correct location to hoist to, then a more complicated (fixed line system) would be beneficial.
Once you have your shelter hoisted there are different ways to attach and use guy ropes see shelter fixing - guy ropes.
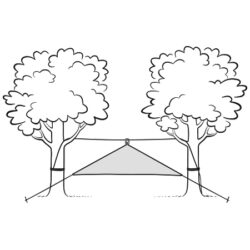
Some larger group shelters already have a built-in central webbing loop or loops to assist with hoisting a central point.
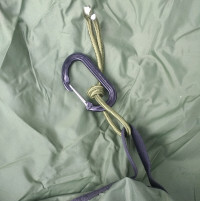
To protect the webbing strap, use a carabiner or piece of sacrificial rope. This will stop any cutting friction to the webbing from the main pulley rope. Never allow rope to run through any webbing loops or straps as it will cut through them.
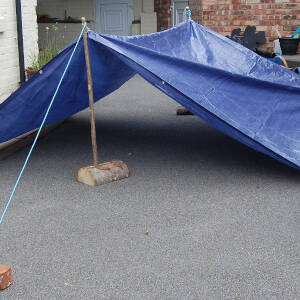
Using a central pole is a quick, effective and straightforward way to erect your shelter and very useful if you don’t have anywhere to hang your shelter from.
The disadvantages of this technique are that you have a pole in the centre of your shelter that can get in the way and might be tripped over or leant against. Also, where the pole is in contact with the material, a hole might form, damaging the shelter/tarpaulin being used. It can also sometimes be tricky to fix out the edges of your shelter in such a way to create a usable space whilst holding the pole up.
Please note: Muddy Faces shelters are not designed to be used with a central pole.
To ensure the longevity of your shelter it is imperative to follow these guidelines:
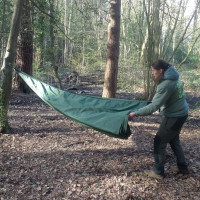
For most large shelters folding is a two person job.
For round group shelters, have one person holding the central fixing point whilst the other person/people hold the edges and fold up the shelter like a pizza slice. Once you have a narrow, manageable slice, roll from the centre to expel the air.
Securing a tarp using natural materials
A selection of techniques utilising natural materials to secure tarps, shelters and sheets.
Read More about Securing a tarp using natural materials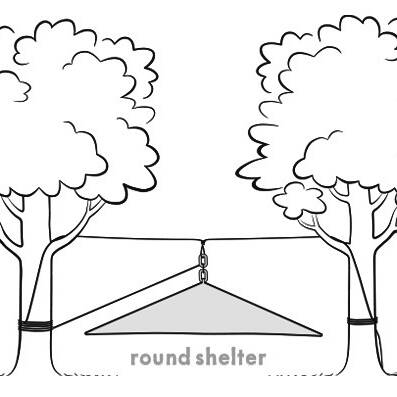
Shelters: fixed line system
Having a semi-permanent fixed line between two points can make putting up your shelter both quick and efficient.
Read More about Shelters: fixed line system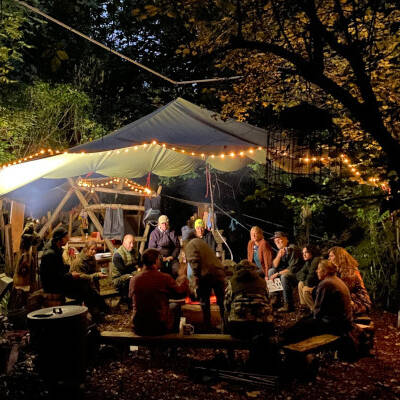
Using a shelter above a fire
Points to consider before placing a shelter above an outdoor fire area.
Read More about Using a shelter above a fireDisclaimer: Muddy Faces cannot take any responsibility for accidents or damage that occurs as a result of following this activity.You are responsible for making sure the activity is conducted safely.