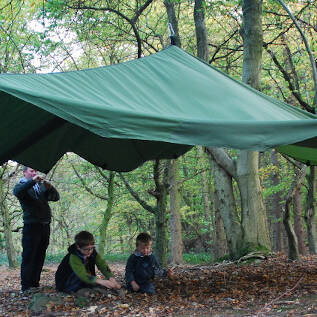
Shelters: throwing a rope over a high branch
A high branch is very handy for raising a shelter, a pulley line or anything else. Here are some ideas for making it an efficient and successful process.
Introduction
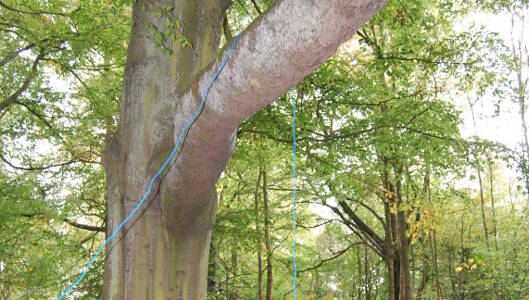
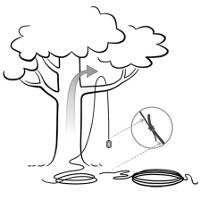
This technique is useful for a temporary fixing of a rope over a branch. A weighted throw line is used to haul a heavier rope over the branch. This technique can be used for lifting up the centre of a shelter/tarpaulin.
What you'll need
- throwing line (light weight length of string/cord that is at least double the height of the branch you are throwing over)
- object to use as weight for throwing line
- rope
This activity has been provided by
Environmental Considerations
Consider the environmental impact of preparing, carrying out & completing this activity. Could this impact be reduced? Specific considerations for this activity could include:
- protecting trees from friction from cord/rope
Health & Safety Considerations
Follow your usual operating procedures and carry out appropriate risk benefit assessments.
Some considerations particular to this activity include:
- choice of branch – size and strength
- health condition of tree and branch
- working at height
- size of rope/weight of shelter
Step #1 choose your branch
Take a look around the area and consider factors relevant to your use
- if you are making a swing check clearance
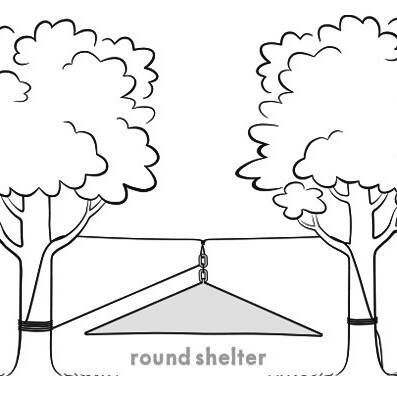
- for rigging up a shelter consider if there is space for the shelter, what the floor area is like, and whether there are enough points of attachment for pulling out the shelter
Once you have identified a possible branch, check the health of the tree and the branch you want to use.
Look for a branch that is relatively horizontal and that will give you the height you need (eg hold a shelter high enough above heads). Make sure there is a clear part on the branch to avoid the line/rope getting snagged on side branches.
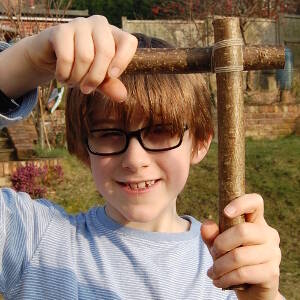
Step #2 Choosing an Object for weight
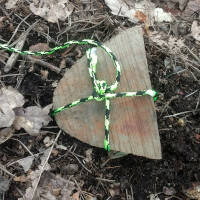
Step #3 attaching a weight to the throwing line
You will use your throwing line as a pilot, to get over your branch, and then you'll attach your main rope to pull it over.
The lightweight throwing line needs a weight attached to the end you are going to throw, to assist it to reach the branch and drop back down to the floor.
Choose a weight that will not get snagged in the tree easily, something that is small and heavy, for example a large bolt/bean bag/short stumpy stick. NB: long sticks often get caught.
Unfortunately, small heavy items are usually the most difficult to tie to string! Ensure the weight is securely tied so that it doesn't detach during the throwing process.

Step #4 preparing the throwing line
It is important to ensure that the line isn't tangled before you throw it. There are a number of ways you can prepare the line:
- if you have a sit mat you could coil the line carefully onto the mat - ensuring the end you want to throw is on the top
- you can also coil the line around your hand. This is a technique called 'lap coiling' that climbers use (see image below).
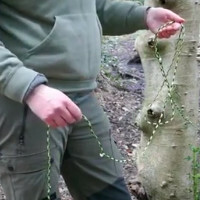
Lap coiling
Holding the string higher up off the floor in your hand means your weight doesn't need to pull the throwing line so far to reach the branch. If using this technique it is essential that the coils can freely leave your hand.
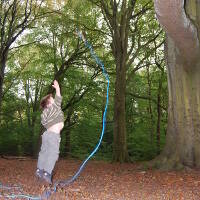
Step #5 throwing
Before throwing make sure that any people around are aware of what you are doing and that they are stood well clear of the area. Always be aware of the fall and swing of the weight and be ready to move out of the way if it starts to swing towards you.
Pick up the weight and throw it, aiming to get the weight and line over the top of the branch.
Tips
- It may take quite a few attempts to get the line over the branch!
- If the line is too heavy for the weight to lift, try holding the line in one hand to take the weight a bit higher (see Lap Coiling) or add a heavier weight.
- To avoid the throwing line wrapping/spinning around the branch, a more vertical throw, that travels up, slightly across and down can be used
- Alternatively, if throwing at an angle, make sure enough line travels over the branch so that when the weight swings back it doesn’t swing back and over the branch again (doing a loop-the-loop).
- If you have got the weight over the branch but the weight doesn't drop far enough for you to reach the line (usually due to friction of the branch on the cord - a common occurrence) then use a flicking action to send a wave up the line. As the wave goes over the branch, it lifts the cord away from the branch, reducing friction and allowing the weight to drop - repeat this and the weight will gradually fall towards the ground.
- If you have a shorter length of throwing line and are worried that you may lose the end of the line, attach the rope to the end of the throwing line prior to throwing it.
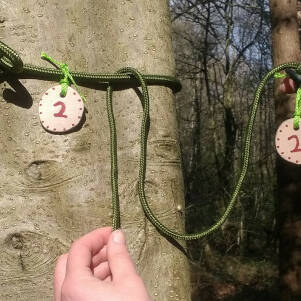
Step #6 attaching the throwing line to the rope
Once you can reach the end of the line, pull it through, remove the weight and attach this end of the throwing line to your rope using an overhand/fisherman's knot or similar.

Step #7 pulling the rope through and tying off
Carefully pull the line as pictured to raise the rope over the branch. Keep an eye on both ends so you don’t pull it too far. Once you are sure that you can get hold of both ends of the rope you can remove the throwing line.
Tip
You could also tie both ends of the rope together at this stage to create a loop if you are worried about it being pulled right over.
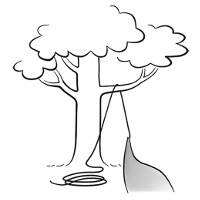
Step #8 attaching the shelter
The end of the rope is now ready to attach to the shelter/tarpaulin, rope swing or seat.
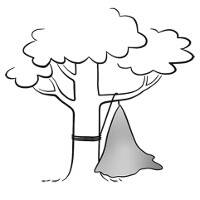
Step #9 tying off
Pull the rope to raise the shelter to the correct height. Tie off the other end of the rope to a lower branch or the trunk of the tree. To avoid people walking into it tie off above head height. Where possible, protect the tree from friction, particularly if you are using the same point frequently.
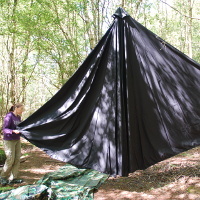
We have more tips and information on putting up a large shelter.
Taking the rope down
Untie the rope from the tree trunk and lower the shelter/swing and remove it from the rope. Carefully pull the rope back over the branch. Watch out for the rope falling once it is over the branch.
Store the throwing line and rope to avoid tangling so they are ready to use next time.
Take it further:
- if you are wanting a shelter for frequent use in the same place then look at our Shelters: fixed line system for more information
- for top
tips on a labelling system for your shelter and advice on storage and
maintenance look at putting up a large shelter
Disclaimer: Muddy Faces cannot take any responsibility for accidents or damage that occurs as a result of following this activity.You are responsible for making sure the activity is conducted safely.
You might also like
Key Features
- Age Range All Ages
- Duration Less than an hour
- Location Garden / HomePark / Green spaceWoods / Forest
- Season Any
-
Categories:
Fire, Shelters & Bushcraft
shelters