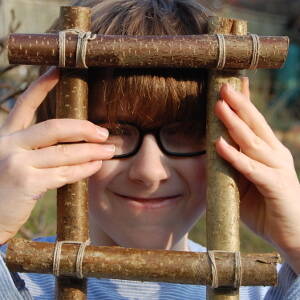
Knot - square lashing
A handy knot – particularly useful for natural frames, den & raft building.
Introduction
A really useful knot to master.
What you'll need
- sturdy sticks of similar width
- scissors/knife
- string
This activity has been provided by
Useful items from our shop
Environmental Considerations
Consider the environmental impact of preparing, carrying out & completing this activity. Could this impact be reduced? Specific considerations for this activity could include:
- source of wood
Health & Safety Considerations
Follow your usual operating procedures and carry out appropriate risk benefit assessments.
Some considerations particular to this activity include:
- tool use
Preparation:
Make sure you cut a much longer length of rope or string than you think you require. In this example we cut lengths of string approximately 2 metres long.
The string or rope needs to be strong (not with a low breaking strain). When you tighten the string to make the joint rigid it exerts quite a lot of pressure and you don’t want your string snapping all of the time.
You’ll need a knife or scissors to hand-cut the string or rope.
If you are using a man-made rope (e.g. para cord or hempex), you’ll need to heat seal the ends to stop the cord from fraying.
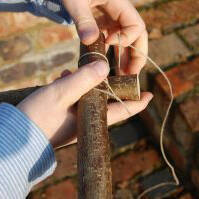
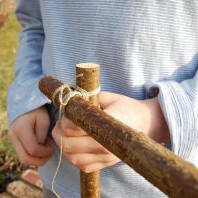
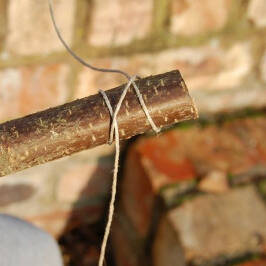
Step #1 Tying On
Tie the string to one of the sticks – a clove hitch is a good knot to use, but not essential.
Leave a short length (approximately 10 centimetres) loose at one end (for tying off at the end).
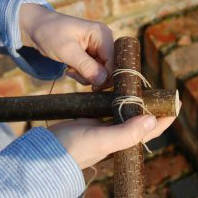
Step #2 Square Lashing
Place the 2nd stick under the first, at right angles.
Take the string down, away from the knot, under the 2nd stick, and back up towards you.
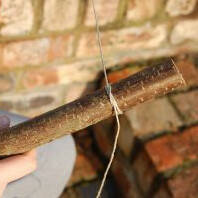
Step #3
Take the string over the top stick and down, then under the bottom stick.
(Note: in this photo the sun is catching the tail-end leftover from the tying on and it looks like the hand is holding this – it’s not. If you look closely you can see the string under the bottom stick. This image shows that the sticks have been rotated 90 degrees).
Step #4
As you pull the string up towards you it should be going over your tying-on string.
As you follow this back over the top stick you should be arriving back where you started.
This completes your first wrapping. The wraps should cross at a 90º angle… this right angle gives the Square Lashing its name.
Step #5
Follow the line of the string, tracing around three times. Try to keep tension on the string as you do this.
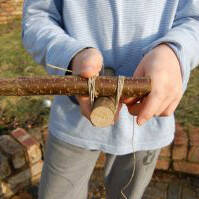
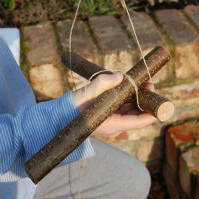
Step #6 Check it looks correct
Once you have been around 3 times return to your initial knot and stop.
At this stage it should look a little like the photo.
If you are super neat you can make sure the lines of strings line up next to each other.
If you wiggle the sticks you will feel they are pretty loose, despite putting tension on the string as you tied them together. This neatly leads onto the clever part…

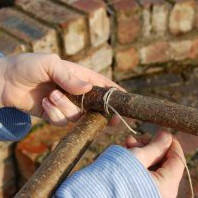
Step #7 Frapping (tightening the lashing)
Instead of continuing along the normal path, turn off and pass the string around the outside of the lashing, effectively creating a ring in-between the sticks.
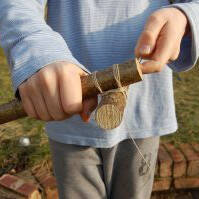
Step #8
Continue wrapping around in this direction, pulling at the string to keep it as taut as possible. This process is known as frapping.
Wrap the string around approx 3-4 times. More is fine, or if you’re near the end of your string make less turns.
Leave about 10cm remaining to tie-off to the loose end left from your initial ‘tying on’ knot.
At this stage, if the lashing has not become taut and the joint rigid, then I suggest you unwrap the frap and re-do it, pulling harder this time.
Step #9
Tie-off the two ends of the string firmly.
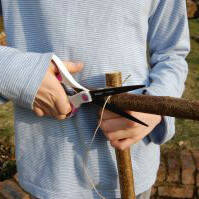
Step #10
Cut loose ends off with a knife or scissors to neaten it all up.
Ta-daaaaah! Two sticks square-lashed together!
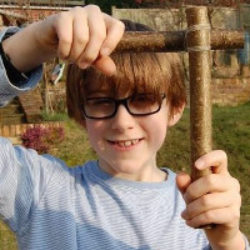
Revel in your knot mastery!
If it all looks a bit wrong don’t worry, just go back to the start and give it another go – all knots take practise.
Take it further:
You can use this technique to:
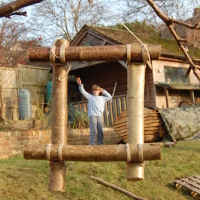
- Make natural frames or a spider web in a frame
- Lash a strong pole/stick between two trees to make a den entrance. Then use a tarp to waterproof your den.
- How about setting a challenge to lash a pole to two trees, strong enough to sit on or walk along? (make sure you protect the tree with a bit of old matting or similar)
- Mini raft-making is a great way to practice this technique
- Raft-making with full-on poles and barrels – bbbbrrrrrr if the lashings are not tight enough and it all disintegrates!
Disclaimer: Muddy Faces cannot take any responsibility for accidents or damage that occurs as a result of following this activity.You are responsible for making sure the activity is conducted safely.
You might also like
Key Features
- Age Range 6+
- Duration Less than an hour
- Location Anywhere
- Season Any
- Time of Day Anytime
-
Categories:
Fire, Shelters & Bushcraft
knots & cordage
Activity Downloads