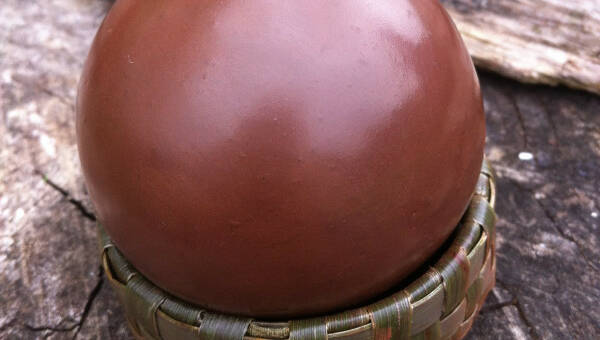
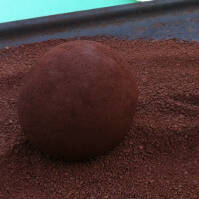
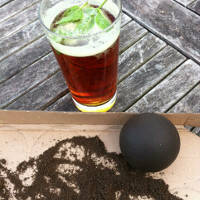
Shiny mud balls
A fun & shiny mud activity - Hikaru dorodango, the Japanese art of making mud shine. Simple, engaging & rather compulsive!
Introduction
Written by Lisa Chell. All photos and text copyright Lisa Chell.
Recently I have become slightly obsessed with making Hikaru Dorodango, the Japanese art of turning ordinary mud into the most amazing shiny balls. Literally translated, ‘hikaru’ means shiny, ‘doro’ means mud, and ‘dango’ is a round dumpling made from rice flour.
Why would anyone sit for hours on end playing with mud and dust?
What you'll need
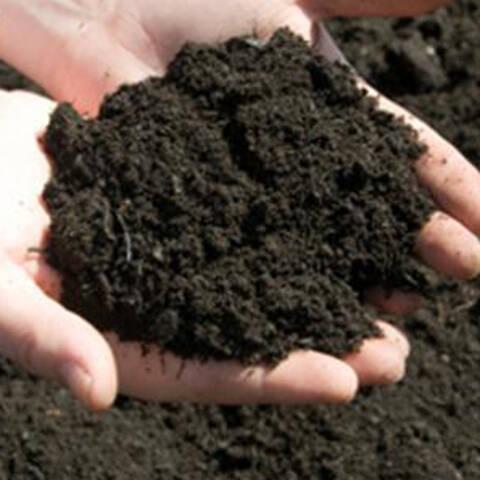
- mud/soil
- water
- plastic bag
- old tights
- bowl
- sieve
Lisa Chell - stickstacks

Environmental Considerations
Consider the environmental impact of preparing, carrying out & completing this activity. Could this impact be reduced? Specific considerations for this activity could include:
Health & Safety Considerations
Follow your usual operating procedures and carry out appropriate risk benefit assessments.
Some considerations particular to this activity include:
Lisa Chell – stickstacks
Lisa is a creative
outdoor educator, Forest School pactitioner, artist and mud lover, who
is never happier than when she is playing, wallowing or creating with
mud. Luckily most of the children she works with love mud too!
Lisa
regularly leads Forest School sessions for under 5s and primary school
age children, and is passionate about providing creative opportunities
for children and young people within a natural environment.
To find out more check out Lisa’s Facebook page
The thing is, the process of making Hikaru Dorodango is strangely compulsive. It is like a meditation; it is repetitive, slow and conscious. There comes a point when you start to feel a real connection to the object you are creating, this thing that is made of mud becomes really precious, and as it slowly begins to shine… that is when the real magic happens!
I shared this process with a group of Forest School leaders recently, and the most common questions were: ‘Do you need special mud?’ and ‘why?’. The answers are ‘no, any soil will work’ and ‘why not?’
Dorodango are not for anything – they just are – and what they are, is beautiful, amazing and magical. They are made simply from earth, water and time. I am, however, more and more convinced that the time spent making them is not just ordinary time. It is time when you are totally absorbed in a process, it is time devoted to yourself, it is play, it is therapy, and it is time and space for social engagement.
Dorodango can be made by anyone, anywhere. They do not require any special equipment or materials. It is a great activity to do on your own, or in a group, over a day, a weekend or several weeks! It is something you can work on for a little while, then put down, go away and return to it whenever you want. It is surprisingly addictive!
I have sat with people I have only just met, and whiled away happy hours rubbing dust onto a ball of mud, chatting and putting the world to rights. Then suddenly someone notices a change to the texture of their ball – they see that it is beginning to take on a new form, the surface is becoming so smooth that a lustre shows through the dust. Excitement ripples through the group – everyone wants to look, compare, question the technique, then move away more determined to achieve the same result!
The origins of Hikaru Dorodango support the idea that the process of making them is really important. Professor Fumio Kayo of the Kyoto University of Education discovered dorodango at a pre-school in Kyoto, in 1999, where he observed the children making simple mud balls.
He made many attempts to make shiny dorodango and eventually devised an easy-to-follow method. He shared this method with the children, resulting in a craze that rapidly spread across Japan. Kayo observed that the children demonstrated behaviour that was ‘surprising from the perspective of developmental psychology’.
“Once Kayo teaches children how to make these mud balls, they become absorbed in forming a sphere, and they put all their energy into polishing the ball until it sparkles. The dorodango soon becomes the child’s greatest treasure.”
Kayo sees in this phenomenon the essence of children’s play, and he has written academic papers on the subject. The mud balls could also offer fresh insights into how play aids children’s growth.
Shiny Mud Balls: Kyoto Professor Taps into the Essence of Play, October 5, 2001

Step #1
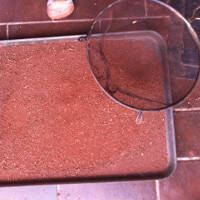
Dig up some earth and sieve it through a garden sieve to get rid of any stones.
Step #2
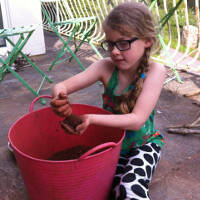
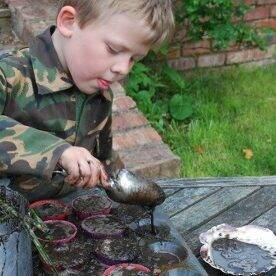
Take a large handful of the earth and put it into a container, gradually add water to form a dough.
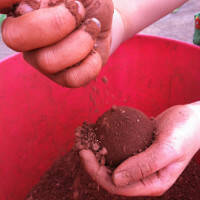
Step #3
Move the dough back and forth between your hands, squeezing and turning as you do so, forming a sphere. (You can be quite rough with it at this stage.) As you move the ball shake it up and down as this encourages the finer particles come to the surface making it smoother.
Move onto the next step when the surface is smooth and quite tacky.
Step #4
Sprinkle dry earth over the ball and gently wipe off with the curve of the outside of your thumb.
Turn and repeat.
Continue with this for half an hour or more. This begins to dry the surface of the ball and form an outer ‘crust’.
If cracks appear stop and go to Step 5!
Step #5
‘Rest’ the ball in a sealed plastic bag placed on a soft surface, so no flat edges appear in the still soft ball, for approximately 20 mins. This allows the moisture to come to the surface and often ‘magically mends’ surface cracks!!
Step #6
Repeat steps 4 and 5 until the ball starts to feel firm and has a slightly leathery surface.
If cracks appear stop and go to Step 5!
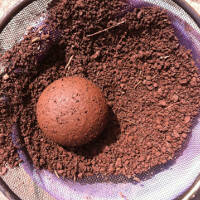
Step #7
Use a kitchen sieve to sieve the earth into finer particles.
Rub this dust with your hand in circular movements to get a fine coating on your hand, then gently rub the dust particles over the ball.
Continue to do this until the surface water has been absorbed and the ball feels powdery.
Step #8
Put the ball into a clean plastic bag to draw out the water.
Then continue to repeat steps 7 and 8 until a strong crust is formed and the dust no longer adheres to the surface of the ball. It is the dust that makes the ball shine, so the longer you repeat these stages, the slower the core dries and the better the shine.
If cracks appear stop and go to Step 5!
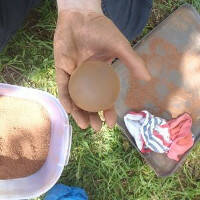
Step #9
Polish the ball gently with a soft cloth – cheap tights work well!
Keep the ball wrapped in a cloth so it can dry out slowly.
Tip:
** Do not be tempted to over-polish – the surface will shine, but then it will crack after a few days, because it has dried out too quickly! If there is still moisture coming to the surface stop polishing and go back to steps 7 and 8.
Step #10
Enjoy and share!!
Disclaimer: Muddy Faces cannot take any responsibility for accidents or damage that occurs as a result of following this activity.You are responsible for making sure the activity is conducted safely.
You might also like
Key Features
- Age Range All Ages
- Duration Long Term Project
- Location Anywhere
- Season Any
- Time of Day Anytime
-
Categories:
Art & Creating
mud, clay & sand
Tool use & Traditional Crafts