Natural dyes
An in depth activity requiring cooking over a fire (or inside if necessary) but what an amazing science experiment whilst physically connecting with nature.
Introduction
Natural dyes are derived from plants, minerals or invertebrates. Most natural dyes are from plant sources such as roots, berries, bark, wood and leaves. Dyeing with natural dyes is very similar now to how it was thousands of years ago. There is evidence of textile dyeing in the Neolithic period and also dating back 5,000 years in China.
We have a lovely real-life example from an outdoor practitioner too - scroll to the bottom to see.
What you'll need
- a variety of strong-colour vegetables and fruit like: beetroot, red onion and red cabbage
- chopping board & knife
- calico/cotton
- large pan
- sieve
- wooden spoon
- plastic jug/container
This activity has been provided by
Useful items from our shop
Environmental Considerations
Consider the environmental impact of preparing, carrying out & completing this activity. Could this impact be reduced? Specific considerations for this activity could include:
- disposal of mordant
Health & Safety Considerations
Follow your usual operating procedures and carry out appropriate risk benefit assessments.
Some considerations particular to this activity include:
- fire safety
This activity has three main parts:
• making the dye – extracting the colour
• mordant – preparing the material
• dyeing the material.
The chemicals involved are not necessarily the ideal ones for getting the best dying results, however they work and can be used safely under the correct supervision with groups. We dyed scraps of material without a fixant in with the boiling vegetables.
This activity would be suitable to be done with a group over a number of weeks. The dyes we produced were popped in to the freezer to use at a later date.
Ingredients:
These are some of the colours you can get from different fruit, vegetables and spices.
Yellow - apple tree bark, white onion skins, turmeric, saffron, pomegranate rind, turmeric, orange and lemon peels
Blues & purple - blackberries, blueberries, red cabbage, purple grapes
Red - beetroot, raspberries, cranberries (note: you can use juice directly from thawed berries or canned beetroot)
Green - spinach, oak bark, crab apple leaves and bark
Orange - onion skins, oats
Tan - coffee and tea
Brown - walnut hulls, paprika
Step #1 Making the dye
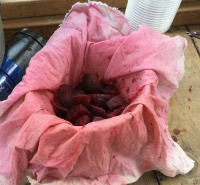
Cut up the vegetables & fruit items into small pieces, approx 1-2cm.
Place in a pan and pour in water until it is covered – approximately twice as much water as plant matter.
You can add the items you want to dye now, as we did, or you can dye with a fixing agent (described next).
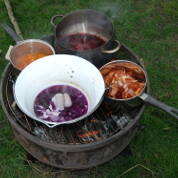
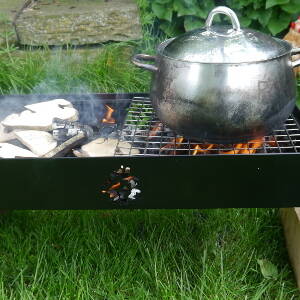
Place the pan over a cooking fire (when the flames have died down, leaving a hot ember bed) and boil gently/simmer for about an hour – if the fire is too hot, too much water will boil away and the plant stuff may burn.
Remove the pan, put it somewhere safe where it will not be knocked over and allow to cool.
Once it has cooled completely, strain the liquid into containers.
Step #2 Mordant
Latin: mordere, means to bite.
A mordant is a a fixing agent that through chemical binding adheres to both the fibres and the dye. Preparing your material with a mordant before dyeing will make the colour stick better.
Most natural dyes do not adhere very well to the fibres and need a mordant/fixing agent to help the colour stick. Plant or cellulose fibres such as cotton bamboo, linen and hemp resist colour more than wool or silk.
To prepare the material:
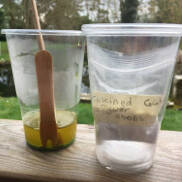
For fruit dyes, make a salt water solution: approximately 1/4 cup of salt to 4 cups water.
For vegetable dyes, make a vinegar solution: approximately one cup of vinegar to four cups water.
Put on the fire and simmer for an hour.
It is important not to put too much material in the mordant-ing pan. You need to leave enough space for it to move in the water.
If you can, leave the material in the mordant overnight, then gently rinse it to remove any unattached mordant. Then either dye it straightaway or dry it for further use.
Step #3 Dying the material
Rinse the fabric in cold water.
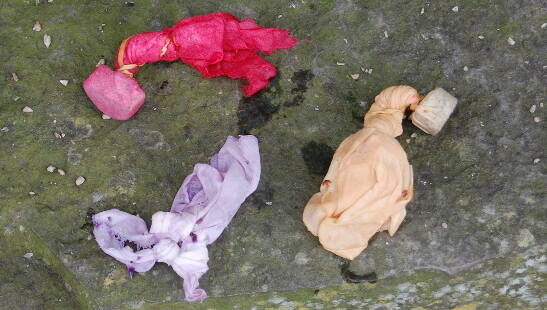
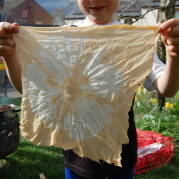
Place the fabric in the natural dye until it reaches the desired colour then remove and allow to dry.
We experimented with a carrot and turmeric mix and the boys collected a load of grass to experiment with, with limited success.
Take it further
- experiment and mix colours together to create different shades and hues
- use string or wool to bind your fabric and try some tie-dyeing
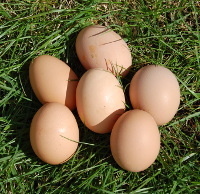
- try dyeing Easter eggs.
Practitioner's Voice
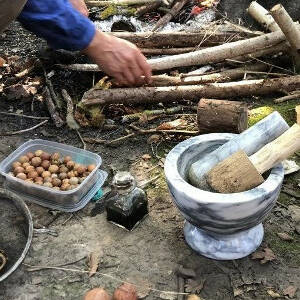
Thanks to Jo from Free Range Play who allowed us to share their photos and twitter thread of using alder cones to make natural dye - and a cute little extra alder cone bee for added fun :)
Great Forest school session today. The children collected Alder cones on the way to the woods, we made them into ink and bees 🐝 #OutdoorEdChat #firestschool @OutdoorEdChat @Muddyfaces pic.twitter.com/iL52UA7NMO
— @JoFreeRangePlay March 21, 2023


Disclaimer: Muddy Faces cannot take any responsibility for accidents or damage that occurs as a result of following this activity.You are responsible for making sure the activity is conducted safely.
You might also like
Key Features
- Age Range 3+
- Duration 3 - 4 Hours
- Location Anywhere
- Season Any
- Time of Day Anytime
-
Categories:
Art & Creating
inks, dyes & perfume
Curriculum Outdoors
science