Pewter - casting over a fire
An advanced-ability campfire craft activity to create beautiful unique pewter keepsakes.
Introduction
Pewter casting over a campfire is a highly-absorbing and rewarding advanced fire-use activity. A great activity to end a course - a celebration giving participants a self-made item of awe and beauty.
What you'll need
- fire or heat resistant gloves
- pewter shot (lead-free)
- metal casting ladle with a pouring spout (crucible)
- metal bucket filled with water
- clay or cuttlefish bone mould/cast & cast board
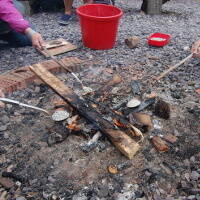
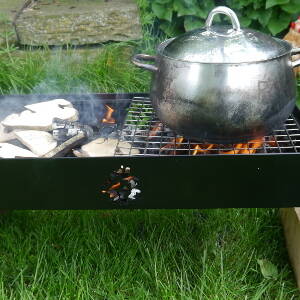
- a hot ember (cooking) fire.
This activity has been provided by
Environmental Considerations
Consider the environmental impact of preparing, carrying out & completing this activity. Could this impact be reduced? Specific considerations for this activity could include:
- the fire area
- any metal left in environment
- use lead-free pewter (old pewter objects are likely to contain lead)
Health & Safety Considerations
Follow your usual operating procedures and carry out appropriate risk benefit assessments.
Some considerations particular to this activity include:
- burn potential from the molten metal & fires
- fire safety
- use lead-free pewter (old pewter objects are likely to contain lead)
- tool use
Preparation:
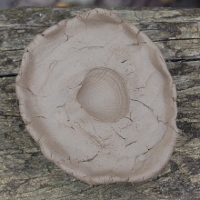
Casting preparation is very important – first you’ll need a mould, also known as a cast. See pewter - making a mould or cast for some ideas and tips.
A crucible can be made by creating a spout in an old spoon and attaching it to a strong stick – see making a crucible (coming soon).
Careful planning can prevent molten metal and hot crucibles becoming potentially hazardous. The aim is to move around as little as possible when holding very hot items.
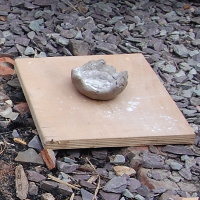
Make sure the mould is secure on a board, this will prevent tipping and spilling as the pewter is poured.
Place your cast board on a level and secure position near to where you will be melting the pewter. Practise moving with an empty crucible from your heating position to the board to check it is in a correct position to be poured comfortably. Once you are melting the pewter you don’t want to be moving unnecessarily as this could be both dangerous, likely to spill and takes longer to pour, thus allowing the metal to cool and become difficult to work with.
Place the bucket of water close by but not in your way. The ladle will be put in here straight after casting to ensure the hot ladle and any unused pewter is cooled in a controlled manner.
Step #1 Melt the pewter
Place a portion of shot into your crucible; this will require a bit of estimation, depending on the size of your cast.
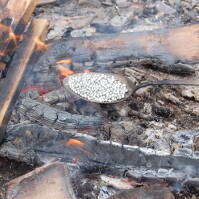
Get into a comfortable position by the fire; you will be here a little while so check you are happy with the position of your cast and water bucket. Hold the crucible over the hot embers.
The pewter will start to melt and eventually will become a silver soup. If there is a breeze your may see a skin on the metal as the breeze cools the surface. Also, if there is any debris in the shot or blown in from the fire this is often visible floating on top of the pewter (don’t be tempted to flick it out).
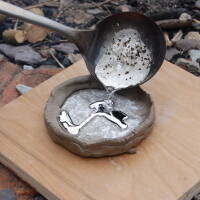
Step #2 Pour
Once the shot has all melted, swiftly, but without rushing, move the crucible to the cast and confidently pour the molten metal into the mould (or through the sprue if using a 3D mould). This allows less time for the pewter to cool which would make it harder to pour.
Once you have filled your cast, place the crucible immediately into the bucket of cold water.
Step #3 Cool
If needed, carefully move the cast board and place it somewhere out of the way and leave to cool – be careful if there is any spilt pewter that it doesn’t move around or off the board.
Cooling time will depend on the size of the item, but ten minutes is a good general guide.
Step #4 Remove the cast
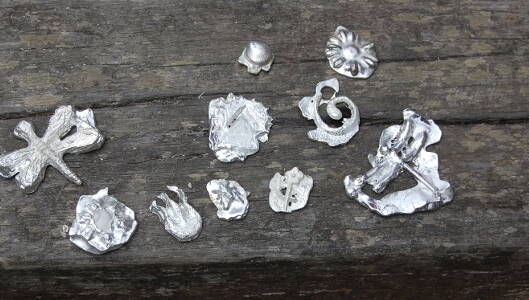
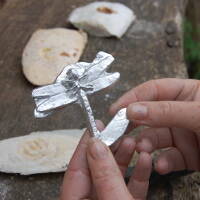
Remove the pewter from its cast.
If it has large pieces of unwanted metal these can be removed with a hacksaw.
Use a file or rasp to rub away any unwanted burrs or sharp edges.

Step #5 finishing touches
Use a file or rasp to rub away any unwanted burrs or sharp edges.
Take it further:
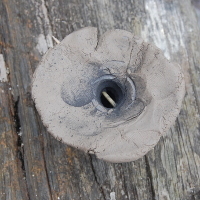
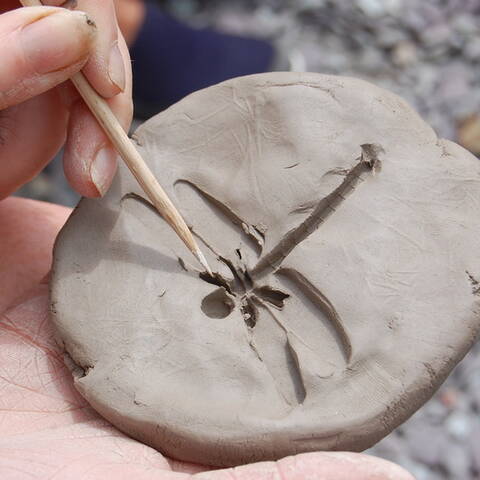
- add a hole for a cord or chain; this image shows a cocktail stick pushed through the cast to create a hole.
Disclaimer: Muddy Faces cannot take any responsibility for accidents or damage that occurs as a result of following this activity.You are responsible for making sure the activity is conducted safely.
You might also like
Key Features
- Age Range 12+
- Duration All Day
- Location Anywhere
- Season Any
- Time of Day Daylight
-
Categories:
Art & Creating
campfire craft
Tool use & Traditional Crafts
pewter
fire craft