Shelters: fixing guy ropes
Tips and ideas to tie out your shelter to trees, including semi-permanent fixing points
Introduction
The techniques described below are for a site that is returned to
frequently to help make shelter erection very quick and easy. It does
require set up time
and leaving some parts in-situ in the woods. It may not be ideal for
your
circumstances but there will hopefully be ideas you can use.
What you'll need
- strong cord or thin rope
- optional - small carabiners, bungee loops
This activity has been provided by
Environmental Considerations
Consider the environmental impact of preparing, carrying out & completing this activity. Could this impact be reduced? Specific considerations for this activity could include:
- damage to trees from rubbing ropes
- if clearing brush ensure it's done correctly to ensure trees are not detrimentally effected
Health & Safety Considerations
Follow your usual operating procedures and carry out appropriate risk benefit assessments.
Some considerations particular to this activity include:
- check tree branches above the site are healthy
- ropes - trip hazards
- cords at head/neck height
Creating a fall
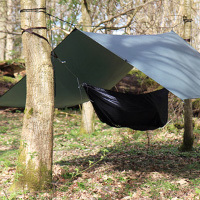
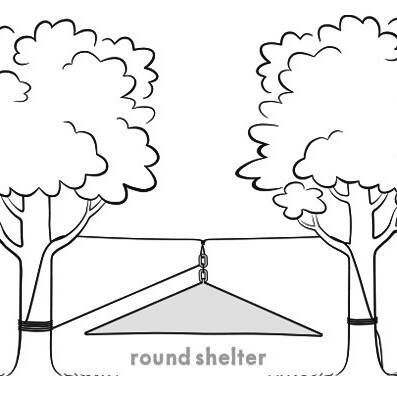
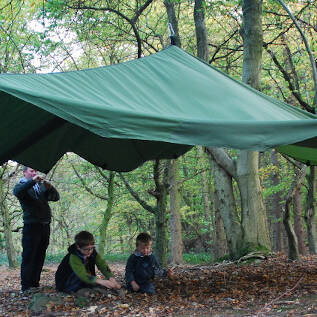
The main aim when erecting your shelter is to cover your desired area as effectively as possible (with water run off in your chosen directions) and to avoid sagging and pooling of water on the ‘roof’.
Pooling water is heavy, it strains and damages shelters and allows water ingress through the seams. To ensure rain runs off your shelter a fall is required.
To create a fall you will need to raise part of your shelter up, creating a ridge line or central point. For guidance on creating a high central point refer to Shelters: throwing a rope over a high branch (many of our Muddy Faces-designed shelters have a reinforced banding across the central point to add extra strength to a ridge line).
The angle of your shelter needs to be such that water can easily run down and off. The height of your fixing points will help you create the best angles. If there are fixing points quite a way from the shelter, they will need to be lower than any fixing point closer to the shelter.
Guy ropes
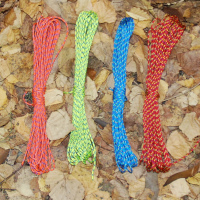
When choosing guy ropes consider:
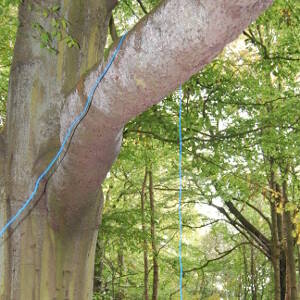
Colour - bright cord or blue polyrope can be seen easily and can be useful if your lines are at head or foot height creating potential hazards. In addition to bright cord you may wish to tie on some ribbon to make sure the lines are clearly visible.
Alternatively, if you want less visual impact and a more subtle appearance then green paracord can blend in with a canopy.
Material - most ropes and cord are made with plastics which often have longevity in an outdoor setting and have different practical applications. Sisal is a natural material and eventually will break down if left in an outdoor environment. It can often be difficult to handle (e.g. untying knots) and it can go mouldy and perish quickly in certain conditions.
Correct length - if you are using the same site then its worth cutting all your attachment cords to the correct lengths and labelling each one (see below). This will enable you to erect your shelter quickly each time.
Prevent fraying - pretty much all ropes will fray at the ends unless sealed off somehow. Cord such as paracord is a sheath around a core and if left unsealed at the end it is likely the outer and inner parts may separate making the cord pretty much unusable.
Therefore it is important to seal the end of your rope or string correctly to increase its longevity and usefulness. Most man-made ropes are made of plastics and you can carefully heat the ends and push down onto a smooth surface to mould the ends.
You can also seal the ends of rope by taping the ends of the cut pieces.
H&S note on heat-sealing
Heated plastic is very dangerous - avoid contact with your skin and ensure you have the correct equipment available if the end should ignite.
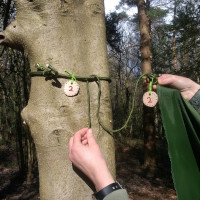
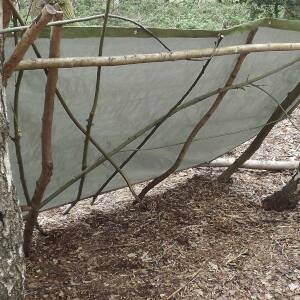
Semi-permanent fixing points
If you use your site frequently you may wish to create fixing points that you leave in place, that can be easily utilised to connect guy ropes to.
A fixing point can also reduce rope rubbing on the tree and make erection of your shelter much quicker. Semi-permanent fixing points are not suitable for many sites though, particularly ones with public access.
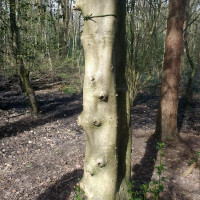
Choose suitable fixing points (trees/posts/fences etc) that are strong enough to withstand the strain of the shelter.
Tie a loop of cord or rope around the tree at the appropriate height, that ideally allows for easy access into/under the shelter without neck-high obstructions.
If you have concerns that the fixing points may be tampered with, tie them at arms-reach above head height and use a less obvious colour such as green or brown.
Attaching shelter lines/guy ropes to fixing points
Once your fixing points are set up you need to cut the shelter lines/guy ropes to length.
Set the shelter at a height just a little lower than where you plan to have it - 10cm-20cm lower for a smaller shelter and 20-40cm for a larger one.
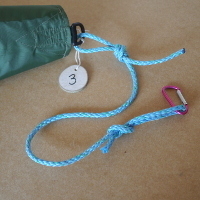
Tie one end of your cord to a 'D' loop on the shelter and pull it out to your first fixing point. You can either tie the end to the the fixing point or tie the guy rope to a relatively strong carabiner or clip (see image). If you are not using fixing points take the cord around your chosen tree/branch and tie off.
Repeat this process until all your fixing points are in position. It is not essential, but it often helps to balance the shelter by working at opposite sides. This avoids you fixing all one side and pulling the shelter over too much. This stage will require quite a bit of fiddling around to get the positioning right by making small adjustments as necessary.
Once you are happy with the position of the shelter and the length of the guy ropes, cut them to length (don't forget to seal the ends).
Hoist the shelter back up the small distance to tension the set up a little more and check your falls are working to avoid pooling of water on your shelter (see Shelters: fixed line system for more on hoisting your shelter).
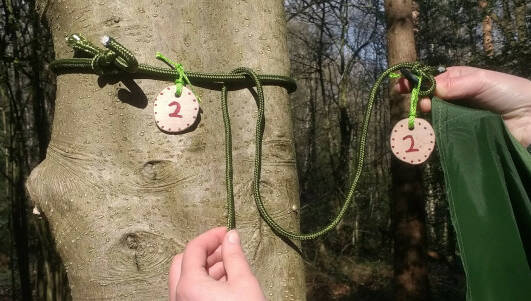
Labelling your shelter fixings
When you are happy the shelter is in its correct position it's advisable to label up the lines and the fixing points for quick future assembly.
A labelling system using numbers, colours or symbols will help speed up the process of putting up your shelter when you return to the site.
Label each fixing point with a number or similar and put the same number on the corresponding guy rope attached to the shelter. It can be helpful to put this on the shelter 'D' loop. Electricians tape or small wooden discs can be used to create a tab which you can write on with a permanent marker (see image).
When you come back to put your shelter up you just need to hoist up the centre to below where you want it, then tie out No.1 guy rope to No.1 fixing point. Repeat with the rest of the guy ropes and then hoist shelter to create further tension.
Very quick and easy!
Other useful guides in our shelter series:
Disclaimer: Muddy Faces cannot take any responsibility for accidents or damage that occurs as a result of following this activity.You are responsible for making sure the activity is conducted safely.
Key Features
- Age Range Adult
- Duration 1 - 2 Hours
- Location AnywhereWoods / Forest
- Season Any
-
Categories:
Fire, Shelters & Bushcraft
shelters