Securing a tarp using natural materials
A selection of techniques utilising natural materials to secure tarps, shelters and sheets.
Introduction
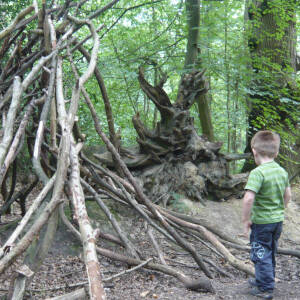
"Many of you will recognise and acknowledge the fun that people, especially children, have in making a den, shelter or just general covered area. Either due to time, resources or limited understanding of using all natural materials it is common for people to make use of tarps, basha sheets or simple sheeting. As natural materials have limited capacity. you would be forgiven for thinking that the only effective way to secure these are with ropes, pegs and bungees. This activity demonstrates several methods that have ample strength and work very well with no compromise."
Donated by bushcraft expert Dave Watson - Woodland Survival Crafts
What you'll need
- tarp/sheet
- natural materials
- secateurs
- knife
Dave Watson - Woodland Survival Crafts

Useful items from our shop
Environmental Considerations
Consider the environmental impact of preparing, carrying out & completing this activity. Could this impact be reduced? Specific considerations for this activity could include:
- source of natural materials
Health & Safety Considerations
Follow your usual operating procedures and carry out appropriate risk benefit assessments.
Some considerations particular to this activity include:
- using tools & cord
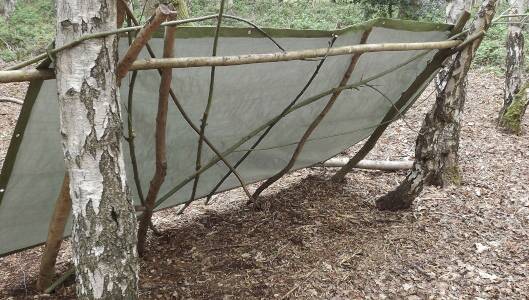
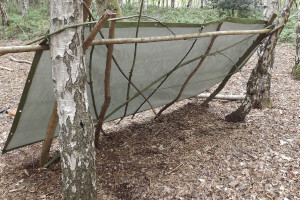
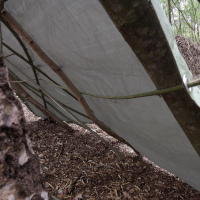
Securing a tarp/sheet onto a basic lean-to-frame
Tying and tensioning techniques are described below.
These are by no means extensive, however it should give you some ideas for encouraging children to find their own solutions and become problem solvers.
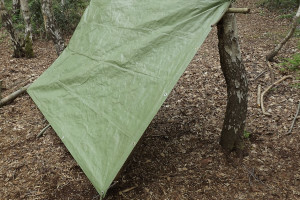
Using a stick to wedge in 'Y' of a tree
When using a wooden frame with 'Y' shaped branches for support, one easy trick you can use is to place a corner eyelet through the gap and then push a stick through the eyelet.
Pull back until the stick engages with the fork creating your first anchor point.
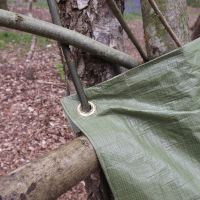
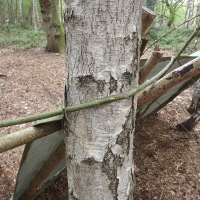
Using a rod to lever behind a tree
On the other end of the sheet I have used a long thin rod of willow (hazel, dogwood, holly or privet would also do) which has gone through the eyelet and then levered around the tree, through the other eyelets, and finally tucked behind one of the shelter frame sticks.
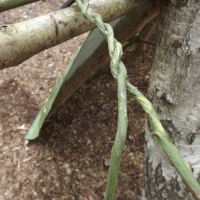
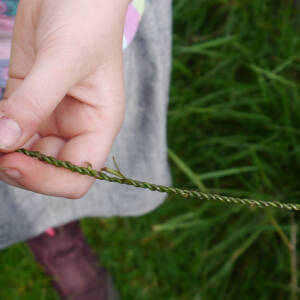
Using bramble cordage
Next, I found a long trailing bramble and
- stripped the thorns off
- twisted it into 2 ply rope/cord
- tied it to a simple tent peg-type stick.
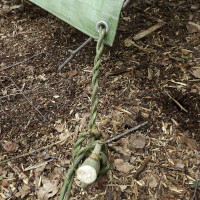
Creating a loop with willow
Make a loop from willow or dogwood going through the eyelet.
The loop it creates a wider anchor point which can allow either another wooden tent peg or log/branch to go though.
The log in the photo is being prevented from further movement by one of the trees and a peg.
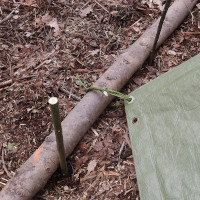
Weaving long rods
The final anchor point is created by weaving a flexible rod in and out of the frame poles then finally being poked through the eyelet.
Concluding comments
Overall, I find that by spending time training people to use natural materials effectively, it opens up their minds to the remarkable resources we have in the countryside. Sessions like this are usually most effective when done as a problem solve, rather than prescriptive. It is important to build the level of understanding and confidence, rather than expect perfect results each time.
Oh, and one more thing - enjoy learning yourself!
Disclaimer: Muddy Faces cannot take any responsibility for accidents or damage that occurs as a result of following this activity.You are responsible for making sure the activity is conducted safely.
Key Features
- Age Range All Ages
- Duration Less than an hour
- Location Anywhere
- Season Any
-
Categories:
Fire, Shelters & Bushcraft
shelters