Mini pulley system (Mini Seilbahn) - instructions
Translated assembly instructions.
Introduction
The translation of assembly instructions below is to be used with the product leaflet that has accompanying pictures. We have also added a few extra images. The physics of the cable car system have not been translated.
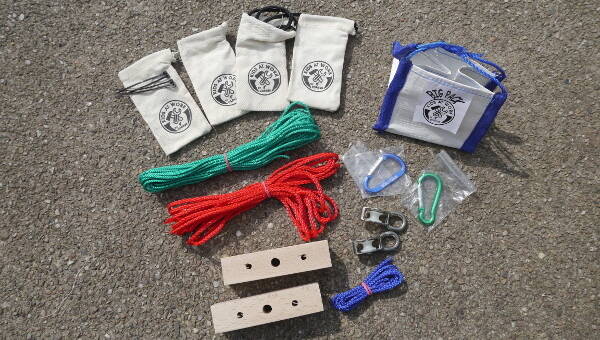
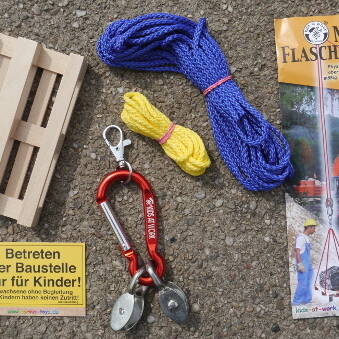
What you'll need
This activity has been provided by
Environmental Considerations
Consider the environmental impact of preparing, carrying out & completing this activity. Could this impact be reduced? Specific considerations for this activity could include:
Health & Safety Considerations
Follow your usual operating procedures and carry out appropriate risk benefit assessments.
Some considerations particular to this activity include:
Assembly of the big packs:
The four strings of the big pack are formed with the help of the cable tie loops (cable ties are dangerous for children, here the adult must help) which can be hung in the load karabiner.
Make sure that all strings are the same length and fold as pictured.
Tighten the cable ties with a pair of pliers and cut off the end pieces.
All kinds of loads can be transported in the big pack.
Attach the end stations (Befestigen der Endstationen):
Image in supplied German instructions.
The two wooden pieces are screwed to the room wall with screws (not included). Outer holes are provided for screws.
A pulley is attached to each end station by means of a knot at the upper inner hole (see images)
The rope (red) is attached to the bottom holes of the pieces of wood, this must be well tensioned so that the cable car does not sag.
Setting up the rope (Einrichten des Zugseils):
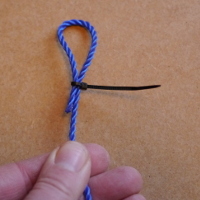
A loop is knotted at one end of the pull rope (green) (image 1).
Then the traction cable is guided through the two pulleys and the other end is tied to the loop (image 2).
The rope must be stretched very tight and if the ropeway is to be permanently installed, the rest of the line can be cut off and heat sealed (by adults: end with a lighter).
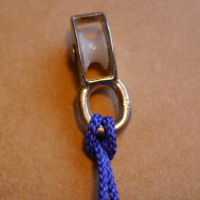
Finally, the karabiners are mounted as shown (image 3) and ready to attach the big pack to the lower karabiner.
And this is how it works:
Pulling the green cable pulls the load back and forth on the cable car.
Tip:
Conversion to the pulley
Disclaimer: Muddy Faces cannot take any responsibility for accidents or damage that occurs as a result of following this activity.You are responsible for making sure the activity is conducted safely.
You might also like
Key Features
- Age Range All Ages
- Duration Less than an hour
- Location Anywhere
- Season Any
- Time of Day Anytime
-
Categories:
Product Information